How to Clean Nalgene Narrow Mouth Bottles
Maintaining clean water bottles is essential for safe hydration and taste. Nalgene narrow mouth bottles are sturdy and practical, but their slim necks can make thorough cleaning a challenge. This guide provides practical steps and the right tools to keep your bottle sparkling, odor-free, and ready for daily use.
Quick Answer
Use a long-handled brush designed for narrow mouths to reach the bottle’s interior, a gentle detergent, and warm water. Rinse well, air-dry with the cap off, and repeat regularly to prevent staining and buildup.
What You’ll Need
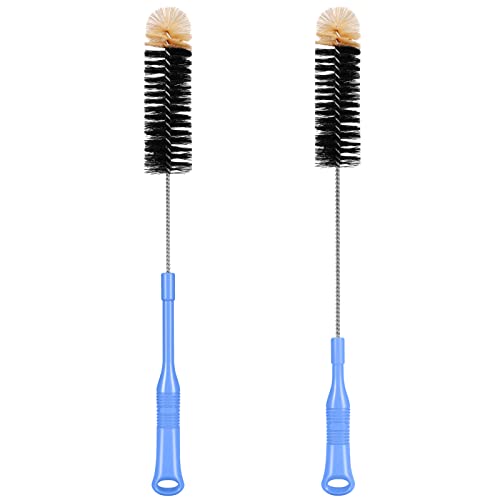
- Narrow mouth bottle brush long handle nylon bristles
- Nalgene narrow mouth bottle cleaning brush curved neck
- Long reach bottle brush for narrow neck water bottles


Before You Start
Prepare a clean workspace and gather supplies. Rinse the bottle with warm water to loosen grime. Use warm, not boiling, water to protect the bottle’s integrity. Do not use abrasive scrubbers that could scratch the surface. Check for any cracks or damage before cleaning, as damaged bottles can harbor bacteria. Expect a total cleaning time of 5–10 minutes per session.
Step-By-Step: How To Clean Nalgene Narrow Mouth Bottles
- Disassemble the bottle by removing the cap and any sealing components.
- Rinse the bottle with warm water to remove loose debris.
- Apply a small amount of mild dish soap or a dedicated bottle cleaner inside the bottle.
- Dip the narrow mouth bottle brush long handle nylon bristles into the bottle and scrub the interior in a circular motion.
- Use the Nalgene narrow mouth bottle cleaning brush curved neck to reach the bottom and curved areas of the interior.
- For stubborn stains, fill the bottle with warm water and a splash of white vinegar or baking soda solution; let sit for 5–10 minutes before scrubbing again.
- Rinse thoroughly with clean water, ensuring all soap and residue are removed from the interior and cap threads.
- Clean the cap and any sealing rings separately, using the same brush if needed.
- Shake out excess water, then air-dry with the bottle inverted and cap off to prevent mold.
- Reassemble once completely dry and store in a clean, dry area away from direct sunlight.
- Repeat the process regularly, especially after consuming dairy or sugary drinks that can leave residues.
Troubleshooting
| Symptom | Likely Cause | Fix | Prevention |
|---|---|---|---|
| Faint odor after cleaning | Residual buildup inside the bottle | Clean with a stronger rinse or a vinegar solution, then rinse thoroughly | Rinse after each use; dry completely |
| Stubborn stains | Colored beverages or mineral deposits | Use baking soda paste or a diluted acid-free cleaner; scrub with brush | Rinse promptly after use; avoid prolonged exposure to colorants |
| Soap taste persists | Soap residue inside cap threads | Rinse cap separately and scrub threads with brush | Rinse with extra water after cleaning |
| Mold around cap gasket | Poor drying or moisture trapped | Disassemble and dry thoroughly; replace gasket if damaged | Air-dry fully; store with cap off |
Common Mistakes
- Using abrasive sponges that scratch the bottle surface
- Forgetting to remove the cap and seal for separate cleaning
- Not allowing the bottle to dry completely between uses
- Leaving soapy residue by not rinsing thoroughly
Tips For Best Results
To maintain clarity and freshness, rinse the bottle immediately after use and perform a deep clean weekly or more often with frequent color-rich beverages. Consider labeling bottles if multiple people share them to track cleaning schedules. Store bottles with the cap off to promote air-drying and reduce odor formation. When selecting tools, prioritize long reach bottle brush for narrow neck water bottles for efficient interior access and a gentler touch on the plastic.
Call A Professional
There are few scenarios that require a professional, but seek help if you notice persistent odors that won’t fade after deep cleaning, cracks or structural damage to the bottle, or if the gasket shows signs of wear that cannot be replaced. If the bottle has sustained heat exposure that warps the interior, stop using it and consult the manufacturer guidance.
FAQ
Can I use bleach to clean a Nalgene narrow mouth bottle?
Bleach is generally discouraged for daily cleaning. If used, dilute properly and rinse thoroughly, but prefer mild soap, vinegar, or baking soda for regular cleaning.
How often should I clean a Nalgene narrow mouth bottle?
Clean after each use with soap and water; perform a deeper clean weekly or when residues or odors are noticed.
Is it safe to put the bottle in the dishwasher?
Many Nalgene bottles are dishwasher-safe on the top rack, but check the manufacturer’s guidance to avoid warping or damage.
What if mold appears inside the cap or threads?
Disassemble and scrub thoroughly with warm soapy water, then use a vinegar rinse if necessary and ensure complete drying before reassembly.
How do I prevent odors from returning?
Rinse promptly after use, dry completely, and perform regular cleanings. Avoid leaving beverage residues for extended periods.
Can I reuse kitchen brushes for bottle cleaning?
Yes, but dedicate a soft, nonabrasive brush specifically for bottles to avoid scratches and contamination of other utensils.
What’s the best storage practice for a clean bottle?
Store with the cap off in a dry area; ensure it’s fully dry before reusing.
Buying Guide
When choosing cleaning tools for Nalgene narrow mouth bottles, consider size, reach, and bristle material. Look for a long reach bottle brush for narrow neck water bottles that fits the bottle’s dimensions and can reach the bottom without scratching. A curved-neck brush, such as the Nalgene narrow mouth bottle cleaning brush curved neck, helps access tight corners around the cap area. Durability matters, as repeated cleaning requires sturdy nylon bristles and a comfortable handle. Noise level is not a primary factor here, but a compact, easy-to-hold design improves ergonomics and reduces user fatigue. For households with multiple bottles, consider purchasing a set that includes both straight and curved brushes to cover all cleaning angles. Finally, verify compatibility with your bottle’s cap and gasket to ensure complete interior and exterior cleaning.
Leave a Reply