How to Clean Mulch: A Practical Guide
Mulch helps suppress weeds, conserve soil moisture, and improve garden aesthetics, but it can accumulate debris over time. Cleaning mulch regularly keeps beds looking fresh and prevents matting that blocks water and air. This guide shows practical, homeowner-friendly steps to clean mulch using common tools.
Quick Answer
Clear debris with a garden rake to lift surface litter, then use a garden blower or a wet-dry vacuum to remove finer particles. Replace or refresh mulch as needed to maintain even coverage and prevent soil exposure. Always work gently to protect plant roots and beneficial soil organisms.
What You’ll Need
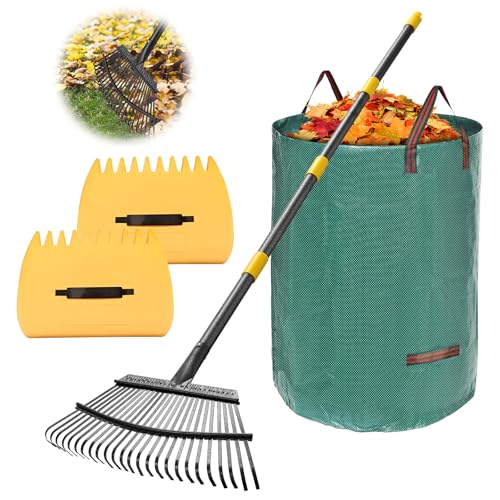
- Garden rake heavy duty mulch cleanup
- Wet dry vacuum for mulch cleanup
- Electric leaf blower for mulch debris
- Protective gloves and safety glasses
- Pruning shears (optional for removing stubborn debris)
- Replacement mulch (if topping up is necessary)


Before You Start
Assess the area: a small bed near delicate perennials may require lighter disturbance than a wide, open border. Clear a path for equipment, remove large sticks or rocks, and trim any overhanging branches that could interfere with equipment. Wear eye protection and gloves to prevent splinters or contact with sharp objects. Time your cleanup for a calm day to avoid dispersing mulch with wind. Plan for a cleaning session lasting 30 to 90 minutes, depending on bed size and debris level.
Step-By-Step: How To Clean Mulch Efficiently
- Prepare the area and gather tools. Ensure the blower, vacuum, or rake are in good working order.
- Remove large litter first. Use the garden rake heavy duty mulch cleanup to lift leaves, twigs, and plastic fragments from the mulch surface.
- Shake out matted mulch. If the top layer is compacted, gently lift with the rake or your hands to restore air pockets within the mulch.
- Blow or vacuum lighter debris. Use the electric leaf blower for mulch debris to push fine dust and small particles toward a boundary or collection area, then follow with the wet dry vacuum for mulch cleanup to capture the material.
- Clean along edges and plant crowns. Be careful not to direct strong air or suction at stems or new growth; keep the nozzle at a safe distance.
- Assess mulch thickness. If mulch has thinned beyond an inch or two, consider topping up with fresh mulch to maintain soil protection and aesthetics.
- Distribute cleaned mulch evenly. Lightly rake to blend fresh material with existing mulch, avoiding ridges that can trap water.
- Dispose of debris responsibly. Compost acceptable plant material; dispose of non-compostable items according to local guidelines.
- Inspect beds after rain. If soil shows exposed roots or compacted patches, add a thin, uniform layer of mulch to restore coverage.
- Store or rehome tools. Clean equipment to prevent residue buildup and extend tool life.
- Document maintenance. Note bed areas that need more frequent cleaning or topping up in the future.
- Schedule periodic cleanups. A routine every few months helps maintain bed health and visual appeal.
Troubleshooting
| Symptom | Likely Cause | Fix | Prevention |
|---|---|---|---|
| Mulch clumps back after cleaning | Moisture or heavy foot traffic | Rake lightly and replace uneven sections | Avoid walking on beds; spread mulch evenly |
| Fine dust or debris remains | Accumulated lawn or garden debris | Run a second pass with blower or vacuum | Clean beds after windy days or storms |
| Equipment bogs down in wet mulch | High moisture content | Switch to a drier time of day or use larger capacity vacuum | Avoid watering right before cleanup |
| Plants show signs of stress | Disturbance near roots | Keep equipment at distance from stems; mulch around crowns | Use softer tools near delicate plants |
Common Mistakes
- Over-compacting mulch during cleanup, which reduces air and water penetration.
- Leaving bare soil patches by not topping up mulch after cleaning.
- Using aggressive settings on blowers or vacuums near young plants.
- Mixing mulch types abruptly, creating inconsistent texture and appearance.
By avoiding these mistakes, mulch beds stay healthier and more visually cohesive. Regular light cleanups often outperform infrequent, deep cleanings.
Tips For Best Results
- Edge beds with a clean boundary to prevent mulch spreading into unwanted areas.
- Choose mulch with appropriate particle size for your plants to promote drainage and soil warmth.
- Schedule seasonal cleanups after major wind events or storms to capture wind-blown debris.
- Use a combination approach: rake for surface litter, then vacuum or blow for finer material.
- Keep a small supply of mulch to touch up shallow areas without replacing entire beds.
Call A Professional
Consider a professional if mulch beds cover a large acreage, if you frequently encounter heavy debris, or if you have plantings that require careful handling. Stop signs to call a pro include persistent matting despite regular maintenance, signs of root damage from heavy equipment, or eye irritation from airborne debris during cleanup.
FAQ
What is the best tool for mulch cleanup?
For most homeowners, a combination approach works best: a garden rake for initial debris, followed by a wet-dry vacuum for fine material and an electric leaf blower for lighter debris.
How often should mulch beds be cleaned?
Seasonal cleanups—typically every 2–4 months—help maintain appearance and health, with extra sessions after storms or heavy winds.
Can I use a leaf blower on mulch near plants?
Yes, but keep the nozzle at a safe distance to avoid damage to stems and to minimize disruption to delicate roots.
Should I replace mulch after cleaning?
If the mulch has thinned significantly, topping up with fresh mulch preserves soil moisture and weed suppression.
Is it okay to mix mulch types during topping up?
Avoid abrupt changes; mix a small amount of new mulch with the existing to maintain a uniform look and consistent texture.
Buying Guide
Choosing mulch-cleaning tools involves considering bed size, debris load, and nearby plantings. Here are factors to weigh for a practical purchase decision.
Size and Scope
For small to medium beds, handheld tools paired with a compact blower or vacuum are sufficient. Larger landscapes may benefit from more capable wet-dry vacuums or even a powered blower with extended reach.
Noise Level
Electrical blowers and vacuums vary in noise. Look for models with adjustable speed settings and anti-vibration features to minimize disruption in residential areas.
Energy Efficiency
Electric tools generally offer good efficiency and lower maintenance compared to gas-powered options. If you prioritize energy use, opt for tools with energy-saving features and variable speeds.
Controls and Ergonomics
Choose intuitive controls, comfortable grips, and balanced weight distribution to reduce fatigue during extended cleanups.
Placement and Storage
Store equipment in a dry, accessible area. Consider compact or stackable designs if space is limited, and ensure cords or hoses are properly managed to prevent damage.
Maintenance Considerations
Regularly clean attachments, replace filters as needed, and inspect hoses for wear. Proper maintenance extends tool life and improves performance.
Leave a Reply