How to Clean Mitsubishi Split AC
Maintaining a Mitsubishi split air conditioner helps maximize efficiency, improve indoor air quality, and extend the system’s life. This guide walks through safe, practical steps to clean the indoor unit, evaporator coil, and accessible components without professional help. It’s tailored for homeowners who want a thorough yet manageable cleaning routine.
Quick Answer
Turn off the unit and disconnect power before cleaning. Use a soft brush or microfiber cloth for the indoor cabinet, a dedicated cleaning spray for coils, and a cleaning kit designed for mini splits to minimize the risk of damage. Clean or replace filters monthly during peak season, and schedule a professional service if you notice reduced cooling performance, leaks, or unusual noises.
What You’ll Need
- Mitsubishi mini split cleaning kit
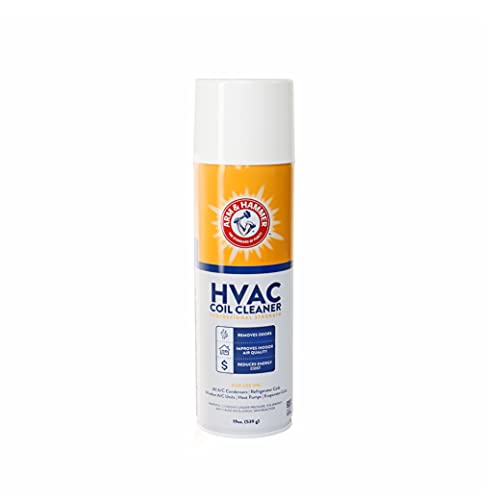
- Mini split air conditioner coil cleaning spray
- Ductless mini split cleaning brush kit
- Soft brushes, microfiber cloths, and a spray bottle
- Glass cleaner or mild cleaning solution for exterior panels
- Vacuum with brush attachment (optional for dust removal)


Before You Start
Prepare the area: clear the space around the indoor unit and ensure you have stable access to the unit. Safety first—no power on and unplug the outdoor and indoor units if accessible. Allow the system to cool if it has been running. Estimate cleaning time at 60 to 120 minutes depending on access and dust level. Wear protective eyewear if cleaning dusty areas and avoid using high-pressure sprays on delicate components.
Step-By-Step: How To Clean Mitsubishi Split AC
- Switch off the system at the breaker and unplug the unit if possible. Remove the remote batteries and ensure no power is flowing to the fans or compressor during cleaning.
- Open the indoor air intake and carefully remove the front panel and the washable filters. Note how components are assembled to reassemble correctly.
- Gently vacuum or brush the filter frames to remove loose dust. If the filters are heavily soiled, wash with a mild detergent and rinse thoroughly; allow to dry completely before reinstalling.
- Use a soft brush to loosen dust around the blower wheel and grille. Wipe surfaces with a microfiber cloth to minimize buildup and avoid scratching plastic parts.
- Apply the mini split cleaning spray to the evaporator coils following the product directions. Keep sprays at the recommended distance and avoid oversaturation to prevent water leaks.
- For stubborn residue, use the ductless mini split cleaning brush kit to carefully agitate the coil fins. Do not bend or force the fins; a gentle touch maintains efficiency and avoids coil damage.
- Wipe down any condensation trays or overflow pans with a damp cloth. Ensure drainage pathways are clear to prevent future leaks.
- Inspect the drain line for clogs; if needed, clear gently using a flexible brush or a small amount of air pressure to resume proper drainage.
- Reinstall the cleaned filters and panel. Restore power and run the unit on a low fan setting to verify airflow and check for unusual noises or leaks.
- Perform a final exterior wipe-down of the case and housing. Replace remote batteries and note any signs that indicate additional maintenance is required.
- Establish a routine: clean filters monthly, and schedule professional service at least once a year or if performance declines despite cleaning.
Troubleshooting
| Symptom | Likely Cause | Fix | Prevention |
|---|---|---|---|
| Weak airflow after cleaning | Filtration or duct blockage | Recheck filters and coil areas for debris | Clean filters monthly; avoid overloading the unit with dust |
| Water leaks after cleaning | Drain pan or line clogged | Clear drain line; remove algae or debris | Keep condensate line clear and dry the tray |
| Unusual noises | Loose panel or fan | reseat panels and verify fasteners | Inspect regularly during maintenance |
| Coil residue remains | Hard water deposits or heavy dust | Use appropriate coil cleaner and repeat cleaning | Schedule periodic professional coil cleaning |
Common Mistakes
- Spraying water directly onto electrical components
- Using metal tools that bend or scratch coil fins
- Skipping the filter cleaning, leading to clogged ducts
- Forgetting to dry filters before reassembly
- Ignore signs of refrigerant leaks or ice formation on coils
Tips For Best Results
- Clean filters monthly during heavy use periods to maintain airflow and efficiency.
- Use the dedicated cleaning spray designed for coils to avoid damaging coatings.
- Perform a light clean quarterly to prevent buildup and preserve indoor air quality.
- Keep outdoor unit clear of debris for optimal heat exchange and efficiency.
- Follow the manufacturer’s maintenance schedule and use approved tools and consumables.
Call A Professional
Consider contacting a pro if you notice refrigerant smells, persistent leaks, ice buildup on the coil, or if the unit fails to operate after cleaning. Stop signs include sudden temperature swings, electrical buzzing, or burning odors. A qualified HVAC technician can perform a detailed inspection, refrigerant checks, and internal coil cleaning with proper safety protocols.
FAQ
How often should I clean a Mitsubishi mini split?
Clean the air filters monthly during peak usage and perform a thorough cleaning of accessible components every 3–6 months, depending on dust levels and occupancy.
Can I use household cleaners on the indoor unit?
Avoid harsh cleaners near electronics. Use mild soaps on exterior panels and coil-specific sprays for coils, following product directions.
Is it safe to use a vacuum on the indoor unit?
Yes, a vacuum with a brush attachment can help remove loose dust from the cabinet and filters, but do not vacuum the evaporator coils directly without proper guidance.
What if the unit still feels weak after cleaning?
Check for refrigerant issues, air leaks, or a clogged drain. If problems persist, schedule a professional service to avoid damage to components.
Should I clean the outdoor unit as well?
Yes. Remove debris around the outdoor unit and ensure unobstructed airflow. Do not spray water directly into electrical components; use a gentle rinse if necessary.
Can I use the same cleaning kit for other brands?
Many kits are designed for ductless systems; however, check compatibility with your specific model before use.
Buying Guide
When choosing cleaning products and accessories for a Mitsubishi split system, consider size, compatibility, and ease of use. A dedicated mitsubishi mini split cleaning kit often includes brushes and protective tools tailored for these units, improving safety and effectiveness. Look for a mini split air conditioner coil cleaning spray that is non-corrosive and residue-free to avoid coating the fins with sticky residues. A ductless mini split cleaning brush kit should offer soft, non-metal bristles to prevent fin damage. For homes with multiple zones, a compact kit with interchangeable heads can save time.
Key buying factors include:
- Size and scope: Choose a kit that matches the number of indoor units and the sizes of the coils you service.
- Noise and energy usage: Cleaning tools should not require excessive effort or energy; select streamlined tools to minimize strain.
- Energy efficiency: Regular maintenance supports efficiency; consider products that enhance coil cleanliness without leaving residues.
- Controls and compatibility: Ensure cleaners work with the materials used in Mitsubishi units and comply with manufacturer guidelines.
- Placement and accessibility: Tools should accommodate ceiling-mounted or wall-mounted units with easy access to filters and coils.
For best results, compare kits by included accessories, ease of use, and accessibility. If you’re unsure about the right products, start with the most trusted brands and read user reviews focused on Mitsubishi compatibility. Would you like recommendations tailored to your unit count and room layout?
Leave a Reply