How to Clean Mirrors Without Streaks
Clean, streak-free mirrors brighten bathrooms, kitchens, and entryways alike. This guide focuses on practical, American-friendly methods using common tools and a carefully chosen cleaning approach to minimize streaks and residue on reflective surfaces.
Quick Answer
Use a microfiber cloth or dedicated microfiber glass cleaning cloth, paired with a spray bottle of a gentle cleaner or water + vinegar. Wipe in a zigzag or circular pattern, then finish with a dry microfiber cloth or a squeegee for a flawless, streak-free shine. Avoid cloudy cleaners and abrasive pads. Always dry the edges to prevent water spots.
What You’ll Need
- Microfiber glass cleaning cloth for streak-free mirrors
- Mirror cleaning squeegee with adjustable handle
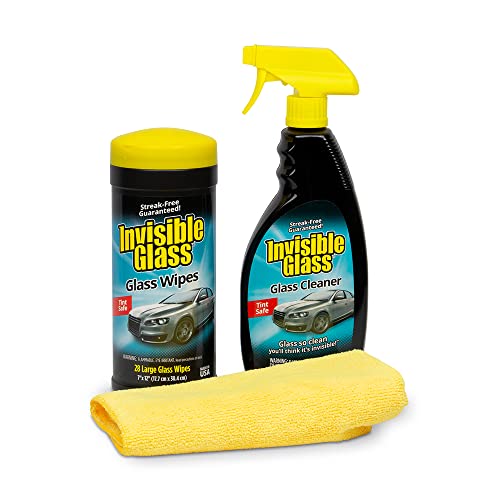
- Glass cleaning kit with microfiber towels and spray bottle


Before You Start
Prepare the area by removing items from the mirror’s frame and ensuring good ventilation. Use a steady, non-slip stance to avoid drips on floors. Time: 5–15 minutes per large mirror. Safety note: unplug nearby electrical devices and avoid spraying cleaners directly on outlets. Never use highly abrasive pads or solvent-heavy cleaners on mirror edges or behind outlets.
Step-By-Step: How To Clean Mirrors Without Streaks
- Dust the surface with a dry microfiber cloth to remove loose particles that can scratch during cleaning.
- Apply a light mist of cleaner or use a diluted vinegar solution to the cleaning cloth, not directly on the mirror.
- Wipe in vertical strokes from top to bottom to minimize missed areas and drips.
- For corners and edges, switch to circular motions to reach tight spots without leaving streaks.
- Use a dedicated mirror squeegee with an adjustable handle for larger surfaces, working from top to bottom in a controlled arc.
- Inspect the surface from different angles after the initial pass to catch any remaining spots.
- Buff the surface with a dry microfiber cloth, using light, quick strokes to blend any residual moisture.
- Pay special attention to the top edge where water tends to gather; dry thoroughly to prevent drips later.
- For large bathrooms, repeat the process in sections to maintain a consistent, streak-free finish.
- Rinse and wring cloths frequently to avoid re-depositing dirt and grime onto the mirror.
- Store cleaning tools clean and dry after use to prevent mildew on cloths and pads.
- Finally, wipe down the surrounding frame and sill to avoid water marks on adjacent surfaces.
Troubleshooting
| Symptom | Likely Cause | Fix | Prevention |
|---|---|---|---|
| Streaks after cleaning | Residue from cleaner or dirty cloth | Switch to a fresh microfiber cloth; dampen lightly with water if needed | Use a dedicated microfiber for glass surfaces |
| Cloudy appearance | Too much cleaner or hard water minerals | Wipe with a microfiber cloth dry, then buff with another clean cloth | Use distilled water for mixing, if possible |
| Water spots on edges | Excess moisture along frames | Dry edges thoroughly during final wipe | Spray lightly and avoid pooling near edges |
| Scratches visible after cleaning | Using abrasive tools or dirty cloth | Switch to scratch-free microfiber; launder cloths separately | Regularly replace worn cloths |
Common Mistakes
- Using household paper towels or abrasive sponges that leave fibers and scratches
- Spraying cleaners directly onto mirrors, creating pools and streaks
- Rushing the process, especially around corners and edges
- Neglecting to dry the edges, which invites water spots
Tips For Best Results
- Choose a dedicated mirror cleaning kit with microfiber towels for consistent results
- Work in sections, especially on larger surfaces, to control moisture and residue
- Maintain a routine: dry cloths should always be lint-free and clean
- Use warm ambient lighting to reveal streaks you might otherwise miss
- If using vinegar, keep a separate spray bottle labeled for glass to avoid cross-contamination
Call A Professional
Consider a professional if mirrors are heavily etched, have permanent stains, or if cleaning requires stair-step access or removal from frames. Stop and call a pro if:
- You notice persistent hazing that does not respond to cleaning
- The mirror is cracked, chipped, or loose from its frame
- Accessing the mirror requires risky ladder use or special tools
FAQ
Can I use window cleaner on mirrors?
Yes, but choose a formula labeled safe for glass and avoid ammonia-heavy products that could damage coatings over time.
Is vinegar safe for all mirrors?
Most household mirrors tolerate diluted vinegar, but check the manufacturer’s care instructions for any coatings or backings.
How often should I clean mirrors?
Weekly cleaning keeps streaks at bay in high-use areas; adjust frequency based on environment.
What’s the best cloth for streak-free results?
High-quality microfiber glass cleaning cloths deliver the most consistent, streak-free shine.
Buying Guide
Choosing the right tools for streak-free mirrors involves considering size, ease of use, and maintenance. Think about how often you clean, the type of mirror enclosure, and whether you prefer a squeegee or cloth-only approach. When evaluating products, compare microfiber density, material quality, and compatibility with your cleaning solutions. A kit that includes microfiber towels and a spray bottle helps keep supplies organized and ready for quick touch-ups. Also, evaluate noise considerations and grip comfort if you’ll be using a squeegee on larger surfaces.
Size and Placement Considerations
For small powder-room mirrors, a compact kit with a small squeegee can cover tight corners efficiently. For large bathroom mirrors, a longer adjustable-handle squeegee reduces reach issues and helps maintain a uniform finish. Placement matters for accessibility and light reflection; ensure cleaning paths don’t cross with outlets, fixtures, or shelving that could interfere with cleaning motions. Proper storage near cleaning supplies makes routine maintenance easier and more likely to occur.
Noise, Efficiency, And Controls
Look for a squeegee with a smooth glide and minimal resistance. Adjustable handles improve ergonomics and reduce fatigue during longer cleaning sessions. A spray bottle with a fine mist helps control moisture delivery, preventing drips. Energy efficiency is less a factor for cleaning tasks; stability and ease of use matter more for consistent results.
How To Compare Options
Compare the included tools, the type and weave of microfiber cloths, and any warranty or replacement policies. Consider whether the kit includes multiple cloth sizes for different mirror shapes. If you have sensitive skin or allergies, check for fragrance-free cleaners and materials. Finally, read user reviews focusing on streak-free performance and durability over time.
Leave a Reply