How to Clean Metal Before Painting
Preparing metal surfaces properly is essential for durable paint adhesion and a smooth finish. This guide walks American readers through a practical, step-by-step approach that works for stainless steel, aluminum, and other common metals used in homes and workshops. By following the methods and using the right tools, you can prevent peeling, rust, and corrosion from undermining your paint job.
Quick Answer
Start with a metal degreaser spray to remove oils and residues, then use a rust remover if rust is present. Finally, scrub with a wire brush and sanding sponge to create a clean, textured surface for paint to cling to. Wipe with a clean, damp cloth and allow to dry completely before priming.
What You’ll Need
- Metal degreaser spray for cleaning before painting stainless steel aluminum
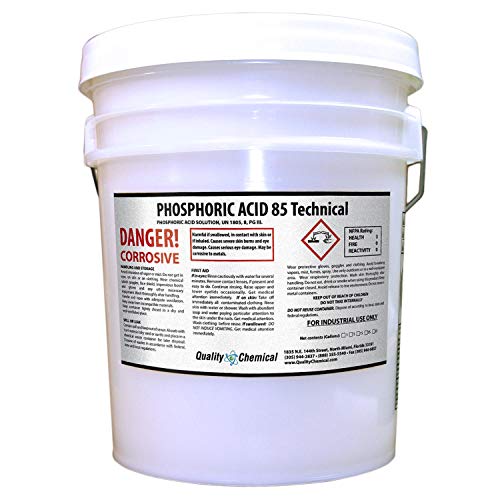
- Rust remover phosphoric acid cleaner for metal prep before painting
- Wire brush and sanding sponge set for metal surface prep before painting


Before You Start
Clear the area and work in a well-ventilated space. Wear protective gloves, eye protection, and a mask when handling chemical cleaners. Test products on a small, inconspicuous area first to ensure no surface damage. Time estimates vary by metal type and the extent of grime or rust, but plan for 1–3 hours for thorough preparation, plus drying time before priming.
Caution: Some cleaners contain acidic or strong alkaline agents. Use gloves and eye protection, and avoid mixing cleaners. For aluminum, avoid aggressive scrubbing that could scratch the surface; use gentler abrasives if needed.
Step-By-Step: How To Clean Metal Before Painting
- Inspect the metal surface for grime, oil, corrosion, and rust spots. Note any areas that may require extra attention during cleaning.
- Apply a thin, even coat of metal degreaser spray for cleaning before painting stainless steel aluminum to remove oils and residues. Let it sit as directed, then wipe with a clean, lint-free cloth.
- Rinse or wipe away the degreaser thoroughly to avoid any chemical residue that could affect adhesion. Dry with a clean cloth or allow air drying if the surface is fully ventilated.
- For rusted areas, apply rust remover phosphoric acid cleaner for metal prep before painting. Follow label instructions for dwell time, then scrub gently with a wire brush to lift corrosion without gouging the metal.
- Wipe away rust remover residue with a damp cloth. Rinse again if the product requires it, and dry the surface completely before proceeding.
- Use a wire brush to knock off loose rust flakes and a sanding sponge to smooth rough patches. Focus on profiles, edges, and any pitted areas to create a uniform surface.
- Wipe down the entire metal surface with a clean, damp cloth to remove dust from sanding. Allow the surface to dry completely before applying primer.
- Inspect again for any remaining imperfections. If necessary, repeat cleaning steps on stubborn spots, then re-dry before priming.
- Apply a high-quality metal primer suited to the metal type (not included in this guide). Allow the primer to cure according to manufacturer instructions before applying paint.
- Proceed with your chosen topcoat, following the paint manufacturer’s application guidelines for best adhesion and curing times.
Troubleshooting
| Symptom | Likely Cause | Fix | Prevention |
|---|---|---|---|
| Paint blistering or peeling | Remnants of oil/grease or inadequate cleaning | Re-clean with degreaser, re-sand, re-prime | Ensure complete degreasing and drying before priming |
| Rust reappears after cleaning | Surface scarred or rust not fully removed | Reapply rust remover and scrub deeper; consider rust-inhibiting primer | Address rust early; avoid sealing in moisture |
| Uneven paint texture | Rough sanding or inconsistent surface | Lightly re-sand with uniform pressure | Maintain consistent sanding pattern and finish |
| Adhesion poor on aluminum | Residual wax or grease on aluminum | Use dedicated aluminum cleaner and avoid steel wool | Test in a small area before full application |
Common Mistakes
- Skipping the degreasing step and painting over oils
- Using too aggressive abrasives on delicate metals like aluminum
- Rushing drying times between cleaning and priming
- Neglecting to remove all rust before priming
Tips For Best Results
- Work in a clean, dust-free area to prevent debris from sticking to fresh paint.
- Test cleaning and priming products on a small area first to avoid damage.
- Wear appropriate PPE, including gloves and eye protection, when handling chemical cleaners.
- Choose a primer that is compatible with both the metal type and the topcoat you plan to use.
- Allow ample curing time between primer and topcoat to maximize adhesion.
Call A Professional
If rust has deeply pitted the metal or if the surface is large or structurally critical, consider consulting a professional refinisher. Stop and seek expert help if you notice extensive corrosion, warped panels, or if chemical cleaners cause discoloration or surface damage.
FAQ
Can I use any degreaser on metal before painting?
Use a metal-specific degreaser to ensure compatibility with the surface and paint system.
Is phosphoric acid cleaner safe on all metals?
Phosphoric acid cleaners work well on many metals but follow product guidelines for compatibility with aluminum, stainless steel, and plated surfaces.
Do I need to sand between coats?
Sanding between coats is often unnecessary if the primer and topcoat are designed for excellent adhesion; light scuffing can help.
How long should I wait before applying paint after cleaning?
Allow the surface to dry completely as per product directions; in dry, warm conditions this can be a few hours.
Buying Guide
Choosing the right cleaning and prep products affects paint longevity more than most people realize. When evaluating options, consider
- Size and packaging to fit project scale
- Effectiveness against oils, greases, and rust
- Compatibility with metal types like stainless steel, aluminum, and steel
- Safety and ventilation requirements
- Ease of use and required dwell times
For best results, select products that are designed for metal prep before painting, and follow label directions carefully. If you are unsure about metal type or rust extent, start with a test area or consult a professional for guidance.
Leave a Reply