How to Clean Marks Off Walls
Walls in homes frequently pick up marks from everyday life, including fingerprints, scuffs, and accidental marks. With the right approach and safe cleaners, most marks can be removed without repainting or damaging paint finishes. This guide lays out practical steps and product options suitable for American households.
Readers will find a straightforward, step-by-step method, a quick reference overview, safety tips, and troubleshooting advice to handle stubborn stains while protecting wall surfaces.
Quick Answer
For light marks, start with a soft microfiber cloth dampened with water or a small amount of mild all-purpose cleaner, then wipe gently. For tougher marks, use a melamine foam sponge sparingly, followed by a damp microfiber cloth. If marks persist, apply a dedicated wall cleaner spray with a spray trigger and wipe clean. Always test a small, inconspicuous area first.
What You’ll Need
- Melamine foam sponge wall eraser 3 pack
- Microfiber cleaning cloth 12×12 inches for removing wall marks
- All-purpose wall cleaner spray 32 oz with spray trigger for marks and scuffs

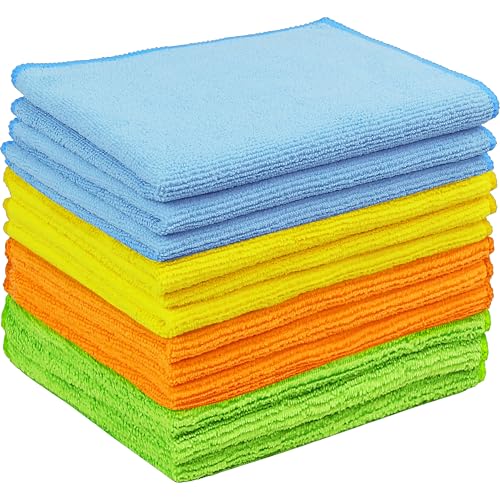

Before You Start
Prep the area by removing nearby items and laying down a drop cloth to catch any drips. Use a gentle touch to avoid removing paint or creating glossy patches. Test cleaner on a hidden spot first to ensure it doesn’t dull or discolor the finish. Time estimate: 15–45 minutes depending on wall size and stain severity. Important safety note: Keep cleaners away from children and pets, and ventilate the room during cleaning.
Step-By-Step: How To Clean Marks Off Walls
- Inspect the wall finish to determine if it’s matte, eggshell, satin, or semi-gloss; this affects which cleaners are safest to use.
- Dust the area with a dry microfiber cloth to remove loose dirt before wiping.
- For light marks, dampen a microfiber cloth with water and wipe in gentle, circular motions.
- If marks persist, apply a small amount of all-purpose wall cleaner spray to the cloth or directly to the stain, and wipe again.
- For stubborn scuffs, rub with a melamine foam sponge wall eraser using light pressure, testing first in a hidden spot.
- Switch to a clean, damp microfiber cloth to remove any cleaner residue.
- Dry the area with a dry section of the microfiber cloth to prevent streaks.
- For ceilings or high walls, use a pole or step stool safely and work in small sections to maintain control.
- If color transfer occurs (ink, dye transfer), blot with a small amount of diluted cleaner and rinse with water, then dry.
- Re-count the areas after cleaning to ensure all marks are addressed; repeat only as needed to avoid over-wetting.
- Finish with a light overall wipe to refresh the surface and restore a uniform appearance.
- Consider applying a touch-up paint to patch isolated spots if discoloration remains after cleaning.
Troubleshooting
| Symptom | Likely Cause | Fix | Prevention |
|---|---|---|---|
| Marks return after cleaning | Oily residue or dye transfer | Rinse with clean water, re-wipe, and dry; consider a mild wall cleaner | Wipe spills promptly; use a sealer on stubborn spots |
| Discoloration or dulling | Over-wetting or harsh cleaner | Use less cleaner and a softer cloth; test first | Avoid abrasive methods on glossy finishes |
| Paint bonds to sponge | Too much pressure with melamine sponge | Lighten pressure or discontinue sponge use in that area | Use only as needed on stubborn marks |
| Streaks after cleaning | Residue from cleaner | Wipe with a clean, damp microfiber cloth and dry thoroughly | Rinse and dry after cleaning |
Common Mistakes
- Using harsh solvents or bleach on painted walls
- Over-wetting walls, which can cause paint peeling
- Scrubbing aggressively, which can remove paint or finish
- Neglecting a spot test on hidden areas before full application
Sticking to mild cleaners and gentle pressure typically yields the best results without damage.
Tips For Best Results
- Test cleaners in an inconspicuous corner before broader use.
- Use a dedicated spray cleaner with a spray trigger for even application.
- Keep a small, color-m
atched cloth handy to monitor color changes during cleaning.
- Work in small sections to prevent excess moisture accumulation.
- For higher walls, consider a microfiber extension tool to maintain contact without reaching over.
Call A Professional
Consider professional help if: a) stains are extensive across multiple rooms, b) the wall has delicate wallpaper or textured surfaces that require special care, c) there is persistent water damage or mold growth, or d) cleaning risks repainting or sealing are concerns. If you notice bubbling paint, peeling, or persistent discoloration despite multiple attempts, a professional assessor can determine whether repaint or refinishing is necessary.
FAQ
Can I use bleach on walls to remove marks?
Avoid bleach on painted walls as it can fade colors and damage finishes; use a mild cleaner first.
Are melamine foam sponges safe for all wall types?
They are effective for many surfaces but can dull or remove finishes on delicate paints; test first and use light pressure.
How do I remove ink marks from walls?
Lightly dab with a mild cleaner and a microfiber cloth; avoid rubbing ink into the paint and test any solvent in a hidden area.
What if my walls are satin or semi-gloss?
These finishes are more durable; you can use a mild cleaner spray and a microfiber cloth, then rinse and dry to prevent streaks.
Is a touch-up paint necessary after cleaning?
Not always, but if staining remains or paint has worn away, a touch-up can restore uniformity.
How long should I wait between cleaning and checking for streaks?
Give the wall a few minutes to dry before inspecting for remaining marks or streaks.
Buying Guide
When choosing tools and cleaners for removing marks from walls, consider size, material compatibility, and the finish of your walls. A proper kit helps in quick, effective touch-ups without damage.
- Size and scope: For large homes, a bundle with multiple microfiber cloths and large sponges can save time.
- Noise level and ease of use: Sprayers with easy trigger mechanisms reduce effort and strain.
- Energy efficiency: Manual tools require no electricity; choose spray bottles with refillable designs to reduce waste.
- Controls and application: A spray cleaner with a fine mist helps prevent over-wetting; consider sponge or cloth-based options for precise control.
- Placement and storage: Keep cleaning tools in a well-organized caddy near living areas for quick access.
For most homes, a paired approach works well: a microfibre cloth for everyday marks, a melamine sponge for stubborn spots, and an all-purpose wall cleaner spray for tougher grime. Are you ready to clean confidently and restore wall beauty without repainting?
Leave a Reply