How to Clean Makeup Puff: A Practical Guide for Clean, Fresh Buffing
The makeup puff is a staple tool for many beauty routines, delivering smooth, even coverage. Regular cleaning helps prevent bacteria buildup and extends the life of the puff. This guide walks through simple, safe methods to keep makeup puffs pristine, using easy-to-find tools and routine maintenance tips.
Quick Answer
Use warm water and a gentle soap or a dedicated cleanser, rinse thoroughly, and air-dry completely. For stubborn buildup, use a silicone pad or a silicone makeup sponge cleaning mat to massage out residue, then rinse and dry before reuse.
What You’ll Need
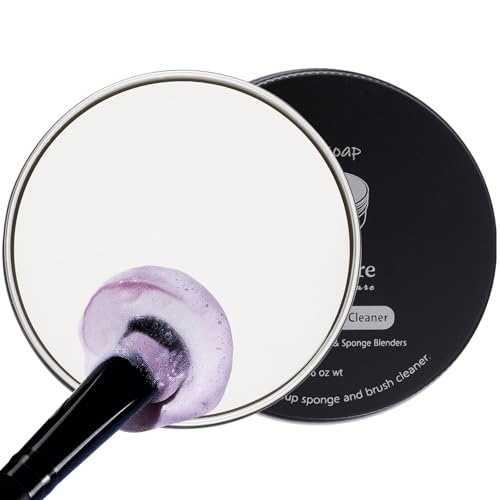
- Silicone makeup sponge cleaning mat
- Makeup puff cleaner soap bar for sponges
- Beauty blender cleaning tool kit silicone pad


Before You Start
Prepare a clean workspace and lay down a towel to catch drips. Use lukewarm water; hot water can dull elastic materials over time. Do not apply harsh detergents or alcohol directly to the puff. Always rinse until the water runs clear and squeeze gently—do not twist, which can damage the puff’s shape. Plan about 10–15 minutes for a thorough cleaning and drying cycle.
Step-By-Step: How To Clean Makeup Puff
- Rinse the puff under lukewarm water to remove surface makeup and oils.
- Apply a small amount of cleanser directly to the puff or onto your cleaning mat.
- Work the cleanser in with gentle circular motions, focusing on areas with color buildup.
- For stubborn stains, press the puff against a silicone pad or mat and massage through the cleaning surface.
- Rinse the puff under running water, squeezing gently to release the soap and lifted debris.
- Repeat the lather and rinse steps until the water runs clear.
- Gently squeeze out excess water and press the puff between clean towels to remove moisture.
- Air-dry the puff flat on a clean surface away from direct sunlight or heat.
- Check for any lingering odors or residue; repeat cleaning if necessary.
- Once completely dry, store the puff in a breathable container or clean pouch.
- For routine maintenance, clean at least once a week with daily use; replace puff every few months or as recommended by the manufacturer.
- Consider using a dedicated cleaning tool kit for frequent cleansing to speed up the process and preserve puff integrity.
Troubleshooting
| Symptom | Likely Cause | Fix | Prevention |
|---|---|---|---|
| Residual soap smell after washing | Soap not fully rinsed | Rinse thoroughly; repeat wash cycle | Rinse until water runs clear; use mild detergents |
| Color stains that don’t fade | Deep pigment buildup | Soak briefly in warm water with a drop of cleanser, then rinse | Clean promptly after use to prevent set-in stains |
| puff feels stiff or cracks after drying | Overexposure to heat or harsh cleaners | Avoid hot water and strong cleaners; air-dry thoroughly | Use gentle cleansers and room-temperature water |
| Odor persists | Bacteria growth in damp puff | Deep clean; ensure complete drying | Dry fully after each wash; replace regularly |
Common Mistakes
- Using hot water or harsh detergents that degrade elasticity
- Over-washing with aggressive scrubbing that damages the puff’s texture
- Forgetting to rinse until no soap bubbles remain, leaving residue
- Storing a damp puff in a closed or humid container
Tips For Best Results
- Clean puffs immediately after each use to prevent makeup buildup.
- Use a silicone pad or mat to target hard-to-reach areas without excessive rubbing.
- Air-dry puffs on a clean rack or hanging line to ensure full circulation.
- Label puffs destined for specific makeup types to avoid cross-contamination.
- Replace makeup puffs every few months to maintain hygiene and performance.
Call A Professional
In most cases, home cleaning is sufficient. Seek professional help if a puff shows signs of mold, persistent odor after multiple cleanings, or if the puff has been exposed to daily active use with contaminated products for an extended period.
FAQ
How often should I clean my makeup puff?
Clean it at least once a week with regular use; replace every few months for best results.
Can I use dish soap to clean a makeup puff?
Yes, a mild dish soap or a dedicated makeup puff cleaner soap bar works well when rinsed thoroughly.
Is it OK to dry a puff in sunlight?
No—direct sunlight can degrade materials; air-dry in a shaded area.
What’s the best method to remove stubborn stains?
Use a silicone pad or mat to agitate the puff gently, then rinse until the water runs clear.
Should I sanitize my puff between uses?
Breathable maintenance is usually enough, but you can spot-clean with a mild sanitizer suitable for fabrics if desired.
Buying Guide
Choosing the right cleaning setup for makeup puffs involves understanding size, material, and compatibility with tools. Look for a kit that includes a silicone pad or mat, a gentle soap bar designed for sponges, and possibly a dedicated cleaning brush. For many users, a compact silicone-based cleaning tool kit provides quick results without harsh scrubbing. Consider how often you cleanse, the number of puffs you own, and your preferred drying setup. A well-rounded kit reduces residue, speeds up cleaning, and helps maintain the puff’s softness and shape over time.
Buying Guide Considerations
- Size and shape: Choose a cleaning mat or pad that fits your puff size and allows easy maneuvering around curves.
- Noise level: Some cleaning tools operate quietly; this matters in shared spaces or late-night routines.
- Energy efficiency: Manual cleaning tools require no power; consider this in eco-friendly planning.
- Controls: Simple on/off or pressure-based pads help tailor cleaning intensity.
- Placement: A dedicated cleaning corner or tray with drainage helps keep the area tidy and dry.
- Materials: Silicone pads are durable and easy to sanitize; check for food-grade or cosmetic-safe materials.
- Maintenance: Look for items that are easy to clean and quick to dry; avoid porous materials that retain odors.
Overall, a compact silicone-based cleaning kit tailored for makeup puffs can streamline routine maintenance. If you frequently use multiple puffs for different products, a reliable system becomes a worthwhile investment. Ready to refresh your tools and keep your makeup application flawless?
Leave a Reply