How to Clean Makeup Brushes Without Brush Cleaner
Keeping makeup brushes clean is essential for skin health and makeup performance. When a store-bought brush cleaner isn’t handy, several everyday items and a simple routine can effectively remove makeup, oils, and bacteria from brushes. This guide focuses on practical methods using common tools, including a silicone cleaning mat, a glove, and an ultrasonic cleaner as optional aides for deeper cleansing.
Quick Answer
Use warm water and gentle soap to lather brush bristles, then work the brush across a silicone makeup brush cleaning mat for agitation. Rinse well, reshape the bristles, and lay flat to dry. For a deeper clean, an ultrasonic makeup brush cleaner or a makeup brush cleaning glove silicone can boost efficacy, especially for densely packed brushes.
What You’ll Need
- Warm water
- Gentle, mild soap or shampoo
- Silicone makeup brush cleaning mat for sinks
- Makeup brush cleaning glove silicone
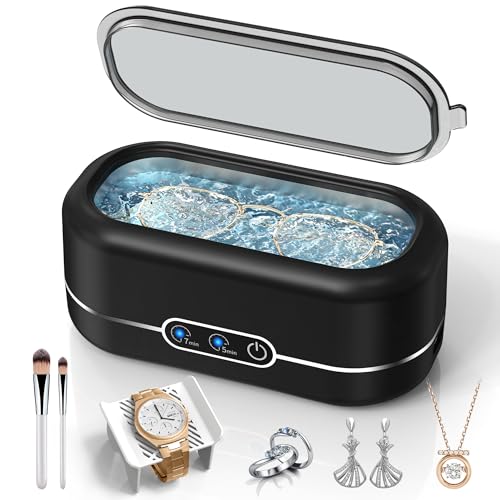
- Optional: Ultrasonic makeup brush cleaner
- Clean towels or a drying rack


Before You Start
Set up a dedicated workspace near a sink. Use lukewarm water and avoid hot water, which can damage bristles. Test any new cleaning method on a single brush before full use. Never submerge wooden-handled brushes fully in water, and avoid bending bristles. Allow brushes to dry completely before reuse to prevent mold or mildew. Typical cleaning time ranges from 5 to 15 minutes per brush, depending on dirtiness and brush type.
Step-By-Step: How To Clean Makeup Brushes Without Brush Cleaner
- Prepare the brushes by removing visible makeup with a dry wipe or gentle tapping to release surface residue.
- Fill a small bowl with warm water and a few drops of mild soap or shampoo.
- Dip only the bristles into the soapy water, avoiding the ferrule where bristles meet the handle.
- Gently swirl the brush across the silicone makeup brush cleaning mat for sinks to loosen makeup and oils. Use circular motions to lift debris from dense brush heads.
- Rinse the bristles under lukewarm water held at an angle to avoid soaking the ferrule and handle. Re-check for remaining residue.
- Repeat steps 3–5 as needed until the water runs clear.
- Gently squeeze excess water from the bristles without twisting. Re-shape the brush heads.
- Lay brushes flat on a clean towel or drying rack with bristles hanging slightly over the edge to air-dry fully.
- For a deeper cleanse on stubborn brushes, use the ultrasonic makeup brush cleaner following the device’s instructions, ensuring that brush materials are compatible with ultrasonic cleaning.
- Once dry, inspect bristles for stray hairs or deformation and replace any damaged brushes to prevent skin irritation.
- Store brushes upright in a clean, dry container to maintain bristle shape and hygiene.
- Establish a regular cleaning cadence—between 1 and 2 weeks for most daily-use brushes.
Troubleshooting
| Symptom | Likely Cause | Fix | Prevention |
|---|---|---|---|
| Bristles stay splayed after drying | Brushing pressure or water exposure | Reshape while damp and avoid excessive bending | Dry brushes with bristles over edge of rack |
| Color staining remains after washing | Deep pigment buildup | Repeat cleaning cycle or use a mild clarifying soap | Clean brushes promptly after heavy color use |
| Musty odor | Moisture trapped in bristles | Ensure thorough drying and air circulation | Dry completely between uses |
| Water wicks into ferrule | Submersion of handle | Avoid soaking; rinse bristles only | Keep handles dry during washing |
Common Mistakes
- Soaking the entire brush, including the handle and ferrule, in water
- Using harsh soaps or solvents that can degrade bristles
- Rubbing bristles too aggressively, causing shedding
- Stacking brushes while wet, which traps moisture and promotes mold
- Not reshaping bristles before drying, leading to misshapen brushes
Tips For Best Results
- Work in small batches to avoid cross-contamination between brushes of different finishes or skin types.
- Rotate: clean high-use brushes weekly and specialty brushes monthly to maintain performance.
- Use color-coded brushes to minimize transferring pigments between products, reducing repeated cleansing needs.
- Pair with a drying rack or a dedicated brush holder to ensure proper airflow around bristles.
- Test new cleaning tools (like the silicone glove) on a single brush before broad use to confirm compatibility with bristle types.
Call A Professional
Consider professional help if brushes show persistent mold, irregular bristle loss, or if specialty brushes have delicate, loose hems or glued components. Stop using brushes that shed bristles or discolor significantly, and seek guidance from the manufacturer or a cosmetic pro if unsure about tool compatibility or cleaning techniques.
FAQ
How often should I clean my makeup brushes?
Clean high-use brushes weekly and lighter-use brushes every 1–2 weeks to maintain hygiene and performance.
Can I use dish soap instead of makeup soap?
Yes, a mild dish soap can work briefly, but use a gentle formula to protect bristles over time.
Is an ultrasonic cleaner safe for all brushes?
Ultrasonic cleaners can be effective for synthetic brushes; avoid natural hair brushes unless the manufacturer approves.
What’s the best way to dry brushes?
Lay flat with bristles over the edge of a surface or use a rack to allow air to circulate and prevent water from sitting at the ferrule.
Buying Guide
When shopping for brush-cleaning gear, consider size, noise, energy use, controls, and placement in your space. A silicone makeup brush cleaning mat for sinks can pair with standard soap for quick daily cleaning and is ideal for small bathrooms. An ultrasonic makeup brush cleaner offers deeper cleansing for dense brush heads but requires access to electricity and a stable surface. A makeup brush cleaning glove silicone provides hands-free agitation and can fit a variety of brush sizes, making it convenient for regular use. Look for mats with textured surfaces, bristle-safe materials, and easy drainage. For ultrasonic devices, check cycle options and compatibility with synthetic hairs. Finally, assess your storage and drying setup to ensure brushes dry completely between sessions, reducing the risk of mold and mildew.
Leave a Reply