How to Clean Leatherette Surfaces Effectively
Leatherette, a popular alternative to real leather, offers durability and a sleek look for furniture, car interiors, and home decor. Cleaning it properly helps preserve its color, texture, and longevity without causing damage. This guide outlines a practical, step-by-step approach using common vinyl and leatherette cleaners and tools.
Quick Answer
For most soiled leatherette, start with a gentle vinyl upholstery cleaning spray and microfiber cloths to remove surface dirt. For tougher spots, use a soft bristle upholstery brush for vinyl upholstery and, if needed, a vinyl leatherette cleaner kit with sponge applicator. Always test a small, inconspicuous area first and air-dry completely.
What You’ll Need
- Vinyl leatherette cleaner kit microfiber cloths sponge applicator
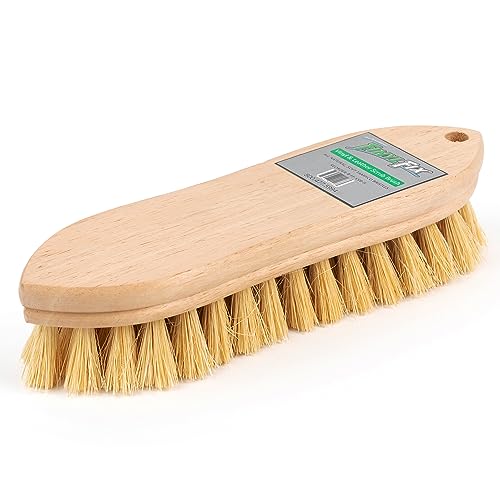
- Soft bristle upholstery brush for vinyl upholstery cleaning kit
- Vinyl upholstery cleaning spray with spray bottle and microfiber cloths


Before You Start
Clear the surface and remove loose debris with a dry microfiber cloth. Work in a well-ventilated area and test any cleaner on a hidden spot for colorfastness. Avoid harsh solvents and excessive moisture, which can seep into seams and cause staining or warping. Plan for a cleaning session that includes time for drying; leatherette can take several hours to fully air-dry in low humidity.
Important cautions: Do not use bleach, strong solvents, or high-pressure sprays. Never saturate the material; use damp, not soaking-wet, cloths. For colored surfaces, ensure the cleaner is labeled safe for colored vinyl to prevent fading.
Step-By-Step: How To Clean Leatherette Surfaces
- Remove surface dust with a dry microfiber cloth to prevent grinding dirt into the material.
- Vent or turn on airflow to speed drying and reduce chemical odor during cleaning.
- Apply a light mist of vinyl upholstery cleaning spray onto a microfiber cloth rather than directly onto the surface.
- Gently wipe the leatherette in small circular motions to lift dirt without rubbing too hard.
- For stubborn spots, use a soft bristle upholstery brush for vinyl upholstery cleaning kit to agitate the area with gentle pressure.
- Wipe away residue with a fresh microfiber cloth; you may dampen the cloth slightly for heavy soils and repeat as needed.
- If using a vinyl leatherette cleaner kit, follow the included sponge applicator directions to work product into the surface evenly.
- Dry the surface with another clean, dry microfiber cloth and allow full air-drying before use.
- Inspect for any remaining stains or odors; repeat treatment if necessary, avoiding over-wetting.
- Finish with a light wipe to restore a uniform sheen. Store cleaning supplies in a cool, dry place away from direct sunlight.
- Optional: For ongoing protection, apply a vinyl-safe conditioner designed for leatherette every few months, following product instructions.
- Document any spots that require professional attention if they persist after multiple cleanings.
Troubleshooting
| Symptom | Likely Cause | Fix | Prevention |
|---|---|---|---|
| Streaks after cleaning | Excess cleaner or insufficient drying | Wipe with a clean cloth and air-dry completely | Use sparing amounts and test before full application |
| Color fading or blotching | Harsh cleaner or solvent exposure | Switch to vinyl-safe products and test first | Stick to products labeled for leatherette |
| Sticky residue | Over-application or evaporated product | Wipe with a damp cloth, then dry | Follow recommended amounts |
| Rough texture after cleaning | Over-brushing or poor cloth choice | Use a softer cloth and lighter touch | Prefer microfiber and gentle brushes |
Common Mistakes
- Using abrasive brushes beyond a light touch on delicate seams
- Over-saturating the surface with cleaner or water
- Choosing cleaners not approved for vinyl or leatherette
- Ignoring colorfastness tests or clean-area tests on dark fabrics
Tips For Best Results
- Test cleaners on a hidden area before full-scale use to protect color and finish.
- Use a two-cloth method: one damp for cleaning, one dry for drying and buffing.
- Clean regularly to prevent buildup that requires heavy scrubbing.
- Rotate cleaning tools between sessions to avoid transferring dirt between items.
Call A Professional
Consider professional help if leatherette shows deep staining, extensive peeling, or visible color transfer that does not respond to standard cleaners. Seek a specialist for persistent odors or damage near seams, which may indicate deeper structural issues.
FAQ
What is the best cleaner for leatherette?
Use a vinyl upholstery cleaning spray compatible with leatherette finishes and follow with microfiber cloths for best results.
Can I use a regular household cleaner on leatherette?
Avoid household cleaners not labeled for vinyl; they can strip color or leave residues.
How often should I clean leatherette furniture?
Light cleaning every few weeks helps maintain appearance; deep cleaning every few months depending on use and exposure.
Is conditioner necessary for leatherette?
Conditioners designed for vinyl may help maintain suppleness, but follow product instructions and avoid over-application.
Buying Guide
When selecting products to clean leatherette, consider size of the surface, stain types, and maintenance goals. A complete kit that includes a vinyl leatherette cleaner, sponge applicator, microfiber cloths, and a soft bristle brush can simplify routines, especially for larger furniture or vehicle interiors. Look for spray bottles that provide fine misters to prevent over-wetting, and check that cloths are lint-free to avoid new marks. Noise-level and energy efficiency are generally not concerns for manual cleaners, but opt for compact kits that store easily in a cleaning caddy. For multiple materials, choose versatile products labeled safe for vinyl and leatherette. If you have sensitive skin or pets, consider fragrance-free formulations and ensure products have clear, simple usage instructions.
Leave a Reply