How to Clean Leather Safely and Effectively
Leather furniture, jackets, and accessories add timeless style to any American home. Proper cleaning protects the material, preserves color, and extends longevity. This guide outlines a practical, step-by-step approach using common leather care products and simple tools.
Quick Answer
Best practice involves using a dedicated leather cleaner and conditioner kit and a soft brush or microfiber cloth. Begin with light cleaning, test a hidden area, and apply conditioner evenly. Avoid harsh solvents, direct heat, and excessive moisture to prevent damage.
What You’ll Need
- Leather cleaner and conditioner kit – a complete solution for cleaning and conditioning
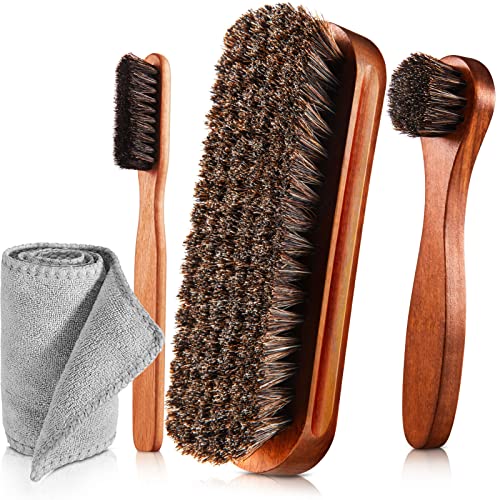
- Leather cleaning brush set – soft brushes designed for leather surfaces
- Microfiber cloth for leather cleaning – gentle, lint-free drying and buffing
- Optional small bowl of distilled water for dampening cloth
- Soft cotton towels for blotting


Before You Start
Before tackling leather cleaning, prepare the area by laying down a protective cover or old towels to catch spills. Test any product in a small, inconspicuous spot to check colorfastness and finish. Schedule a dry-time window; most leather needs 1–2 hours to air dry fully. Avoid using all-purpose cleaners, ammonia-based products, or alcohol on leather, as these can dry, crack, or fade the finish. If the leather is antique or highly valuable, consider professional cleaning for the first treatment.
Step-By-Step: How To Clean Leather
- Remove loose dirt with a dry microfiber cloth or a soft brush from the leather cleaning brush set.
- Prepare a small amount of cleaner from the leather cleaner and conditioner kit according to the label instructions. Never apply undiluted cleaner directly to the surface.
- Lightly work the cleaner into the leather in a circular motion using the microfiber cloth for leather cleaning. Focus on stained or heavily soiled areas but avoid over-wetting the surface.
- After cleaning, wipe away residue with a clean, dry microfiber cloth. Use a fresh section of cloth to prevent re-depositing dirt.
- Allow the leather to dry naturally in a well-ventilated area, away from direct heat sources like radiators or sunlight.
- Apply a thin layer of conditioner from the same kit. Conditioning helps restore suppleness and adds a protective barrier against future soil.
- Buff the surface gently with the microfiber cloth to achieve an even shine. Work in small circular motions until the finish looks uniform.
- Record any spots that remain noticeable and plan a follow-up treatment if needed. For persistent stains, repeat the cleaning step with a gentle touch, or consult the product instructions for spot-specific guidance.
Troubleshooting
| Symptom | Likely Cause | Fix | Prevention |
|---|---|---|---|
| Stiff or dry feeling after cleaning | Insufficient conditioning | Apply a light coat of the leather conditioner and buff | Condition leather after cleaning as recommended |
| Color fading or darkening | Over-wetting or using wrong products | Use minimal moisture; test first; switch to a compatible kit | Stick to manufacturer-approved cleaners |
| Streaks or uneven finish | Uneven application | Reapply in small sections with gentle, even strokes | Use a single type of cloth for each phase |
| Sticky residue | Residual cleaner or conditioner | Wipe with a clean microfiber cloth until residue is gone | Follow exact product directions |
Common Mistakes To Avoid
- Using household detergents or dish soap on leather
- Over-wetting leather during cleaning
- Skipping a patch test before full application
- Failing to condition after cleaning, which can lead to cracking over time
Keeping these pitfalls in mind helps maintain leather’s appearance and resilience over years of use.
Tips For Best Results
- Clean regularly to prevent buildup of oils and grime that can degrade leather over time.
- Always test cleaning products in a hidden corner first to assess colorfastness.
- Use a dedicated brush and microfiber cloth to avoid scratching the surface.
- Store cleaning products in a cool, dry place away from direct sunlight.
- For matte finishes, avoid aggressive buffing that could alter texture.
Call A Professional
Seek professional help if leather shows extensive cracking, water damage, or color loss that does not improve after home cleaning and conditioning. Stop further DIY attempts if the leather feels tacky, smells unusual, or if staining worsens after repeated treatments. If the item has significant sentimental or monetary value, professional restoration may be the safer option.
FAQ
Can I use everyday soap to clean leather?
No. Everyday soaps can strip natural oils and cause drying or damage.
How often should I clean leather?
For typical use, clean every 3–6 months and condition 2–4 times per year, or as recommended by the kit.
Is it safe to use water on leather?
Minimal, dampened cloth is acceptable; avoid soaking the material.
What if my leather has ink or dye transfers?
Spot-clean carefully with a product designed for ink removal, and follow with conditioning; for delicate items, professional care is advised.
Buying Guide
Choosing the right leather care setup involves several factors. First, consider size and type of leather item—sofas, jackets, or car seats may require different approaches or kit sizes. Look for a leather cleaner and conditioner kit that includes both cleaning and conditioning steps to simplify the process. Noise level is generally not a concern with household care tools, but if you’re cleaning shared spaces, choose silent brushes and soft cloths to minimize disruption. Energy efficiency isn’t a major factor here, but opting for high-quality, long-lasting tools reduces waste. Controls matter in terms of kit usability and safety: prefer products with clear instructions, patch test guidance, and gentle formulas. For placement, choose a well-ventilated area and lay down protective coverings to protect floors from any spills. If you’re deciding between brands, compare how the kit’s conditioner protects against drying and cracking, and whether the included brushes are specifically designed for leather cleaning without scratching. Finally, assess value by considering how many treatments you can perform with a single kit and whether you’ll need additional cloths or brushes over time. If you own multiple leather items, a single kit with refill options can be a cost-effective choice.
Leave a Reply