How to Clean a Keurig Single Cup Brewer
Keeping a Keurig single cup brewer clean helps maintain brew quality and extend the machine’s life. Regular cleaning removes mineral buildup, mold, and stale coffee oils that can affect flavor and performance. This guide covers practical steps, tools, and safety tips tailored for American users.
Quick Answer
Run a descaling cycle with a Keurig descaling solution to remove mineral buildup, followed by a rinse. Use Keurig cleaning tablets to refresh the internal components, and finish with a thorough rinse cycle. For narrow parts, use a cleaning brush and needle tool set to clear the needle. Regular monthly cleaning can keep your brewer brewing reliably.
What You’ll Need
- Keurig descaling solution for coffee makers
- Keurig cleaning tablets for coffee maker
- Keurig brewer cleaning brush and needle tool set


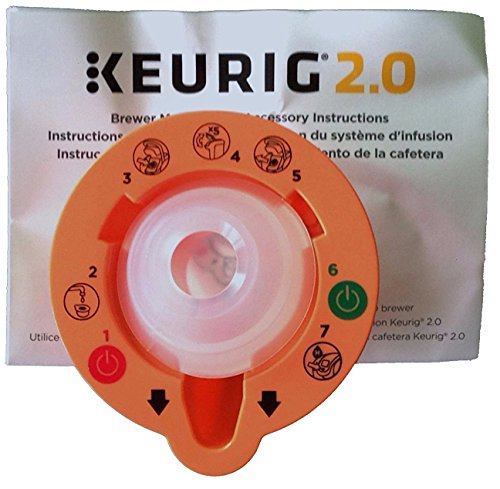
Before You Start
Unplug the brewer and remove the water reservoir before any cleaning. Empty the water reservoir and discard any used pods. Use warm, not hot, water to rinse parts and avoid harsh chemicals. Do not immerse the base or electrical components in water. Plan for a 60–90 minute cleaning window, especially if performing a full descale cycle.
Step-By-Step: How To Clean A Keurig Single Cup Brewer
- Fill the reservoir with a mix of descaling solution and water as instructed on the product label.
- Run a complete descaling cycle without a mug until the tank runs dry, then repeat with fresh water to rinse.
- Allow the brewer to cool briefly, then repeat a second rinse cycle with clean water only.
- Remove the water filter (if your model uses one) and rinse it under warm water.
- Use a Keurig cleaning tablet according to the package directions to disinfect the internal components; remove the pod holder after the cycle.
- Run additional rinse cycles to ensure all cleaning solution residues are flushed from the system.
- Detach the drip tray and wash it with warm, soapy water; dry before reattaching.
- Use the cleaning brush to gently scrub the exterior surfaces and the needle tool to clear any clogged K-Cup needles.
- Reassemble the brewer, fill the reservoir with fresh water, and run a final test brew with a cup.
- Wipe the exterior again and check for leaks or unusual noises; repeat rinsing if necessary.
Troubleshooting
| Symptom | Likely Cause | Fix | Prevention |
|---|---|---|---|
| Weak or no brew | Clogged needles or mineral buildup | Use needle tool to clear; descale again | Regular monthly descaling |
| Water leaks from unit | Misaligned components or gasket wear | Re-seat parts; replace worn seals if needed | Avoid overfilling; gentle cleaning |
| Residue in cup | Residue from cleaning tablets or inadequate rinsing | Run extra rinse cycles | Rinse thoroughly after each cleaning |
| Unusual odors | Stale coffee oils buildup | Deep clean with descaling and clean cycle | Regular cleaning schedule |
Common Mistakes
- Using harsh cleaners not approved for coffee makers
- Skipping the rinse cycles after descaling
- Ignoring the needle and tubing in the K-Cup head
- Not removing mineral buildup from the reservoir cap and filter area
Following proper steps minimizes residue and improves brewing performance.
Tips For Best Results
- Use distilled or filtered water to reduce mineral buildup between cleanings.
- Space descale cycles every 1–3 months depending on usage and water hardness.
- Clean the exterior and drip tray weekly to prevent grime transfer to cups.
- Keep the needle tool and brush dedicated to the Keurig to avoid cross-contamination.
Call A Professional
Consider professional help if the Brewer shows persistent leaks, electrical issues, or unpredictable brews after thorough cleaning. Do not attempt disassembly beyond manufacturer guidance, and contact support if liquid spills into electrical components.
FAQ
How often should I descale a Keurig single cup brewer?
Most users descale every 1–3 months, depending on water hardness and usage. If you notice slower brewing or changes in taste, descaling is a good first step.
Can I use vinegar to descale my Keurig?
Vinegar is not recommended in most Keurig models. Use the official Keurig descaling solution or an approved descaler designed for coffee makers.
What if the cleaning tablets don’t dissolve?
Ensure you follow the tablet directions precisely and use the appropriate water volume. If needed, run a short rinse before retrying.
Is it safe to wash all removable parts in a dishwasher?
Many removable parts are dishwasher-safe, but refer to the user manual. Hand washing with warm, soapy water is often safest for non-dishwasher-safe parts.
Will cleaning affect the flavor of my next brew?
Post-cleaning rinses remove residue, which typically improves flavor. If taste is off, run a few clean water cycles before brewing a cup.
Should I replace the water filter after cleaning?
Check your model’s guidelines; most filters should be replaced per schedule or after a deep clean.
What maintenance should I do between deep cleanings?
Regular quick rinses, emptying the reservoir, and wiping the exterior help prevent buildup.
Buying Guide
When choosing cleaning products and replacement parts for a Keurig single cup brewer, consider several factors to maximize performance and longevity.
- Size and compatibility: Ensure descaling solutions and tablets are compatible with your Keurig model and size of brewer.
- Descaling solution type: Use Keurig descaling solution or a recommended alternative designed for K-Cup brewers to avoid residue or damage.
- Cleaning accessories: A dedicated cleaning brush and needle tool set helps reach knobby areas and the K-Cup needles safely.
- Frequency and ease of use: Simpler cleaning kits encourage regular maintenance; consider multi-pack kits for cost efficiency.
- Water quality: If your tap water is hard, using filtered or bottled water between cleanings reduces mineral buildup.
- Noise and energy considerations: Some descalers require longer cycles; plan sessions when noise will not disturb others.
- Placement: Keep the brewer on a stable, dry surface away from heat sources; ensure space for reservoir removal during cleaning.
Compare products based on the included tools, ease of use, and compatibility with your model to choose the best cleaning setup for a Keurig single cup brewer.
Leave a Reply