How to Clean a Keurig Coffee Maker With Descaling Solution
Descaling a Keurig helps remove mineral buildup from hard water, improving taste and extending machine life. Using a dedicated descaler ensures safe, effective cleaning without damaging internal parts. This guide shows a practical method using common descaling products so American households can maintain their brewer at home.
Regular maintenance can prevent clogs, stale flavors, and uneven extraction. Follow the steps below to keep your Keurig brewing hot, clean water every time.
Quick Answer
Prepare a descaling solution according to product instructions, run a full brewing cycle with the solution, then rinse with several clean-water cycles. Wipe the exterior, run a few water-only cycles until the descale odor is gone, and dry all surfaces thoroughly.
What You’ll Need
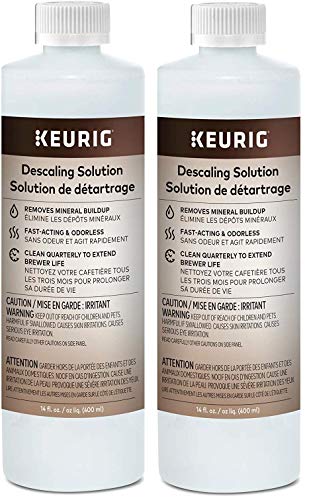
- Keurig descaling solution 12 oz
- Affresh coffee maker descaler cleaner kit
- CLR Pro descaler for coffee makers
- Clean water for rinsing
- Soft cloth or sponge for exterior wiping


Before You Start
Unplug the Keurig before any disassembly or cleaning. Empty the water reservoir and remove the K-Cup holder and any used pods. Place a large mug on the drip tray to catch the descale solution. A typical descaling process takes 30–60 minutes, depending on the model. Do not use metal utensils inside the brew area to avoid scratching plastic surfaces. If you notice mold or unusual smells, pause and inspect the water reservoir seal and needle screens before proceeding.
Step-By-Step: How To Clean Keurig Coffee Maker With Descaling Solution
- Turn off and unplug the brewer. Remove the water reservoir and any removable parts according to the user manual.
- Prepare the descaling solution. If using Keurig descaling solution 12 oz, mix as directed with water in the reservoir. If using Affresh or CLR Pro, follow package instructions for the correct dilution.
- Pour the descaling solution into the reservoir. Reattach the reservoir to the brewer and place a large mug on the drip tray to catch the liquid.
- Run a cleansing brew. Select the largest cup size and run a full brewing cycle without inserting a K-Cup. Repeat until the reservoir is empty.
- Let the machine sit for 15–20 minutes with the descaler solution inside to loosen mineral buildup inside the tubes.
- Rinse the reservoir thoroughly, fill with fresh clean water, and run multiple water-only cycles to flush remaining descaler out of the system. If a coffee scent persists, run additional rinses until neutral.
- Disassemble removable parts and rinse with warm water. Wipe the exterior with a damp cloth and dry completely before reassembling.
- Run a final taste test with a plain cup of hot water to confirm no lingering descaler taste. Resume normal brewing with a K-Cup to ensure full functionality.
Troubleshooting
| Symptom | Likely Cause | Fix | Prevention |
|---|---|---|---|
| Descale odor or taste after cleaning | Insufficient rinse cycles | Run 4–6 additional water-only cycles | Rinse until neutral scent persists |
| Brewing stops mid-cycle | Clogged needle or filter | Clean needles and use the cleaning needle tool if provided | Regularly descale and rinse |
| Leaks from reservoir | Misaligned reservoir or gasket wear | Re-seat reservoir and inspect seals | Check seals during routine cleaning |
| Brews too slowly | Mineral buildup in water lines | Repeat descaling process or use a stronger dilution per instructions | Descale regularly to prevent buildup |
Common Mistakes
- Using household vinegar or other non-approved cleaners, which can damage internal parts
- Skipping the rinse phase, leaving a residual taste or odor
- Using hot water straight from the tap if it’s very mineral-rich; use cooled, filtered water when possible
- Overfilling the reservoir beyond the recommended level, causing spills or leaks
Tips For Best Results
Space the descaling routine based on usage and water hardness. If the home has hard water, consider descaling every 1–2 months or after 60 brews, whichever comes first. Use fresh water for every rinse cycle to avoid redepositing minerals. Keep the K-Cup mechanism clean by occasionally running a cleaning cycle without a pod to prevent blockages. Store descaler products out of reach of children and pets, and never mix different descalers in the same reservoir during a single cleaning session.
Call A Professional
If the brewer still shows persistent issues after multiple descaling attempts—such as persistent leaks, inconsistent brew temperatures, or failure to heat water—contact a qualified appliance technician or Keurig support. Stop attempting to repair on your own if there are electrical concerns or visible damage to cords or housing.
FAQ
Can I use vinegar to descale a Keurig?
Vinegar is not recommended for Keurig machines as it can leave a strong odor and may corrode internal components over time.
How often should I descale a Keurig in a typical household?
Descale every 1–3 months depending on water hardness and usage frequency.
Do I need to remove the water filter during descaling?
Some models require removing the filter or cartridge; follow the specific model’s manual for best results.
Can I skip the final rinse and just brew with a K-Cup?
No. A thorough rinse helps remove any remaining descaler, ensuring pure coffee flavor.
What should I do if the descaler won’t mix with water?
Ensure the solution is diluted correctly according to the product’s instructions and shake gently before use.
Is it safe to descale with CLR Pro on all Keurig models?
Descalers vary in compatibility; always check the product label and the Keurig model’s guidance before use.
Buying Guide
When choosing a descaling approach for a Keurig, consider factors like the size of the reservoir, water hardness, and how often the machine is used. Key buying factors include:
- <bSize and concentration: 12 oz bottles are common; ensure the product provides clear dilution directions for your model.
- <bNoise and run time: Some descalers require longer soak times; plan cleaning when the machine is not in use.
- <bEnergy efficiency: Descaling sessions are energy-light but plan cycles to minimize wasted energy and water.
- <bControls and compatibility: Check that the descaler is labeled safe for coffee makers and compatible with Keurig machines.
- <bPlacement: Store descalers in a cool, dry place away from children; keep the machines’ drip tray and surroundings clear during cleaning.
For many users, a trusted trio of descalers provides flexibility: the official Keurig descaling solution for straightforward use, Affresh for general cleaning cycles, and CLR Pro for tougher buildup. Compare how each product instructs dilution, soak time, and recommended rinse steps to match your brewer’s needs. Would you prefer a single-brand approach or mix-and-match options based on mineral levels? Either way, regular descaling keeps your coffee tasting fresh and your Keurig performing reliably.
Leave a Reply