How to Clean Jars for Canning: A Complete Step-by-Step Guide
Cleaning jars properly is essential for successful canning. This guide explains practical methods to prep jars, remove residue, and ensure each jar is ready for sealing. Clear steps, smart tools, and safe practices help maintain freshness and prevent spoilage.
Whether you are new to canning or revisiting your process, the following steps balance efficiency with thorough sanitation. The focus is on everyday kitchen tools and reliable jar-cleaning gear that makes the task easy and safe.
Quick Answer
Start with a pre-rinse to remove loose debris, then use warm, soapy water and a dedicated jar brush to scrub rims and lips. Run through a high-heat sterilization method, and air-dry on a clean rack. For tough residue, a long-handled brush or bottle brush can reach narrow mouths without scratching.
What You’ll Need
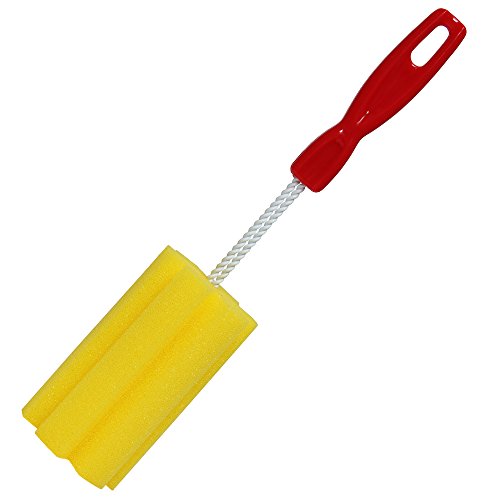
- Wide-mouth canning jar brush long-handle
- Jar cleaning brush set for canning jars with bottle brush
- Stainless steel canning jar rack dishwasher-safe
- Dish soap and hot water
- Large pot or canner for sterilization


Before You Start
Prepare a clean, dry workspace and ensure all jars are free from cracks or chips. Inspect lids and rings for corrosion. Safety first: always use heat-resistant gloves when handling hot jars, and keep children away from hot water. Plan a time window that allows for sterilization, filling, and cooling. Jars should be completely dry before filling to avoid dilution of heat during processing.
Step-By-Step: How To Clean Jars For Canning
- Rinse jars with warm water to remove any loose food particles and dust.
- Fill a large sink or basin with hot, soapy water and submerge jars, lids, and rings briefly.
- Scrub the interior and exterior surfaces using jar brush or the jar cleaning brush set, paying attention to the rims and threads.
- Rinse each jar thoroughly with clean water to remove all soap residue.
- Place jars in a rack or on a clean towel to drain, ensuring air can circulate around each piece.
- Transfer jars to a boiling-water bath or use a dedicated canner to sterilize, following recommended processing times for your altitude.
- Inspect rims and threads for any remaining residue or nicks; wipe clean if needed.
- Dry jars completely using a clean towel or allow air-drying on a rack until completely dry.
- Lightly warm jars before filling to reduce thermal shock, especially if transferring from cool to hot processing environments.
- Insert lids and rings only after jars have cooled to a safe handling temperature post-sterilization.
- Label and store clean, dry jars in a cool, dry place until ready to use.
Troubleshooting
| Symptom | Likely Cause | Fix | Prevention |
|---|---|---|---|
| Residue around rims after washing | Soap residue or hard water deposits | Rinse with clean water; repeat with fresh hot soapy water | Use distilled water for final rinse if hard water is an issue |
| Jars stick to rack after drying | Moisture trapped against rims | Ensure jars are fully dry; separate with clean towels | Keep rack in a dry area between uses |
| Cracked jars after processing | Thermal shock or pre-existing damage | Inspect jars before cleaning; avoid drastic temperature changes | Warm jars gradually before full immersion |
| Seal failures after canning | Residue on rims or improper lid seating | Clean rims thoroughly; ensure lids seat evenly | Adhere to manufacturer guidelines and processing times |
Common Mistakes
- Using abrasive cleaners or scouring pads on jar rims, which can scratch and harbor bacteria
- Rinsing with cold water after hot sterilization, causing thermal shock
- Skipping thorough drying, leading to moisture on lids and rings
- Ignoring hard-water deposits that leave mineral film on glass
- Overloading dishwashers or relying solely on dishwasher cycles for sterilization
Tips For Best Results
- Always pre-rinse to remove soil before scrubbing for faster cleaning
- Use a dedicated jar brush or long-handle brush to reach narrow mouths without splashing
- Consider a stainless steel canning jar rack that’s dishwasher-safe for efficient sterilization
- Sterilize jars in a rolling boil for recommended times to ensure safety
- Label jars after drying to keep track of contents and batch dates
Call A Professional
Most cleaning steps are straightforward, but seek professional help if you notice cracks, chips, or compromised lids that can affect seal integrity. If jars show cloudiness with persistent residue despite thorough cleaning, a canning specialist can advise on alternative jar options or safety considerations.
FAQ
What is the best brush for cleaning canning jars?
The best option is a jar brush or jar cleaning brush set designed for canning jars with bottle brush features to reach difficult areas.
Can I use a dishwasher to sterilize jars?
Dishwashers can help with cleaning, but full sterilization is usually achieved with boiling water or a dedicated canner process.
How do I prevent jar rims from sticking during cleaning?
Rinse thoroughly, avoid harsh scrubbers on rims, and dry completely to prevent mineral buildup and sticking.
Should I pre-warm jars before filling?
Yes, pre-warming helps prevent thermal shock when transferring to hot filling or processing environments.
Can I reuse lids after cleaning?
Lids are generally intended for single-use; inspect for any signs of wear and follow manufacturer guidance.
What if I see mineral deposits on jars after cleaning?
Soak in a mild vinegar solution, then scrub again; rinse well before sterilizing.
Buying Guide
Choosing the right cleaning setup for canning jars involves several factors. Consider size and capacity: standard jars vs. wide-mouth jars affect the type of brush you need and how easily you can scrub rims. Noise level and energy efficiency matter if you run a dishwasher or canner frequently; look for quiet dishwashers and energy-efficient methods. Controls and features should accommodate safe sterilization cycles and accessible placement in your kitchen. Finally, plan placement near hot water sources and drying racks to streamline the workflow. For most home canners, a wide-mouth canning jar brush long-handle paired with a jar cleaning brush set for canning jars with bottle brush and a stainless steel canning jar rack dishwasher-safe offers a practical, durable setup that covers cleaning, sterilization, and drying with minimal fuss. If you frequently process large batches, assess whether a larger rack or a commercial-grade sterilization option is worth considering. Think about how you will store jars between uses and ensure the cleaning tools are easy to access during busy canning days. By weighing size, noise, energy use, controls, and placement, you can create a smooth, efficient workflow that keeps jars spotless and ready for preservation.
Leave a Reply