How to Clean a House After Renovation
Renovations can leave behind dust, debris, and lingering odors that affect everyday comfort. A structured cleaning plan helps restore livability without missing hidden pockets of dust. This guide provides practical steps, safety notes, and product-ready tactics to tackle post-renovation cleanup efficiently in American homes.
With the right approaches and tools, homeowners can manage dust control, surface cleaning, and air quality improvements systematically. The focus is on maximizing results while minimizing labor, using common sense safety practices and vendor-approved cleaning methods.
Quick Answer
Start with securing the work area, then remove large debris, seal off spaces with plastic, and clean in progressive passes—from high to low surfaces. Use a HEPA-equipped vacuum for fine dust, an air scrubber if available, microfiber tools for delicate surfaces, and finish with damp mopping. Schedule a final walk-through to confirm all dust levels are acceptable before resuming normal activities.
A What You’ll Need
Gather tools and supplies that target renovation dust, debris, and lingering odors. The following items align with common post-renovation cleanup tasks.
- 5 gallon shop vac HEPA filter renovation cleanup
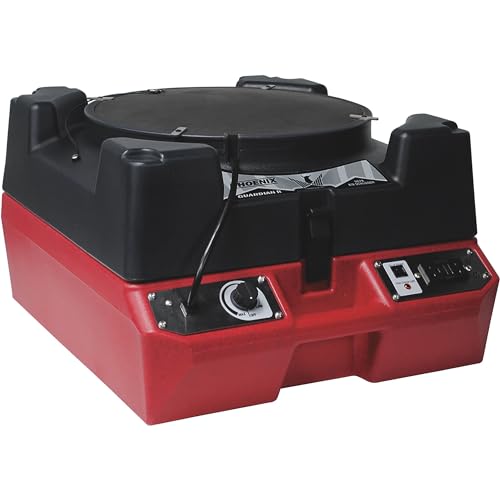
- HEPA air scrubber 250 CFM renovation dust removal
- microfiber mop with replaceable pads for renovation cleanup


Before You Start
Prepare the space by containing the renovation zone to prevent dust from spreading to rest of the home. Use plastic sheeting or tarps to seal doorways and vents when possible. Wear appropriate PPE, including a high-quality dust mask or respirator, eye protection, and disposable gloves. Plan a cleaning timeline that fits your schedule, typically a few hours for a single room and longer for open-plan areas. Important caution: avoid wet cleaning on unfinished surfaces that may swell or warp, and never mix cleaning solutions haphazardly—check compatibility with finishes.
Step-By-Step: How To Clean A House After Renovation
- Ventilate the space by opening exterior doors and windows as allowed to reduce stagnant air and odors.
- Remove large debris from floors using the shop vac, ensuring the 5 gallon shop vac HEPA filter renovation cleanup is ready for repeated passes.
- Dust upper surfaces first by wiping with a microfiber cloth or use a microfiber mop with replaceable pads to capture floating dust from ceilings, crown molding, and light fixtures.
- Vacuum walls, baseboards, and corners with the HEPA-equipped vacuum to trap fine particles that normal vacuums miss.
- Address HVAC and air quality by running the HEPA air scrubber 250 CFM renovation dust removal in the main living areas for several hours to reduce airborne dust.
- Wipe down all hard surfaces, including countertops, cabinets, and tile, with a damp microfiber cloth. Rinse cloth frequently for best results and replace pads as needed.
- Clean windows and glass surfaces with a dedicated glass cleaner or a vinegar-water solution for a streak-free finish.
- Focus on flooring with damp mopping, moving from the farthest room back toward the exit to prevent recontamination of cleaned areas.
- Inspect for remaining dust in closets, drawers, and ventilation grilles; use the shop vac to capture any stubborn particles.
- Conduct a final air check using the air scrubber and a quick visual sweep to determine if additional passes are required.
- Dispose of debris and empty vacuum bags in accordance with local guidelines and safety considerations.
- Return furniture and belongings cautiously, cleaning items as they are placed to avoid tracking dust into cleaned spaces.
Troubleshooting
| Symptom | Likely Cause | Fix | Prevention |
|---|---|---|---|
| Dust lingers on surfaces after cleanup | Incomplete dust capture or hidden dust pockets | Revisit high surfaces, run air scrubber longer | Dust during renovation should be contained from the start |
| Smell persists after cleaning | Odor-emitting materials or trapped fumes | Ventilate thoroughly and use activated carbon filters if available | Schedule odor-control steps during demolition and disposal |
| Streaks on glass or countertops | Wrong cleaner or dry cloth | Use proper cleaner and a microfiber cloth; wipe in one direction | Test cleaners on inconspicuous areas first |
| Vacuum loses suction | Clog or full dust bag | Check hose, replace bag or empty canister | Regular maintenance during cleanup |
Common Mistakes
- Using wet mop on dusty, unfinished surfaces that absorb moisture
- Skipping high surfaces like ceilings and vents, leaving hidden dust
- Overloading the vacuum with debris, causing clogs
- Neglecting air quality devices in favor of surface cleaning
To avoid these missteps, plan a staged approach, keep tools ready, and check filters and pads frequently during the cleanup process.
Tips For Best Results
- Work from top to bottom and from center outward to prevent recontamination of cleaned areas.
- Keep a dedicated dust-free zone for clean clothes and equipment to minimize cross-contamination.
- Use color-coded microfiber pads to distinguish cleaning zones and avoid spreading dust to living areas.
- Routinely replace disposable gloves and cleaning cloths to prevent particle redistribution.
- Schedule a mid-cleaning break to reassess dust levels and adjust equipment placement as needed.
Call A Professional
Consider contacting a professional if dust levels remain high after repeated cleanup passes, if large-scale renovations involve mold, lead paint, or hazardous materials, or if there are persistent odors that do not dissipate. Signs to stop DIY work and seek help include ongoing coughing or skin irritation, poor indoor air quality, or failure to meet safety standards for occupied living spaces.
FAQ
What is the best order for post-renovation cleaning?
Start with debris removal, seal and protect, then dust surfaces from top to bottom, followed by vacuuming with a HEPA vacuum, cleaning with microfiber tools, and finishing with damp mopping.
Can I use an all-purpose cleaner for renovation dust?
Prefer cleaners that are safe for the surface type and avoid overly aggressive products on delicate finishes; test first on a hidden area.
How long should I run an air scrubber after cleaning?
Run it for several hours, especially in active dust zones, and consider overnight operation if dust persists.
Is it necessary to remove all dust before putting furniture back?
Yes, a thorough wipe-down and vacuum reduction helps prevent recontamination of cleaned items as they are brought back in.
What tools help speed up post-renovation cleanup?
A combination of a HEPA-filter shop vac, a HEPA air scrubber, and microfiber cleaning tools offers the best balance of dust capture and surface cleanliness.
Buying Guide
When selecting tools for post-renovation cleanup, consider size, noise, energy efficiency, controls, and placement. A compact 5 gallon shop vac HEPA filter renovation cleanup balances portability with strong suction for debris, while a HEPA air scrubber 250 CFM renovation dust removal helps manage airborne dust in mid-size to large rooms. For ongoing surface care, a microfiber mop with replaceable pads for renovation cleanup provides efficient dust capture without scratching finishes. For best performance, pair these tools with sturdy PPE and plan a staged workflow that minimizes cross-contamination. If space is limited, select compact models with easy storage, but ensure they still provide adequate filtration and air exchange. Compare models by filter compatibility, filter replacement costs, and maintenance requirements to keep long-term costs predictable and equipment effective.
Leave a Reply