How to Clean Grout Quickly and Safely
Grout, the cement-based filler between tiles, can accumulate dirt, mold, and stains over time. Proper cleaning restores brightness and helps extend tile life. This guide outlines a practical, device-assisted approach suitable for typical American homes, using common tools and safe methods.
Whether you’re refreshing a shower surround, kitchen backsplash, or floor tile, a systematic routine yields the best results. The steps below emphasize ease, effectiveness, and reducing wear on grout lines while keeping surfaces safe.
Quick Answer
Best overall approach: use a dedicated grout cleaning brush set with nylon bristles, optionally paired with a steam cleaner for tough grime, and finish with an electric grout scrubber for stubborn areas. For large jobs, alternate between scrubbing and steam for efficiency. Always test a small area first.
What You’ll Need
- Grout cleaning brush set angled nylon bristles
- Steam cleaner for grout tiles
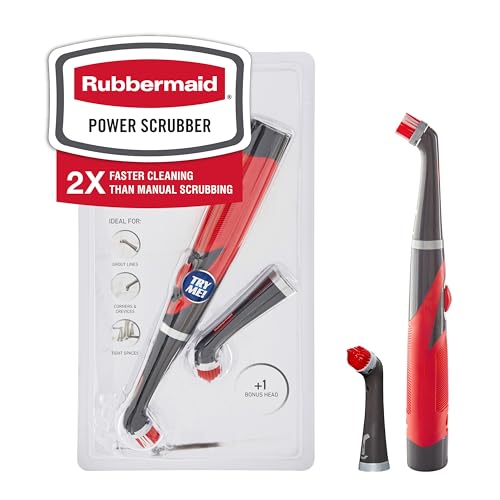
- Electric grout scrubber oscillating head
- Tile-safe cleaner or a homemade baking soda paste
- Spray bottle and microfiber cloths
- Protective gloves and eye protection


Before You Start
Before beginning, clear the area and remove loose debris from grout lines. Ventilate the space well if using chemical cleaners. Do a spot test in a small, inconspicuous area to confirm no surface damage. Time management helps: plan for 30–90 minutes depending on the area and grout condition. Never mix cleaners that create dangerous fumes, and avoid acidic cleaners on natural stone or marble grout, which can etch tiles.
Step-By-Step: How To Clean Grout With Common Tools
- Dry brush the grout with a soft-bristle brush to loosen surface dirt and mold spores.
- Apply a grout-safe cleaner or a baking soda paste to the grout lines. Let it sit for 5–10 minutes to break down grime.
- Scrub with the angled nylon bristle grout cleaning brush set, focusing on discolored sections.
- For tough stains, use the steam cleaner on a moderate setting. Hold the nozzle a few inches from the grout and move slowly to lift grime.
- Rinse with clean water and wipe with a microfiber cloth to remove residue.
- If residues persist, repeat scrubbing with the electric grout scrubber oscillating head on a low-to-moderate speed.
- Dry the area thoroughly to prevent mildew growth. A fan or open window speeds drying.
- Inspect lines for uniform color; touch up any remaining dark spots with a brief scrub and rinse.
- Seal grout after it is completely dry if the grout is untreated or after a recommended cure period; follow product instructions for timing.
- Store tools clean and dry to prevent bristle wear and bacterial buildup.
Troubleshooting
| Symptom | Likely Cause | Fix | Prevention |
|---|---|---|---|
| Grout remains discolored after cleaning | Deep-set stains or mold | Repeat cleaning with stronger brushing or steam; consider a grout stain remover recommended for your grout type | Regular cleaning schedule; promptly address spills |
| Cracking or crumbling grout after cleaning | Old or weakened grout | Avoid aggressive scrubbing; re-grout if necessary | Time grout cure and gentle maintenance |
| Tiles feel slippery after cleaning | Leftover soap or cleaner residue | Rinse thoroughly with clean water and wipe dry | Rinse and dry during cleaning sessions |
| Streaks or white film after steam | Mineral deposits from hard water | Wipe with a damp cloth, then dry; use distilled water in steam cleaner | Regular maintenance with distilled water in steamers |
Common Mistakes
- Using acidic cleaners on cement-based grout or natural stone grout
- Over-wetting grout lines, which can weaken adhesion over time
- Skipping a spot test, leading to surface damage
- Rushing the drying process, inviting mildew growth
Tips For Best Results
- Work in small sections to prevent cleaner from drying on grout lines.
- Choose tools with nylon bristles to avoid scratching tiles.
- Alternating between manual scrubbing and steam can maximize efficiency.
- Keep a damp cloth handy to wipe away loosened grime immediately.
- Consider sealing grout after cleaning to protect against future staining.
Call A Professional
Seek professional help if grout is severely cracked, missing, or mold returns after thorough cleaning and sealing. Stop and contact a pro if:
- Grout damage exposes substrate or underlying tile edges
- Extensive mold growth persists despite cleaning
- Multiple areas show uneven tile alignment after cleaning
FAQ
Can I clean grout without special tools?
Yes, but special tools like a nylon-bristle brush or oscillating head speed up the process and protect tile surfaces.
How often should grout be cleaned?
High-traffic areas may require monthly maintenance; less frequent cleaning can work for dry powder buildup or routine grime.
Is sealing grout necessary after cleaning?
Sealing helps repel stains and mildew; follow grout manufacturer guidance on curing time before sealing.
Will steam damage sealed grout?
Steam can erode certain sealants; test a small area and use lower steam settings if sealing exists.
Buying Guide
When choosing grout-cleaning tools, consider size of the space, grout color and type, and the level of staining. Key buying factors include:
- Size of area: Larger spaces benefit from an electric grout scrubber or a high-output steam cleaner to reduce effort.
- Noise level: Some tools run quietly; consider household use and tolerance for sound.
- Energy efficiency: Steam cleaners with energy-efficient modes help reduce running costs for frequent cleaning.
- Controls and ergonomics: Look for comfortable grips, adjustable heads, and simple on/off controls for extended sessions.
- Placement and storage: Compact handheld designs fit tight showers and backsplashes; store with accessories attached for quick access.
- Compatibility: Ensure tools are suitable for your grout type (cementitious, epoxy) and tile surfaces.
- Maintenance: Replace brush heads and scrubber heads as they wear to maintain performance.
For many homes, a combination of a grout cleaning brush set, a steam cleaner, and an electric grout scrubber offers a versatile, effective toolkit. Consider your cleaning frequency, the severity of stains, and the layout of tiled areas when selecting a setup.
Leave a Reply