How to Clean Grout With Baking Soda
Grout lines can collect dirt, mold, and grime over time, making tiled surfaces look dull. Baking soda is a gentle, affordable option that, when paired with proper brushing and rinsing, can restore the brightness of grout without harsh chemicals. This guide covers practical steps, safety tips, and tools to help American homeowners achieve clean, fresh-looking grout.
Quick Answer
Mix baking soda with water to form a paste, apply to grout, and scrub with a grout brush or scrubber. For stubborn stains, add white vinegar or use a handheld electric grout cleaner cordless scrubber for deeper cleaning. Rinse thoroughly and wipe dry to prevent mold growth.
What You’ll Need
Gather these items before you start. They’re designed to work well with baking soda and common grout cleaning tasks.
- Baking soda (sodium bicarbonate) for paste and gentle abrasion
- Water to form paste or to rinse
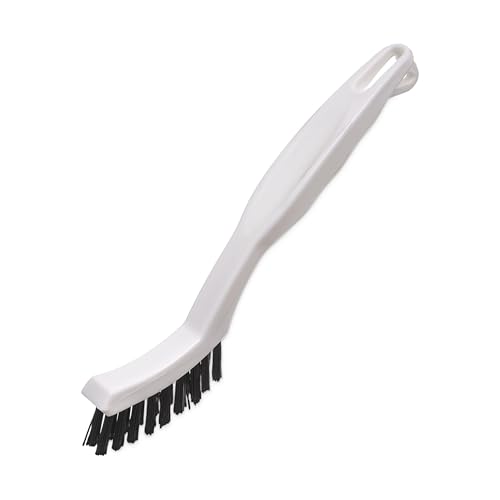
- Stiff nylon grout brush cleaning tool for scrubbing grout lines
- Handheld electric grout cleaner cordless scrubber for tougher stains and faster work
- Tile grout cleaning kit brush sponge scraper for applying paste and removing loosened grime
- Optional: white vinegar (use cautiously on natural stone; if unsure, test in a small area)


Before You Start
Prepare the workspace by removing surrounding items and laying down towels or a drop cloth to catch residue. Ensure the area is well ventilated if using vinegar. Test a small, inconspicuous grout section first to check for colorfastness. Time estimate: 20–60 minutes depending on grout condition. Safety note: avoid mixing baking soda with chlorine bleach, which can release harmful gases. Wear eye protection if you are scrubbing vigorously or dealing with mold.
Step-By-Step: How To Clean Grout With Baking Soda
- Inspect grout lines to identify which areas are most stained or moldy.
- Mix a paste: combine baking soda with a small amount of water until it forms a thick, spreadable consistency.
- Apply the paste directly to grout lines, pushing it into the gaps with a scrub brush or a sponge scraper.
- Let the paste sit for 5–10 minutes to loosen grime; for tougher stains, let it sit longer but monitor for drying.
- Scrub with a stiff nylon grout brush cleaning tool or, for heavy buildup, a handheld electric grout cleaner cordless scrubber to lift dirt.
- Rinse the area with clean water and wipe away paste and grime using a damp sponge or microfiber cloth.
- Inspect and repeat on any remaining spots. For persistent staining, sprinkle more baking soda, spray a tiny amount of water, and scrub again.
- Rinse thoroughly with water, dry the surface, and allow grout to air dry completely to prevent mildew.
- Optional finish: if staining remains, sprinkle a small amount of baking soda and apply a vinegar spray in a light mist, then rinse and dry; do not mix vinegar directly with baking soda in a sealed container.
- For ongoing maintenance, repeat cleaning every few months or as soon as grout looks dingy.
- Clean adjacent tile surfaces by wiping with a damp cloth to prevent transfer of paste and residue.
- Dispose of waste water in a drain and wipe down cleaning tools after use to extend tool life.
Troubleshooting
| Symptom | Likely Cause | Fix | Prevention |
|---|---|---|---|
| Grout remains stained after first pass | Thick grime or deep-set stains | Apply more paste, let sit longer, and scrub with electric scrubber | Regular cleaning to prevent buildup |
| Rinsing leaves residue | Excess paste not fully removed | Rinse with clean water and wipe with a dry cloth | Rinse thoroughly during each pass |
| Mold grows after cleaning | Moist environment, insufficient drying | Dry grout completely; use a fan or dehumidifier | Keep bathroom well ventilated |
| Discoloration on stone tiles | Vinegar contact with stone or acidic cleaners | Avoid vinegar on natural stone; use only baking soda paste and water | Test area first and follow material-safe practices |
Common Mistakes
- Using straight vinegar on all tile grout; test first and avoid on natural stone surfaces
- Overly aggressive scraping that scuffs tile edges or grouts
- Not rinsing thoroughly, leaving baking soda residue that can attract more grime
- Neglecting to dry grout after cleaning, which invites mold growth
Tips For Best Results
- Work in small sections to ensure the baking soda paste stays usable while you scrub
- Combine manual brushing with a cordless scrubber for faster results on large areas
- Use a damp microfiber cloth to pick up loosened debris before final rinse
- For textured or heavily stained grout, repeat cleaning cycles rather than pushing through one long session
- Consider sealing grout after a complete cleaning to reduce future staining and make maintenance easier
Call A Professional
Seek professional help if grout is cracked, crumbled, or if mold covers a large area beyond typical cleaning. Stop and contact a pro if you notice persistent musty odors, water damage, or if cleaning does not improve grout color after multiple attempts. Structural repairs or mold remediation may be required in severe cases.
FAQ
Can baking soda damage grout?
Baking soda is generally safe for grout when used as a gentle abrasive. Avoid harsh scrubbing on very old or fragile grout and dampen surfaces to prevent dust.
Is vinegar safe to use with baking soda on grout?
Vinegar can help remove mineral deposits, but it should not be used on natural stone or in combination with baking soda in a closed container. Use cautiously and test first.
How long should grout dry after cleaning?
Allow grout to dry 24 hours or more in well-ventilated areas to ensure all moisture evaporates.
Can I use baking soda on colored grout?
Yes, but test a small area first to ensure the color remains stable and does not fade or stain.
What if grout is permanently stained?
Permanently stained grout may require replacement or professional restoration, especially if there is deep discoloration or damage.
Do I need a sealant after cleaning?
Sealing freshly cleaned grout helps repel stains and moisture, especially in high-traffic areas like kitchens and bathrooms.
Buying Guide
When choosing tools and cleaners for grout cleaning, consider factors that influence results and ease of use.
- <bSize and reach: For large tiled areas, a cordless handheld grout cleaner speeds up the process; for tight corners, a small grout brush helps reach crevices.
- <bNoise level: Electric scrubbers vary in noise; look for models with comfortable handle design and adjustable speeds if available.
- <bEnergy efficiency: Battery life matters for cordless devices; choose energy-efficient motors and long-lasting batteries.
- <bControls and usability: Simple, intuitive controls reduce setup time and minimize user fatigue.
- <bPlacement: Consider whether the area is prone to water exposure; choose durable, rust-resistant tools and store them in a dry place.
Compare a tile grout cleaning kit brush sponge scraper against individual tools to balance cost and versatility. Think about how often you clean grout in the home and whether you need a heavy-duty solution or a light, preventive routine. If you mainly tackle showers and backsplashes, a compact kit may suffice; for larger floors, a cordless scrubber can save time and effort.
Leave a Reply