How to Clean Foam Pads for Polishing Safely
Foam pads are essential for achieving a flawless finish in automotive detailing. Over time, they collect compound, wax, and debris that can dull results. This guide explains a practical, step-by-step method to clean foam pads effectively, extend their life, and maintain performance with common detailing tools.
Quick Answer
Rinse and pre-clean to remove loose material, soak gently with a mild cleaning solution, agitate lightly with a dedicated brush, rinse thoroughly, and air dry completely before reuse to preserve pad integrity.
What You’ll Need
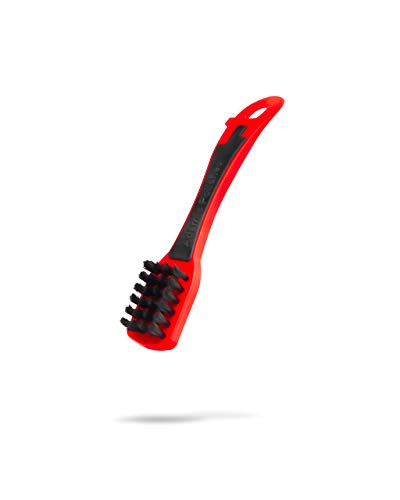
- car polishing foam pad cleaning brush
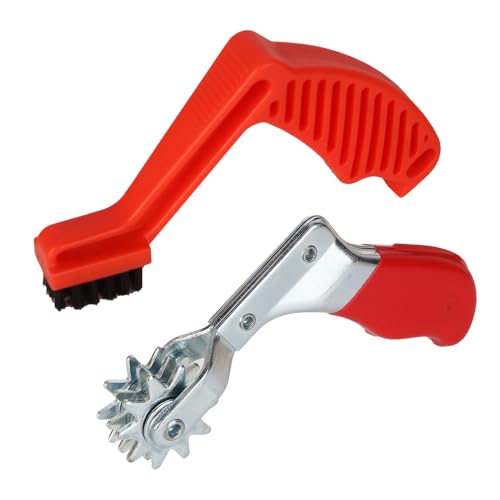
- polishing pad cleaning kit brush and solution
- electric polisher foam pad cleaning tool

Before You Start
Prepare a clean work area and gather the pads you plan to clean. Wear eye protection and gloves if handling solvents. Work in a well-ventilated space to avoid fumes. Keep a dedicated washing basin or bucket to prevent cross-contamination with household laundry. Time estimate: 15–30 minutes per pad, depending on condition.
Step-By-Step: How To Clean Foam Pads For Polishing
- Remove the foam pad from the backing plate and detach it from the polisher if attached.
- Gently brush off loose compound, wax, and dust using the car polishing foam pad cleaning brush to avoid spreading debris in subsequent steps.
- Rinse the pad under lukewarm water with the nap facing down to remove surface contaminants. Do not use hot water, which can damage the foam.
- Prepare a cleaning solution suitable for foam pads. A mild detergent or a dedicated polishing pad cleaning kit solution works best. Swirl the pad in the solution to loosen embedded residues.
- Gently agitate the pad with the polishing pad cleaning kit brush and solution, focusing on stained areas. Avoid aggressive scrubbing that could fray the foam.
- Rinse thoroughly until the water runs clear and all soap residues are removed. Check the pad for remaining debris; repeat cleaning if necessary.
- Press out excess water by hand without twisting the foam; lay the pad flat on a clean surface or hang it to air dry. Do not use heat sources to dry the pad.
- Inspect the pad for signs of wear, such as tearing or loss of shape. If the foam is degraded, replace the pad to maintain polishing performance.
- Reattach the pad to the backing plate once completely dry and store in a cool, dry area away from direct sunlight.
- Document cleaning after use to track pad life and maintenance intervals for best results on future detailing sessions.
Troubleshooting
| Symptom | Likely Cause | Fix | Prevention |
|---|---|---|---|
| Foam remains stained after cleaning | Deep embedded residues | Soak longer in a stronger pad cleaning solution per product guidelines | Clean promptly after use to prevent set-in staining |
| Foam pads feel stiff when dry | Insufficient rinsing or over-drying | Rinse thoroughly and avoid wringing; let air dry completely | Rinse until water runs clear |
| Foam tears or loses shape | Excessive mechanical agitation | Use softer brushes and minimal scrubbing | Inspect pad condition after each session |
| Pad retains odor | Residual solvents or oils | Additional gentle wash and thorough rinse | Use fresh cleaning solution and ensure complete drying |
Common Mistakes
- Using hot water or harsh solvents that degrade foam.
- Rubbing too aggressively with brushes, which damages the surface.
- Not drying pads completely before storage, leading to mildew or odor.
- Washing pads in a household washing machine, which can distort shape.
Noticeable improvements come from gentle handling, proper drying, and using purpose-built cleaning tools.
Tips For Best Results
- Use a dedicated polishing pad cleaning brush to target embedded residues without harming foam.
- Rotate pads after cleaning to distribute wear evenly over time.
- Keep cleaning solutions separate from solvent-based products to avoid chemical interactions.
- Label pads by use (compound, polish, wax) to prevent cross-contamination during storage.
Call A Professional
Consult a professional if pads show irreversible damage, persistent odors after multiple cleanings, or if pads fail to regain their original shape after standard cleaning. Seek expert advice if introducing new compounds or unusual residues that standard cleaners cannot remove.
FAQ
Can I reuse a pad after cleaning it?
Yes, as long as the pad is completely dry, free of odors, and shows no signs of damage or excessive wear.
What cleaning products are best for polishing pads?
Use a dedicated polishing pad cleaning kit solution or a mild detergent designed for foam pads.
How long should foam pads dry?
Allow pads to air dry completely, typically 6–12 hours depending on humidity and airflow.
Is it better to wash pads by hand or in a machine?
Hand washing with a brush is recommended to avoid deforming foam and to preserve pad life.
Buying Guide
When choosing foam pads and cleaning accessories, consider how size, density, and rigidity affect cleaning and performance. The right combination minimizes heat buildup and ensures consistent polishing results. Also weigh noise, energy efficiency, and the types of controls on any electric polisher or cleaning tools.
Key buying factors include:
- Size and density: Select pad size to match backing plate and project scope; denser foams are more durable for heavy compounds, while softer foams work well for finishing.
- Cleaning tools: A car polishing foam pad cleaning brush and a dedicated polishing pad cleaning kit with solution help maintain pads between uses.
- Electric polisher foam pad cleaning tool compatibility: Ensure the tool suits your polisher model and pad size.
- Maintenance ease: Look for tools and cleaners that are easy to rinse, dry, and store to extend pad life.
- Storage: Use breathable bags or containers to prevent moisture buildup and odor.
Considering these factors helps builders and hobbyists select a setup that balances performance with longevity. Ready to refresh your foam pads with the right tools and method?
Leave a Reply