How to Clean a Faucet Cartridge
Faucet cartridge maintenance helps restore smooth operation and prevents leaks. Regular cleaning removes mineral buildup and debris that can affect water flow. This guide provides practical steps, safety tips, and tool recommendations to refresh most common faucet cartridges found in kitchens and bathrooms.
The process focuses on disassembling the faucet, cleaning or replacing the cartridge, and reassembling with proper seals. Readers will learn how to identify when cleaning is enough or when a replacement cartridge is required, plus safety precautions to protect finishes and surfaces.
Quick Answer
In a nutshell, shut off water, disassemble the faucet, remove the cartridge with a cartridge removal tool if needed, soak with calcium lime remover for mineral buildup, scrub gently with a cartridge cleaning brush kit, rinse, reinstall with new seals, and test for leaks.
What You’ll Need
- Faucet cartridge removal tool
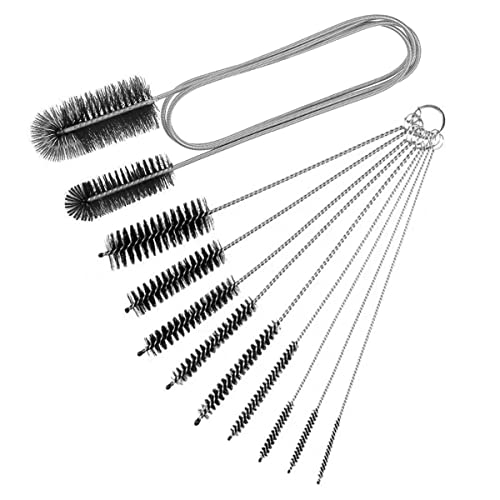
- Faucet cartridge cleaning brush kit
- Calcium lime remover for faucets
- Small screwdriver set and pliers
- Cleaning rags or towels
- Replacement cartridge (if worn)


Before You Start
Prepare the work area with a towel to catch drips and protect the sink surface. Shut off the water supply valves to prevent leaks, then open the faucet handles to relieve pressure. Use eye protection if splashes are possible. Note that finishes on some faucets can tarnish from harsh cleaners, so opt for mild cleaners and test a small area first. Plan for about 30 to 60 minutes for the full process, depending on faucet design and accessibility.
Step-By-Step: How To Clean Faucet Cartridge
- Remove the faucet handle and decorative cover to access the cartridge area. Use a screwdriver if needed and keep track of small parts.
- Install the faucet cartridge removal tool if the cartridge is hard to pull by hand. Attach it securely and twist counterclockwise to loosen.
- Carefully lift out the cartridge assembly. Note its orientation so it can be reinstalled correctly.
- Rinse the cartridge housing with warm water and inspect for wear, burrs, or damaged seals. Replace if necessary.
- If mineral buildup is present, apply calcium lime remover for faucets to soak or spray the affected areas. Allow the recommended dwell time, then scrub gently with the faucet cartridge cleaning brush kit.
- Rinse thoroughly to remove cleaner residue. Dry the parts before reassembly to avoid trapping moisture inside the faucet.
- Reinstall the cartridge, seals, and retaining hardware in the correct orientation. Reattach the handle and decorative cover.
- Turn the water supply back on slowly and test the faucet for leaks and smooth operation. If stiffness persists, consider replacing the cartridge and seals.
- If a leak remains around the handle, reseat the cartridge or replace o-rings and washers as needed. Recheck after a full minute of operation.
- Clean up the workspace and wipe down the faucet to remove any cleaner residue and mineral dust.
- Record maintenance notes for future reference, including the cartridge model and cleaning interval.
Troubleshooting
| Symptom | Likely Cause | Fix | Prevention |
|---|---|---|---|
| Dripping from faucet after reassembly | Worn o-rings or damaged seals | Replace seals and reassemble | Inspect seals during every cleaning |
| Stiff handle or poor valve control | Deposits inside cartridge | Clean with calcium remover and brush kit; replace if necessary | Perform mid-year cleanings in hard water areas |
| Low water flow | Mineral buildup blocking passages | Soak cartridge and housing; scrub with brush kit | Install water-softening devices if applicable |
| Water temperature inconsistent | Thermal limits or cartridge wear | Replace cartridge if mismatched | Follow manufacturer guidelines for compatibility |
Common Mistakes
- Over-tightening components, which can crack housings or strips threads.
- Using strong solvents that damage finishes or seals.
- Not drying parts before reassembly, inviting corrosion or mineral traps.
- Mixing parts from different faucet models leading to improper fit.
Careful disassembly, proper cleaning, and correct reassembly help reduce recurring issues and extend cartridge life.
Tips For Best Results
- Test water flow after each major step to isolate any problem areas quickly.
- Keep a small tray of replacement seals on hand for quick fixes.
- Use a soft-bristle brush to avoid scratching the cartridge or housing.
- Warm water helps loosen mineral deposits without harsh cleaning agents.
- Label screws by size and placement to simplify reassembly.
Call A Professional
Call a plumber if there is persistent leaking after cleaning, if the cartridge is seized beyond simple removal, or if the faucet design requires special tools or certifications. Seek professional help for complex multi-handle fixtures, unusual valve types, or if the fixture is still under warranty and disassembly could void coverage.
FAQ
Can I reuse old seals after cleaning?
Reusing seals is possible only if they show no cracks, wear, or hardening; otherwise replace them.
Is calcium lime remover safe for all faucet types?
Most common faucets respond well, but test on a small area first and follow product directions to avoid finishes damage.
How often should I clean a faucet cartridge?
In hard-water regions, every 6–12 months is advisable; more frequent cleaning may be needed with continuous mineral buildup.
What if the cartridge is not listed for my faucet?
Use a compatible replacement cartridge recommended by the faucet manufacturer or consult a professional for model-specific guidance.
Do I need special tools for every faucet?
Basic tools cover most repairs, but some models require specialized cartridge removal tools; check the faucet manual.
Should I use silicone lubricant on seals?
Generally not required; use manufacturer-approved lubricants if specified.
Buying Guide
When selecting components for faucet cartridge maintenance, consider several factors to ensure optimal performance and compatibility.
- Cartridge compatibility: Match the model and series to ensure proper fit and sealing.
- Material and finish: Look for corrosion-resistant materials and finishes that resist mineral buildup.
- Seals and O-rings: High-quality gaskets reduce leaks and prolong cartridge life.
- Ease of removal: Tools like a cartridge removal tool simplify hard-to-reach cartridges.
- Cleaning kit compatibility: A dedicated cartridge cleaning brush kit helps remove stubborn deposits safely.
- Water type: Hard water may require stronger mineral-removing solutions; consider water-softening options if persistent.
- Installation availability: Replacement cartridges should be readily available; check regional suppliers or manufacturer catalogs.
- Noise and flow considerations: Some cartridges influence stream stability; verify flow characteristics match needs.
In real-world terms, choose a kit and parts that align with your faucet model, water hardness, and maintenance preference. A well-matched cartridge and clean components lead to smoother operation and fewer calls for service. If unsure, consult a professional for model-specific guidance and installation checks.
Leave a Reply