How to Clean a Derailleur: A Practical Guide for Cyclists
Maintaining a clean derailleur helps ensure crisp shifting, prolongs drivetrain life, and keeps your ride performing at its best. The process is straightforward with the right tools and a steady routine. This guide walks American riders through a clear, step-by-step method to clean your derailleur safely and effectively.
Quick Answer
To clean a derailleur quickly, remove the bike from the stand, apply a drivetrain degreaser, scrub the cage pulleys and joints with a dedicated brush set, rinse with water, and dry completely before lubricating the chain. Repeat monthly or after rides in wet or muddy conditions.
What You’ll Need
- Bike derailleur cleaning brush set
- Drivetrain cleaning kit bicycle with chain scrubber and brushes
- Bike chain and derailleur degreaser spray 16 oz


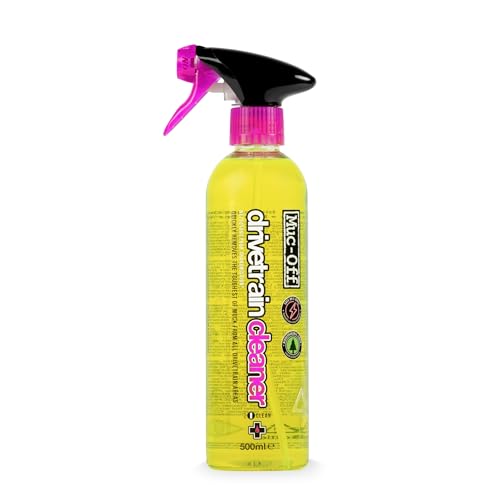
Before You Start
Prepare a tidy workspace and secure the bicycle so it won’t tip. Protect the floor with a tray or old cloth to catch degreaser runoff. Wear eye protection if splashes are likely. Have a clean rag nearby for wipe-downs and a small container for catching excess liquid. Time estimate: 20–40 minutes depending on drivetrain condition. Keep degreasers away from painted surfaces and plastic components to avoid damage.
Step-By-Step: How To Clean A Derailleur
- Shift to the smallest chainring and smallest cog to expose the derailleur fully.
- Place the bike on a stable stand or support and loosen any external fastening bolts only if needed to access the cage.
- Spray a liberal amount of drivetrain degreaser onto the derailleur’s moving parts, focusing on the jockey wheels, cage pivots, and anchor points.
- Let the degreaser sit for a minute to break down built-up grease and grime.
- Using the bike derailleur cleaning brush set, scrub the jockey wheels, pulleys, and linkage areas in a circular motion.
- Wipe away loosened grime with a clean rag, then reapply degreaser to stubborn areas and repeat brushing as needed.
- Rinse the drivetrain carefully with water or wipe with a damp cloth if a direct rinse isn’t practical. Avoid spraying water directly into bearings or seals.
- Dry the derailleur and surrounding components completely with a microfiber cloth to prevent rust and corrosion.
- Reinstall any loosened bolts to their original torque specifications and ensure the derailleur tension and limit screws are intact.
- Lubricate the chain after drying, then spin the crank to verify smooth operation and proper shifting alignment.
- Optional: inspect the derailleur hanger alignment with a suitable tool if shifts remain inaccurate after cleaning.
- Clean up the workspace and dispose of used degreaser and rags according to local regulations.
Troubleshooting
| Symptom | Likely Cause | Fix | Prevention |
|---|---|---|---|
| Sticking pulleys after cleaning | A buildup persists in the pulley wheels | Reapply degreaser and scrub more thoroughly, then rinse and dry completely | Regular maintenance after wet rides |
| Rubbing or misalignment after cleaning | Derailleur hanger bent or misadjusted | Realign derailleur hanger or have a pro check alignment | Handle with care during maintenance |
| Shifting slow or skipping | Residual grime in cable housing or derailleur knuckles | Clean housing ends and shift cables; lubricate cables if needed | Inspect cables and housings periodically |
Common Mistakes
- Overlooking the pulleys when cleaning—the jockey wheels often collect the most grime.
- Excessive degreaser near seals or bearings—avoid soaking sensitive components.
- Rinsing with a strong jet directly at bearings—this can push water into seals and create rust.
- Skipping full drying—moisture left on metal parts accelerates corrosion.
Tips For Best Results
- Schedule derailleur cleaning as part of a broader drivetrain maintenance routine for optimal shifting.
- Use dedicated brushes designed for bikes to avoid scratching delicate surfaces.
- Work methodically from the top down to ensure every moving part is addressed.
- After cleaning, apply a light lubricant to the chain and wipe off excess to prevent attract dust.
- Store cleaning products in a cool, dry place away from heat and direct sunlight.
Call A Professional
Consider a professional if the derailleur shows bent alignment, persistent shifting issues after cleaning, or you’re unsure about proper torque settings. Signs to seek help include abnormal noise, binding during movement, or damage after a crash. If you notice any cracks in the derailleur body or hanger, stop riding and consult a bike shop.
FAQ
How often should I clean my derailleur?
Clean your derailleur monthly under normal conditions and more often after riding in mud, sand, or rain.
What should I use to degrease a derailleur?
A dedicated drivetrain degreaser spray designed for bicycles is recommended for fast, effective cleaning.
Can I use soap and water to clean a derailleur?
Soap can be used for a general wipe-down, but a dedicated degreaser is more effective at breaking down oil and grime on the drivetrain.
Is it necessary to lubricate the derailleur after cleaning?
Lubricating the chain after cleaning is essential; apply light lubrication to the chain and wipe away excess to prevent dust attraction.
What tools are essential for derailleur cleaning?
A bike derailleur cleaning brush set and a drivetrain cleaning kit with a chain scrubber are highly recommended for thorough cleaning.
Should I remove the derailleur before cleaning?
Removing the derailleur is not usually necessary; cleaning while attached is common, but remove if the bike is difficult to access.
Can I clean the derailleur while riding?
Cleaning is best done off the bike on a stand; avoid attempting maintenance while riding to prevent injury.
Buying Guide
Choosing the right derailleur cleaning tools involves assessing how you ride, your bike’s drivetrain complexity, and workspace needs. Look for a kit that includes a variety of brushes and a reliable degreaser, plus a chain scrubber for deep cleaning. Consider the size of the brushes—smaller, precise brushes reach tight areas between pulley wheels and linkages. A compact kit travels well for on-the-go maintenance. If you ride in wet or muddy conditions, invest in a deeper cleaning system that helps remove stubborn grime. Battery-powered or manual degreasers are optional benefits depending on preference, but the core choice should emphasize effective cleaning and safe handling of components. Finally, ensure compatibility with common drivetrain configurations (double or triple chainrings) and that the kit’s brushes won’t shed bristles into the drivetrain.
Leave a Reply