How to Clean a Coway Air Purifier
The Coway AP-1512HH and similar models deliver clean air when kept free of dust and debris. Regular cleaning extends filter life and maintains peak performance. This guide walks through safe, effective cleaning steps tailored for American homes and common Coway models.
Quick Answer
Turn off and unplug the purifier, remove the filter and pre-filter, wipe the exterior with a microfiber cloth, rinse or replace filters as recommended, dry completely, reassemble, and run on a low fan setting to recondition the unit before normal use.
A Quick Start List: What You’ll Need
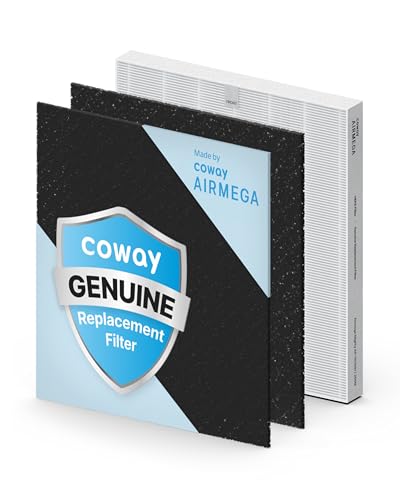
- Coway AP-1512HH replacement filter kit True HEPA activated carbon
- Coway Mighty AP-1512HH filter replacement set
- Microfiber cleaning cloth for air purifier dust and housing cleaning


Before You Start
Before cleaning, ensure the device is turned off and unplugged. Remove the power cord from the outlet and wait for any moving parts to stop. Protect surfaces and avoid moisture on electrical components. Keep pets and children away during maintenance. Estimate cleaning time: 15–30 minutes, depending on model and condition.
Safety notes: never submerge the purifier in water. Do not use harsh chemicals or abrasive cleaners on plastic housings. If the unit has obvious mold or persistent odors, replace filters promptly and consult the user manual.
Step-By-Step: How To Clean A Coway Air Purifier
- Unplug the unit and relocate it to a clean, stable work area with good lighting.
- Open the front grill or access panel according to the user manual, using gentle pressure to release clips without forcing them.
- Remove the pre-filter and outer HEPA filter assembly. Inspect for dust buildup and note any signs of wear.
- Gently tap the pre-filter over a trash can to release loose dust, then wipe it with a damp microfiber cloth if needed. Let it air-dry completely.
- If your model uses a replaceable True HEPA filter and activated carbon filter, follow the manufacturer’s replacement interval. Install the new filter kit as directed, ensuring the arrows align correctly.
- Wipe the interior and exterior housing with a microfiber cloth dampened slightly with water. Avoid soaking any components, and dry with a clean cloth.
- Reassemble the filter housing, reattach the front grill, and plug the unit back in. Reset the filter life indicator if your model has one.
- Place the purifier on a stable surface in a room with good air circulation. Run the unit on a low setting for 15–20 minutes to stage the system before returning to normal operation.
- Check for unusual vibrations or noises after reassembly. If present, pause use and recheck all fasteners and filter alignment.
- Schedule routine maintenance every 3–6 months, or as recommended by the manufacturer, with more frequent checks in dusty environments.
Troubleshooting
| Symptom | Likely Cause | Fix | Prevention |
|---|---|---|---|
| Low airflow or weak cooling | Clogged pre-filter or dirty filters | Clean or replace filters per instructions | Routine filter checks every 1–3 months |
| Odor coming from unit | Accumulated dust or old carbon filter | Replace activated carbon filter and clean housing | Schedule filter changes and air freshening steps |
| Unusual noises | Improper reassembly or loose parts | Power off, recheck grill and screws | Save initial step order to avoid mistakes |
| Indicator light not resetting | Filter life not updated | Follow reset procedure in manual | Note replacement dates for future scheduling |
Common Mistakes To Avoid
- Using water to clean the electronic components inside the housing
- Forcing clips or grills beyond their intended alignment
- Over-wetting the filters or using a damp cloth on the motor area
- Neglecting to replace filters within recommended intervals
Staying mindful of these pitfalls helps ensure the purifier remains effective and safe to operate.
Tips For Best Results
- Schedule a regular filter change based on usage and environmental dust levels to maintain optimal performance.
- Use a microfiber cloth for all cleaning to avoid scratching plastic surfaces.
- Place the purifier in an unobstructed area with at least 1–2 feet of clearance on all sides for maximum air intake.
- Elevate the unit slightly off the floor if possible to reduce dust from the surface affecting the intake.
- Keep the surrounding room clean and vacuum regularly to reduce particulate load entering the unit.
Call A Professional
Contact a professional if the unit shows persistent electrical issues, persistent odors after filter replacement, or if abnormal noises continue after reassembly. Stop using the purifier if it smells like burning or emits smoke, and seek service right away.
FAQ
How often should I clean my Coway air purifier?
Clean the exterior weekly and inspect filters every 1–3 months, replacing filters according to the manufacturer’s schedule.
Can I wash the HEPA filter?
No. HEPA filters are not designed to be washed; follow replacement guidelines for Best results.
What should I use to clean the housing?
A dry or lightly damp microfiber cloth is recommended; avoid abrasive cleaners and excessive moisture.
Is it normal for the purifier to run quietly?
Yes. Many Coway models operate quietly, especially on low settings; noise levels should be minimal with proper maintenance.
Buying Guide
When selecting replacement parts or additional kits, consider compatibility with your Coway model, especially whether you need a True HEPA activated carbon filter kit like the Coway AP-1512HH replacement filter kit or a Mighty AP-1512HH filter replacement set. Look for official or certified replacements to ensure proper fit and performance.
Key buying factors include size and capacity for the room, noise level, energy efficiency, and control features that fit your lifestyle. Consider whether a package with both a HEPA filter and carbon filter is necessary for odor control and allergen reduction. Placement matters too; keep units away from walls and ensure unobstructed airflow. Evaluate replacement frequency based on room dust levels and usage patterns to maintain indoor air quality effectively.
Leave a Reply