How to Clean a Cavitation Ultrasonic Machine Safely and Effectively
The cavitation or ultrasonic machine used for beauty treatments requires regular cleaning to maintain performance, hygiene, and safety. This guide provides practical, step-by-step instructions tailored to American users, with common tools and materials that are widely available. Following best practices helps extend the device’s life and ensures consistent results.
Quick Answer
Clean after each session using a gentle ultrasonic cleaner solution and lint-free wipes. Avoid harsh chemicals on delicate components. Rinse, dry thoroughly, and store away from moisture. Regular maintenance reduces residue buildup and prevents cross-contamination.
What You’ll Need
Gather the following tools and materials before starting. They are commonly used with cavitation and ultrasonic devices.
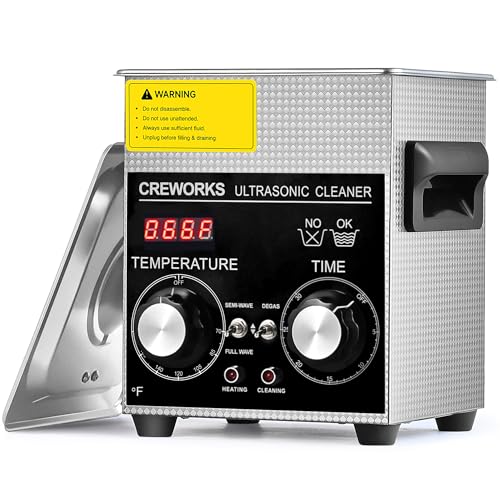
- 2L stainless steel ultrasonic cleaner for jewelry and instrument parts
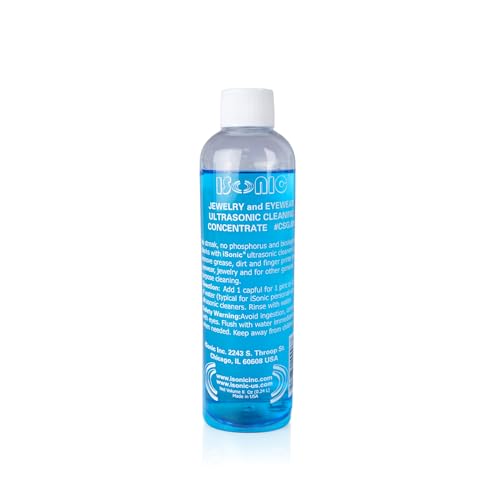
- Ultrasonic cleaning solution concentrate for ultrasonic cleaners
- 70% isopropyl alcohol wipes for electronics and cosmetic equipment

Before You Start
Prepare a clean workstation and ensure the device is powered off and unplugged. Check the user manual for any model-specific cautions. Never submerge electrical components unless the manufacturer allows it, and avoid contact with solution on exposed controls. Allow adequate ventilation when mixing cleaning solutions and never mix chemicals without guidance. Estimate 15–30 minutes for initial setup and 10–20 minutes for a standard cleaning cycle, depending on the model.
Step-By-Step: How To Clean A Cavitation Ultrasonic Machine
- Remove accessories and detach detachable parts from the device as directed by the manual.
- Rinse removable parts with warm water to loosen debris, then pat dry with a lint-free cloth.
- Fill the 2L stainless steel ultrasonic cleaner with the recommended ultrasonic cleaning solution concentrate according to the label. Do not exceed the fill line.
- Place removable parts into the cleaner and run a short cycle (3–5 minutes) at a gentle cleaning setting to avoid trauma to delicate components.
- After the cycle, remove items and rinse again with distilled water to remove residual cleaning solution.
- Wipe external surfaces with a 70% isopropyl alcohol wipe to disinfect and remove oils. Do not saturate controls or electrical ports.
- Dry all parts completely before reassembly. Use a soft cloth and air-dry if needed, ensuring crevices are dry.
- Reassemble the device and perform a short test run with water or a manufacturer-approved solution to confirm proper operation.
- Document the cleaning step in maintenance logs and schedule routine cleaning after every few sessions or as recommended.
- Store the device in a clean, dry area away from direct sunlight and moisture to prevent corrosion or degradation over time.
- If persistent buildup remains on certain surfaces, repeat the cleaning cycle with a fresh solution while avoiding aggressive scrubbing on sensitive components.
- For any unusual noises, smells, or performance changes, stop use and consult the manual or a professional technician.
Troubleshooting
| Symptom | Likely Cause | Fix | Prevention |
|---|---|---|---|
| Weak cleaning action | Insufficient cleaning solution or cycle time | Increase cycle length or adjust concentration per instructions | Use fresh solution; follow dilution guidelines |
| Residue on parts | Inadequate rinsing | Rinse thoroughly with distilled water after cleaning | Rinse step becomes part of routine |
| Device not powering on | Electrical contact or moisture near controls | Unplug, dry thoroughly, inspect connections | Keep controls dry during cleaning |
| Unusual noises | Partial debris or damaged components | Inspect and remove debris; consult technician if persists | Gentle handling; avoid forcing parts |
| Corrosion on metal parts | Exposure to harsh chemicals or prolonged moisture | Use manufacturer-approved cleaners only | Store in dry environment |
Common Mistakes
- Using household cleaners not rated for ultrasonic equipment
- immersing the main unit or controls in liquid
- Skipping rinsing steps, leaving chemical residues
- Inadequate drying, leading to rust or mold in crevices
- Overfilling the cleaner beyond the recommended level
Tips For Best Results
- Test cleaning on a small, inconspicuous area first to verify compatibility.
- Label and date cleaning solutions to manage shelf life and effectiveness.
- Use distilled water to avoid mineral deposits that can affect performance.
- Store wipes and solutions in a cool, dry place to preserve efficacy.
- Keep a dedicated set of tools for cleaning to prevent cross-contamination.
Call A Professional
Contact a professional if the device shows persistent performance issues, electrical faults, unusual heat buildup, or signs of internal damage. Do not attempt internal dissections or repairs without proper training and parts. Seek service if the unit emits smoke, smells burnt, or fails routine safety checks.
FAQ
How often should the cavitation ultrasonics be cleaned?
Clean after each use when possible, with a deeper clean weekly or after multiple sessions to prevent buildup.
Can I use any ultrasonic cleaning solution?
Use only manufacturer-recommended solutions or those specified for your device to avoid damage.
Is it safe to use alcohol wipes on all surfaces?
Alcohol wipes are safe on most non-electrical surfaces, but avoid dampening controls or electronics; always follow the manual.
What should I do if water leaks into the device?
Unplug immediately and contact a professional technician; avoid turning the unit on until inspected.
Can I reuse cleaning solution?
Most solutions lose efficacy after a certain time; dispose of old solution per label guidance and mix fresh as needed.
Is drying time important?
Yes, thorough drying prevents corrosion and mold; ensure all components are completely dry before reassembly.
Buying Guide
When selecting a cleaning setup for cavitation or ultrasonic devices, consider several factors to balance performance and ease of use.
Size and Capacity
Choose a unit with a capacity that matches typical parts. A 2L stainless steel model is compact yet versatile for jewelry and instrument components, providing enough space for regular maintenance without occupying excess counter space.
Noise Level and Comfort
Look for a cleaner with a moderate noise level and a sturdy, insulated housing. Quiet operation reduces disruption in small clinics or home setups.
Energy Efficiency
Energy-efficient models save power during idle and cleaning cycles. Check energy ratings or manufacturer specifications for cycle modes and standby consumption.
Controls and Interfaces
Simple, intuitive controls minimize setup time and user errors. Clear indicators for temperature, time, and cycle stage help ensure consistent results.
Placement and Safety
Ensure a stable, level surface with adequate drainage nearby. Consider splash guards or containment trays to protect surroundings from cleaning solutions.
Materials and Maintenance
Stainless steel interiors resist corrosion and are easier to clean. Verify that the recommended maintenance schedule aligns with your routine to prevent long-term buildup.
Compatibility With Accessories
Check whether the device supports compatible accessories, such as dedicated cleaning baskets, lids, and compatible cleaning solutions for your typical items.
Brand and Support
Choose reputable brands with accessible customer support, clear warranty terms, and readily available replacement parts.
Leave a Reply