How to Clean Cabinets After Sanding
Sanding cabinets creates fine dust that can settle into every corner, finish, and surface. Proper cleanup ensures a smooth repaint or refinishing process and helps maintain a safe, dust-free workspace. This guide walks through practical steps using common tools to remove wood dust efficiently and protect your cabinets during cleanup.
Quick Answer
Start with containment, then vacuum with a HEPA-filter system, wipe with tack cloths, and finish with air filtration to keep dust from recirculating. For stubborn dust, repeat vacuuming and wiping before applying any finish primer.
What You’ll Need
- HEPA vacuum for wood dust sanding cabinets
- tack cloth wood finish sanding dust removal
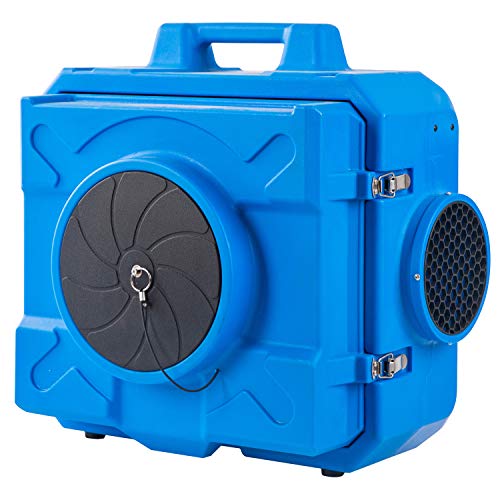
- air scrubber HEPA filter for workshop dust cabinet cleanup


Before You Start
Clear the area around the cabinets and seal off the workspace to prevent dust from spreading. Wear a dust mask or respirator and safety glasses. Remove loose hardware, and cover nearby surfaces with drop cloths. Time estimate: 20–60 minutes for initial cleanup, plus repeat sessions as needed after sanding sessions. Important: ensure proper ventilation and avoid using water on unfinished wood surfaces until you are ready to apply primer or finish.
Step-By-Step: How To Clean Cabinets After Sanding
- Vacuum the cabinet interiors and exteriors using a HEPA vacuum for wood dust sanding cabinets, paying attention to corners, edges, and grooves.
- Remove removable shelves and hardware; vacuum those components separately or wipe with tack cloths before reinstalling.
- Wipe all surfaces with a tack cloth wood finish sanding dust removal to pick up fine particles that the vacuum may miss.
- Inspect the cabinet doors and frames for remaining dust; repeat vacuuming if a noticeable film remains.
- Use an air scrubber HEPA filter for workshop dust cabinet cleanup to purge airborne dust. Run it for 15–30 minutes in cycles between cleanings.
- Wipe hard-to-reach areas with a slightly damp microfiber cloth if the finish has begun to raise grain or if stubborn dust clings to surfaces.
- Reassemble hardware after it has been dusted and wiped; vacuum the interiors again to ensure no loose dust remains before painting or sealing.
- Do a final check under bright lighting to catch any remaining dust specks, then proceed with priming or finishing as planned.
Troubleshooting
| Symptom | Likely Cause | Fix | Prevention |
|---|---|---|---|
| Dust resurfaces after cleaning | Residual dust in hidden crevices | Repeat vacuuming and tack cloth wipe-down | Vacuum thoroughly before begins and after any sanding session |
| Dust clogs air scrubber | Filtration overload or dirty pre-filter | Replace or clean filters; run on lower speed when room is dusty | Schedule filter maintenance between cleanings |
| Finish runs or dusting on fresh primer | Dust trapped under fresh coats | Wait for surfaces to stay dry; wipe again with tack cloth | Clean workspace before priming |
| Shelves or doors retain fine dust | Shape intricate profiles | Brush or vacuum into crevices; follow with tack cloth | Mask off areas during sanding to minimize dust |
Common Mistakes
- Using only a regular vacuum without a HEPA filter, which recirculates fine dust.
- Over-wetting surfaces when wiping, causing grain raising before finishing.
- Skipping the air filtration step, leading to dusty air during finishing.
- Neglecting hidden recesses where dust hides, resulting in imperfect final coats.
Tips For Best Results
- Run the air scrubber in the room between cleanup passes to maintain a cleaner air environment.
- Work in diagonals and corners where dust tends to accumulate, not just flat surfaces.
- Keep tack cloths readily available; they pick up fine dust that vacuums may miss.
- Label hardware and shelves to simplify reassembly after cleaning.
Call A Professional
Consider contacting a pro if any of the following apply: persistent heavy dust in hard-to-reach areas, electrical or mechanical issues with ventilation equipment, or if the cabinet project involves high-stakes finishes that require perfectly dust-free surfaces.
FAQ
How often should I vacuum during a sanding project?
Vacuum after each sanding session and before moving to the next step to minimize dust buildup.
Can I use water to clean cabinets after sanding?
Avoid trapping moisture on unfinished wood; use a tack cloth and a lightly damp microfiber cloth only on sealed surfaces.
Is an air scrubber necessary for small projects?
Not strictly, but it speeds up dust removal and improves air quality, especially in tight spaces.
What should I do with the dust collected in the vacuum?
Dispose of it according to local regulations for wood dust; avoid blowing it into the air.
When is it safe to start priming after cleaning?
Only after surfaces are completely dry and free of visible dust; a final tack cloth wipe is recommended.
Buying Guide
When choosing cleaning tools for cabinet sanding cleanup, consider size, noise, and filtration efficacy. A portable HEPA vacuum is ideal for wood dust because it traps fine particles. An air scrubber with a true HEPA filter complements vacuuming by cleaning airborne dust. Look for easy filter replacement, durable housings, and a compact footprint for workshop spaces. For most DIY projects, pairing a reliable HEPA vacuum, tack cloths, and an effective air scrubber provides a practical balance between efficiency and cost. Consider where you will work most often: small closets or large workshop areas, and choose equipment that can be easily stored when not in use. Always review safety data sheets for any powered cleaning devices and follow manufacturer guidelines for maintenance and use.
Leave a Reply