How to Clean a Builder Gel Brush for Nail Care
Keeping a builder gel brush clean is essential for precise application and long brush life. Proper cleaning removes gel residue, prevents cross-contamination, and maintains brush shape. This guide walks through practical steps using common nail care tools.
Quick Answer
Best practice: rinse the brush in a mild brush cleaner, work gently with a silicone cleaning mat, and finish with an ultrasonic clean if available. Dry thoroughly before reuse to prevent stiffness or shedding.
What You’ll Need
- Builder gel brush cleaning kit for nails
- Ultrasonic cleaner for nail brushes builder gel
- Silicone cleaning mat for gel brush nail care
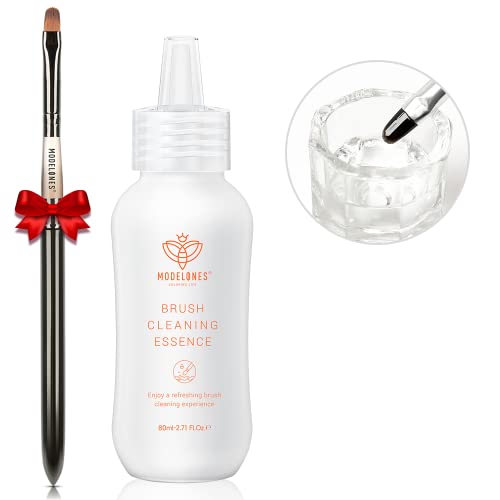


Before You Start
Prepare a clean, well-lit workspace. Remove any visible gel from the brush tip with gentle strokes against a lint-free wipe. Wear eye protection if splashing solvents and ensure good ventilation. Time estimate: 10–15 minutes per cleaning session. Allow 24 hours for complete drying if the brush was soaked.
Step-By-Step: How To Clean A Builder Gel Brush
- Work carefully to remove excess gel from the brush by wiping it across a silicone cleaning mat or a lint-free pad.
- Dip the brush into a small amount of brush cleaner or, if allowed by the product, acetone-free remover. Avoid soaking the ferrule for too long.
- Gently swirl the brush on the silicone mat to lift residual gel from the bristles.
- Rinse briefly in clean brush cleaner or alcohol, ensuring no solvent remains on the handle.
- If using an ultrasonic cleaner, place the brush in a dedicated brush-cleaning tray, add water or approved cleaning solution, and run a low-cycle program for 2–3 minutes.
- Remove the brush, reshape the bristles with your fingers, and lay flat on a clean surface or drying rack.
- Allow the brush to air-dry completely before reuse; avoid storing while wet to prevent bristle damage.
- Inspect for any leftover gel and repeat the process if needed, focusing on the ferrule area where buildup can occur.
- Store in a clean, dry container or case to protect the bristles and prevent contamination.
- Periodic deep cleaning: perform a full soak in brush cleaner once a week if heavy gel usage is routine.
- For color-coded kits, label brushes by gel type to minimize cross-contamination during cleaning and reuse.
Troubleshooting
| Symptom | Likely Cause | Fix | Prevention |
|---|---|---|---|
| Stiff or misshapen bristles after cleaning | Inadequate drying or harsh solvents | Gently reshape and air-dry completely | Use milder cleaners and avoid excessive soaking |
| Gel residue remains in ferrule | Insufficient scrubbing on silicone mat | Repeat steps 2–3 with light pressure | Clean after each use to prevent buildup |
| Bristles shed or fray | Brushing too aggressively during cleaning | Minimize pressure; replace brush if shedding persists | Regular, gentle cleaning routine |
| Soap film or scent after cleaning | Inadequate rinsing | Rinse thoroughly with clean solution | Rinse between steps |
Common Mistakes
- Over-soaking brushes in solvents, especially near the ferrule
- Using abrasive materials that fray bristles
- Using hot water or heat sources to dry quickly
- Neglecting to dry brushes completely before storage
Tips For Best Results
- Clean brushes immediately after each gel layer application to prevent hardening.
- Use a dedicated silicone cleaning mat to capture gel debris without harming bristles.
- Schedule a weekly deep clean for frequently used brushes and rotate between tools.
- Label brushes to match gel colors or formulas, reducing cross-contamination during cleaning.
Call A Professional
Seek professional help if bristles remain bent, permanently stained, or if the brush experiences persistent shedding after cleaning. Serious damage may require replacement rather than repair to maintain application quality.
FAQ
How often should I clean a builder gel brush?
Clean brushes after each use with a quick wipe, and perform a more thorough cleaning at the end of the day or with every new color change.
Can I use regular dish soap to clean builder gel brushes?
Dish soap is not recommended for professional brush maintenance; use a dedicated brush cleaner or approved solvent to protect bristles.
Is an ultrasonic cleaner necessary for cleaning gel brushes?
Not mandatory, but it can save time and remove stubborn residue when used with the correct cleaning solution.
What drying method is best for builder gel brushes?
Air-dry the brush bristles pointed downward or lay flat on a clean surface to preserve bristle shape.
Should I soak brushes in acetone?
Avoid prolonged acetone exposure, as it can dry and damage bristles; use non-acetone cleaners when possible.
What if the brush still feels stiff after cleaning?
Gently condition the bristles with a brush conditioning spray or leave to air-dry fully; consider replacing the brush if stiffness persists.
Buying Guide
When choosing tools for cleaning builder gel brushes, consider size, compatibility, noise, and maintenance needs. Look for a builder gel brush cleaning kit for nails that includes a dedicated cleaner and a silicone cleaning mat for daily use. An ultrasonic cleaner for nail brushes builder gel can accelerate the process but may require additional accessories and space. A silicone cleaning mat for gel brush nail care helps confine gel debris and reduces bristle wear. Evaluate compatibility with your gel system and whether the kit covers multiple brush sizes. For quiet operation and energy efficiency, prefer compact units with adjustable cleaning cycles. Proper storage and labeling also help reduce cross-contamination between colors or formulas. Consider your workflow: a simple daily kit may suffice, while a larger setup with an ultrasonic feature suits high-volume salons.
Leave a Reply