How to Clean Buffing Pads for Car Detailing
Buffing pads are essential for achieving a smooth, polished finish on a car’s paint. Proper cleaning extends the life of each pad and maintains consistent results across detailing sessions. This guide walks through practical, step-by-step methods to clean foam and waffle pads used in car detailing.
Quick Answer
Rinse the pad with lukewarm water, apply a dedicated pad cleaner, work the cleaner into the fibers, rinse until clear, and air-dry completely. For stubborn residue, use a soft brush and repeat as needed. Always ensure pads are fully dry before storage or reuse.
What You’ll Need
- Buffing pad cleaner for car detailing foam pads
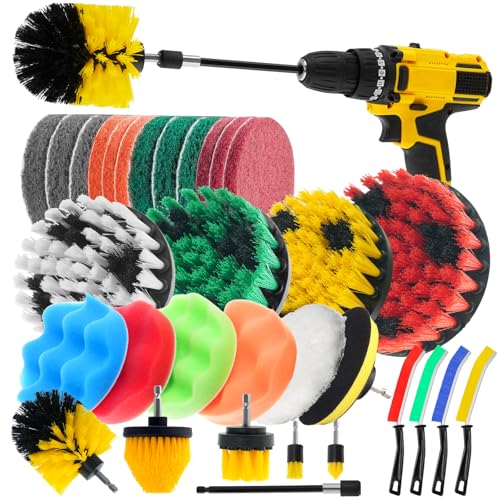
- Buffing pad cleaning brush and cleaner kit 6 inch
- 6 inch car polishing pad washer cleaning kit


Before You Start
Before cleaning, detach pads from any backing plates and rinse off loose grit with cool water. Use lukewarm water rather than hot, which can damage some pad foams. Safety notes: work in a well-ventilated area, keep cleaners away from eyes, and wear gloves if you have sensitive skin. Time estimates vary: basic cleaning can take 5–10 minutes per pad; deeper cleaning may require 15–25 minutes for stubborn buildup.
Critical cautions: Do not squeeze pads aggressively; aggressive wringing can distort foam structure. Avoid using harsh solvents unless the cleaner’s label permits it, and always follow manufacturer instructions for any product you use.
Step-By-Step: How To Clean Buffing Pads
- Remove the pad from the backing plate and tap it gently to release loose particles.
- Rinse the pad under lukewarm running water, letting water flow from the center outward to push dirt away.
- Prepare a cleaning solution using a buffing pad cleaner for car detailing foam pads or a gentle soap, following the product’s dilution instructions.
- Apply the cleaner directly to the pad and work it in with circular motions, focusing on stained or embedded residue.
- Use a buffing pad cleaning brush and cleaner kit 6 inch to agitate the foam, dislodging compacted material without tearing the fibers.
- Rinse thoroughly until the water runs clear and all soap suds are removed.
- Inspect the pad for remaining residue; repeat cleaning steps for any stubborn spots.
- Gently squeeze excess water without twisting; press the pad between clean towels to remove remaining moisture.
- Lay the pad flat or hang to air-dry in a well-ventilated area; avoid direct sunlight to prevent foam degradation.
- Store pads only when completely dry to prevent mold and unpleasant odors.
- For heavily used or contaminated pads, a second cycle with the cleaner may be necessary to restore performance.
- Document any pads showing signs of wear, and retire them if the foam is cracked, torn, or has visible mold growth.
Troubleshooting
| Symptom | Likely Cause | Fix | Prevention |
|---|---|---|---|
| Pad remains stained after cleaning | Embedded color pigments or heavy wax buildup | Repeat cleaning cycle with a dedicated pad cleaner | Clean pads promptly after use; avoid leaving product on pads |
| Foam smells musty after drying | Moisture trapped in pad | Ensure complete drying; use fans or a dry, warm room | Dry pads fully before storage |
| Pad fibers feel stiff or dry | Over-cleaning or harsh solvents | Switch to milder cleaners and shorter soaking | Follow manufacturer directions for cleaners |
| Pads show cracking or tearing | Old or worn foam | retire affected pads | Rotate pad usage and replace after heavy wear |
Common Mistakes
- Using hot water that can warp foam structure
- Over-scrubbing with hard brushes that damage fibers
- Leaving pads damp in storage, which invites mold
- Using aggressive chemical cleaners not labeled for foam pads
Tips For Best Results
- Clean pads immediately after use to prevent color transfer and tough buildup.
- Keep a dedicated pad cleaner on hand to maintain foam integrity.
- Label pads by use (polishing, finishing) to avoid cross-contamination.
- Air-dry pads on a rack or hanger for even drying and shape retention.
- Inspect pads regularly for wear and retire seriously compromised ones.
Call A Professional
Consider a professional detailer if pads show persistent odor after multiple cleanings, mold growth, or visible damage such as deep cracks or torn foam. Also seek help if you handle hazardous cleaners and lack ventilation, or if your tools require specialized maintenance beyond home cleaning capabilities.
FAQ
Can I wash buffing pads in a washing machine?
Most pads are best washed by hand or with a dedicated pad cleaner; machine washing can twist or damage foam.
How often should I clean buffing pads?
Clean pads after each detailing session to maintain performance and hygiene.
What if the pad dries and becomes hard?
Rehydrate gently with a small amount of cleaner and water; if it remains hard, replace it.
Are all pads cleaned the same way?
Foam and microfiber pads share cleaning principles, but check manufacturer guidelines for specific materials.
Buying Guide
When choosing buffing pads and cleaners, consider pad size (6 inches is common for many machines), pad type (foam vs. microfiber), and backing plate compatibility. Noise level and energy efficiency are less about the pad and more about the polisher you pair with; look for tools that minimize vibration to protect pads. Controls and placement matter for ergonomics—look for pads that are easy to clean and dry, with clear color-coding to avoid cross-use. For households or shops with limited space, opt for compact washer/cleaner kits that store neatly. Evaluate how often you detail and choose durable, replaceable pads to maximize long-term value and performance.
Leave a Reply