How to Clean an Acrylic Night Guard
Acrylic night guards are a durable option for protecting teeth during sleep. Regular cleaning helps prevent bacteria buildup, avoid odors, and extend the life of the appliance. This guide provides clear, actionable steps for American users to keep an acrylic night guard hygienic and ready for use.
Quick Answer
Rinse the night guard with cool water, brush gently with a soft-bristle brush and a non-abrasive cleaner, soak briefly in a dental guard cleaning solution, rinse again, and air dry. Use cleaning tablets as an occasional deep clean for built-up deposits.
What You’ll Need
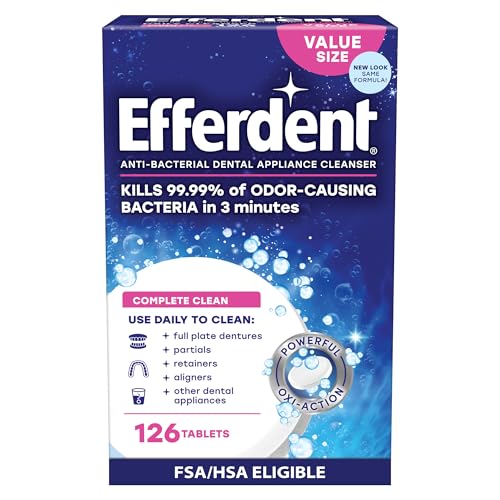
- Acrylic night guard cleaning tablets
- Night guard cleaning brush soft bristle for acrylic
- Dental guard cleaning solution for acrylic night guard


Before You Start
Before cleaning, rinse the guard under cool running water to remove loose saliva and debris. Do not use hot water, which can warp acrylic. Remove the guard only when your hands are dry to prevent slipping. Ensure your workspace is clean, and dry the guard thoroughly after cleaning to prevent bacterial growth.
Caution: Do not use household bleach or abrasive cleaners on acrylic night guards. If the guard has cracks or warping, stop using it and consult a dental professional.
Time estimate: 5–10 minutes for routine cleaning; up to 15 minutes for a deeper clean with cleaning tablets.
Step-By-Step: How To Clean An Acrylic Night Guard
- Rinse the guard under cool, running water to remove saliva and loose debris.
- Gently brush the exterior and interior surfaces with a soft bristle brush for acrylic, using a non-abrasive toothpaste or a cleaner specified for dental appliances.
- Apply a small amount of dental guard cleaning solution for acrylic night guard or a recommended cleaner to the brush and continue brushing to lift stains and biofilm.
- Rinse thoroughly to remove all cleaner residues; residual chemicals can irritate the mouth if left on the surface.
- For a deeper clean, drop a acrylic night guard cleaning tablets into a cup of cool water and soak the guard for the time indicated on the product packaging.
- Rinse again after soaking and inspect for any remaining deposits. If needed, repeat the brushing and rinsing cycle.
- Pat dry with a clean, lint-free cloth and place the guard on a dry surface or tray to air-dry completely before storing.
- Store in a ventilated case or open tray to allow airflow. Avoid sealing wet guards, which can promote bacterial growth.
- If you notice persistent odors or discoloration, consider alternating between the cleaning tablet soak and the brushing routine on a weekly schedule.
- Perform routine cleanings daily or after each use, following the same steps to maintain hygiene and material integrity.
- Schedule periodic check-ins with a dentist to ensure the fit remains optimal and the material integrity is intact.
- Keep cleaning materials out of reach of children and pets to prevent accidental ingestion or misuse.
Troubleshooting
| Symptom | Likely Cause | Fix | Prevention |
|---|---|---|---|
| Discoloration that won’t fade | Stain buildup from meals or beverages | Soak in a dental guard cleaning solution as directed, then brush | Rinse after meals and clean nightly to prevent buildup |
| Unpleasant odor | Bacterial growth on surfaces | Increase frequency of cleaning; use a cleaning tablet soak weekly | Store in a dry, ventilated container; avoid sealed moisture environments |
| Guard feels brittle or cracked | Age or improper cleaning with abrasive methods | Consult a dentist; avoid hot water and abrasive products | Handle gently; replace as recommended by a professional |
| Guard slipping or not fitting after cleaning | Warping from heat or improper storage | Clean with cool water only; store away from heat | Store in a cool, dry place; follow fitting guidelines |
Common Mistakes
- Using hot water or heat to clean the acrylic guard, which can warp the material.
- Employing abrasive brushes or toothpaste that scratch the surface.
- Over-soaking beyond recommended times, which can degrade certain cleaners.
- Closing the storage case while the guard is still damp, encouraging mold growth.
Tips For Best Results
- Brush in gentle, circular motions to avoid micro-scratches on the acrylic surface.
- Use cool or lukewarm water consistently to preserve fit and material properties.
- Rotate between cleaning methods: routine brushing plus periodic tablet soaks for optimal cleanliness.
- Label your cleaning products to prevent cross-use with other dental items.
- Routinely inspect for signs of wear or cracking and replace as recommended by a dental professional.
Call A Professional
Stop cleaning attempts if the guard becomes loose, cracked, or warped, or if it continues to cause irritation. If the fit worsens after cleaning, or if you notice persistent odor or staining despite routine care, contact a dentist or removable appliance specialist for evaluation and potential replacement.
FAQ
How often should I clean my acrylic night guard?
Clean it daily after use, with a deeper clean using cleaning tablets or a dedicated solution weekly.
Can I use regular toothpaste to brush an acrylic night guard?
It is better to use a non-abrasive cleaner or a toothpaste designed for dental appliances to avoid scratching the acrylic.
Is it safe to soak my guard in mouthwash?
Most mouthwashes contain alcohol that can dry or degrade the material over time; use only recommended cleaners or tablet soaking solutions.
What should I do if the guard smells after cleaning?
Consider an extended soak with a dedicated cleaning tablet and ensure thorough rinsing; store in a dry, ventilated place between uses.
Can I place my guard in a dishwasher?
No. Dishwashers can heat the guard unevenly and damage the acrylic; stick to hand cleaning and the recommended soaking products.
Buying Guide
Choosing the right accessories improves the cleaning routine for an acrylic night guard. Consider size, compatibility with cleaners, noise considerations for any cleaning devices, energy efficiency of powered aids if used, control options, and placement in the home.
Key buying factors include:
- <bSize and fit: Ensure the device or cleaner is compatible with your guard’s dimensions and material type.
- <bNoise level: If you use any cleaning device, look for quiet operation to avoid disturbing others at night or early morning cleaning sessions.
- <bEnergy efficiency: Choose energy-efficient options for any powered cleaners or ultrasonic devices used in cleaning routines.
- <bControls and ease of use: Simple, intuitive controls help maintain consistent cleaning without damaging the guard.
- <bPlacement and storage: Look for solutions that fit within your bathroom or kitchen area and provide proper airflow to dry the guard between uses.
- <bMaterial compatibility: Verify that cleaners and tools are safe for acrylic materials to prevent warping or surface damage.
- <bMaintenance and replacements: Assess the availability of replacement brushes, tabs, and cleaners to keep the system running smoothly.
Thinking about a full cleaning setup? Consider starting with the core items listed in the What You’ll Need section and gradually adding compatible products for deeper cleaning or convenience. A consistent routine will help maintain hygiene and prolong the life of an acrylic night guard.
Leave a Reply