How to Clean a Stove Oven for a Sparkling Kitchen
Maintaining a clean stove oven helps improve efficiency, prevent lingering odors, and extend appliance life. This guide lays out practical, safe steps for American kitchens to deep clean a typical range oven using commonly available tools. The approach balances everyday cleaning with thorough scrubbing to remove baked-on grime without damaging finishes.
Quick Answer
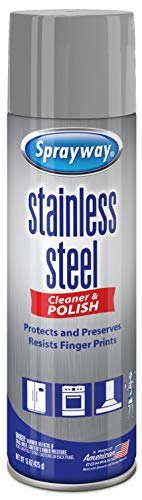
For a fast refresh, spray a stainless steel oven cleaner on the interior, let it sit per product directions, then scrub with a nylon-bristled brush and wipe clean. For stubborn spots, use an oven cleaning scraper with blade with gentle pressure. Always follow the manufacturer’s safety notes and test a small area first.
What You’ll Need
- Stainless steel oven cleaner spray or a non-abrasive cleaner designed for ovens
- Oven rack cleaning brush nylon bristles for racks and rack rails
- Oven cleaning scraper with blade for baked-on residue
- Non-abrasive sponge or microfiber cloths
- Plastic or silicone oven-safe scraper (optional)
- Gloves and eye protection
- Old towels or a drop cloth to protect the floor


Before You Start
Prepare the work area by removing burner grates, simmer plates, and any loose debris. Turn off power to the oven if needed and let the interior cool completely before cleaning. Do not mix cleaners with bleach or ammonia, and ventilate the area by opening a window or turning on a vent hood. Plan for a short cleaning session or multiple sessions if the oven is heavily used, as deep cleaning can take 1–2 hours depending on grime levels.
Step-By-Step: How To Clean A Stove Oven
- Remove all racks, racks or trays, and accessories from the oven and set them aside.
- Wipe loose crumbs and splatters from the interior with a dry cloth or brush to prevent smearing.
- Apply the stainless steel oven cleaner spray to the interior surfaces per label directions, focusing on the walls and door. Avoid the heating elements if visible.
- Let the cleaner sit for the recommended dwell time to break down baked-on grime. Do not let it dry completely.
- While waiting, clean the racks using the oven rack cleaning brush nylon bristles and warm, soapy water. Rinse and dry thoroughly before reassembly.
- Scrape stubborn spots with the oven cleaning scraper with blade using gentle, controlled strokes. Avoid gouging the enamel.
- Wipe away loosened residue with a damp cloth, then dry with a clean towel. Repeat as needed on areas with heavy buildup.
- Reinstall racks and accessories, then wipe the door seals carefully to avoid loosening any gasket material.
- Optionally run a short bake cycle at a low temperature with a protective sheet of foil on the bottom to catch drips, and wipe away any remaining residue after cooling.
- Perform a final wipe-down with a clean, damp cloth and a dry towel to restore a polished surface.
- Keep the oven door slightly ajar after cleaning for air-drying if necessary and ensure the area is free of cleaner fumes before using again.
Troubleshooting
| Symptom | Likely Cause | Fix | Prevention |
|---|---|---|---|
| Stubborn brown stains persist | Deep baked-on residue | Reapply cleaner and allow longer dwell time; use scraper with light pressure | Regular maintenance clean after heavy cooking |
| Racks are dull or tacky | Improper rinsing or buildup | Soak longer in warm soapy water; scrub again and rinse well | Rinse thoroughly after each cleaning |
| Smell of cleaner lingers | Incomplete rinsing | Wipe with damp cloth and dry; run a short bake with vent on | Avoid overuse of chemical cleaners |
| Gasket shows wear or looseness | Over-scrubbing | Be gentle around seals; consult a professional if gasket damages | Handle seals with care during cleaning |
Common Mistakes
- Using abrasive pads that scratch enamel finishes
- Spraying cleaner directly on heating elements or electrical components
- Rushing through the rinse and dry steps, leaving residues behind
- Ignoring the oven door gasket or misaligning racks during reassembly
Tips For Best Results
- Schedule routine maintenance cleanings to minimize heavy buildup.
- Test cleaner on a small, inconspicuous area before full application.
- Protect skin and eyes during cleaning; wear gloves and goggles if splashes occur.
- Use a dedicated scraper blade designed for oven use to prevent scratches.
- Ventilate the kitchen to dissipate fumes and improve safety.
Call A Professional
Consider professional help if the oven has persistent, widespread damage, unusual odors after cleaning, or if the interior seals show significant wear. Stop cleaning and contact a technician if you notice gas or electrical concerns, unusual heat, or signs of corrosion.
FAQ
Can I use regular household cleaners on my oven?
Use cleaners labeled for ovens or appliances; avoid bleach or ammonia mixtures that can release harmful fumes when heated.
Is it safe to clean the oven with heat on?
Avoid cleaning while the oven is hot. Wait for it to cool completely to protect skin and prevent chemical reactions.
How often should I deep clean the oven?
Deep cleaning every 3–6 months is a good baseline, with lighter spot cleaning after frequent heavy cooking.
What should I do after cleaning if smells linger?
Run a short bake cycle with the vent on and a small amount of water to help dissipate odors, then wipe down the interior.
Buying Guide
When choosing products for stove oven cleaning, consider how often you clean, the level of baked-on grime, and your oven’s finish. Look for a stainless steel oven cleaner spray that is non-abrasive and safe for enamel. For racks, a dedicated oven rack cleaning brush nylon bristles is ideal to remove grime without scratching metal. A oven cleaning scraper with blade can help tackle hard-to-remove spots, but select a blade designed for delicate enamel to prevent gouges.
Key buying factors include size and packaging size, ease of use, and the presence of protective gloves or brushes in a kit. Noise level is generally not a concern for cleaning tools, but ergonomic handles and comfortable grips matter for longer sessions. Energy efficiency is not directly impacted by cleaners, but choosing products with fewer harsh chemicals can align with sustainable cleaning goals. Think about placement: store bottles away from heat or reach, keeping the kitchen organized for quick maintenance.
Ask yourself: Do you prefer a spray, a paste, or a wipe-on solution? Do you need heavy-duty tools for stubborn stains, or a gentle set for routine maintenance? A balanced combination often yields the best results—regular wipe-downs complemented by targeted deep-clean sessions when needed.
Leave a Reply