How to Clean a Sewing Machine: A Practical Guide
Regular cleaning helps extend the life of a sewing machine and keeps stitches consistent. This guide walks through a safe, practical routine suitable for most home machines, with a focus on using common tools and maintenance products.
By following a structured cleaning process, users can prevent lint buildup, oil dry spots, and mechanical sticking. The steps below emphasize safety, proper disassembly, and routine checks to keep the machine running smoothly between professional servicing if needed.
Quick Answer
Best practice: unplug the machine, remove the bobbin and needle, brush away lint, apply a light sewing machine oil to moving parts, and store the tools for future cleanings. Use a dedicated lint brush and a gentle blower to dislodge hidden dust.
What You’ll Need
Prepare these tools and supplies before you begin. They align with the most commonly available sewing machine maintenance products:
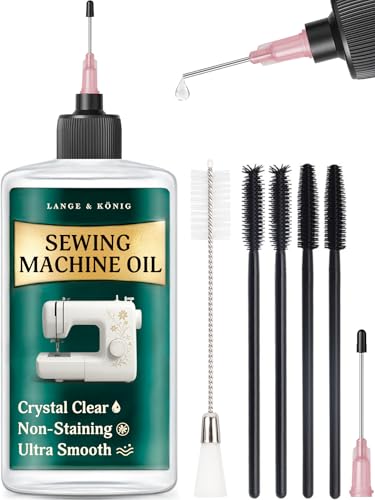
- Sewing machine cleaning kit with lint brush and oil
- Sewing machine oil and lint remover set
- Sewing machine maintenance tool kit (brush, air blower, screwdriver)


Before You Start
Before cleaning, unplug the machine and remove any power cords or pedals. Work on a clean, well-lit surface with good ventilation. Watch for hot parts after running the machine and avoid touching the needle area while cleaning. Reserve a dedicated area for tools to prevent cross-contamination. Time estimate: 15–30 minutes for routine cleaning; longer for deep servicing.
Step-By-Step: How To Clean A Sewing Machine
- Unplug the machine and remove the needle, bobbin, and bobbin case to access the interior areas.
- Use a small brush from the maintenance kit to sweep lint from the feed dogs, shuttle area, and bobbin housing.
- Hold a soft cloth beneath the bobbin area to catch lint as you brush, preventing debris from falling into gears.
- Lightly oil moving parts as specified in the user manual, typically the needle bar, shuttle race, and hook race. Use sewing machine oil and lint remover set for clean, minimal lubrication.
- Wipe away excess oil with a lint-free cloth to avoid staining fabric during sewing.
- Blow out stubborn dust using the air blower from the tool kit, keeping a safe distance to avoid pushing lint further inside.
- Inspect and clean the needle plate and presser foot clamp; loosen any thread build-up with a lint brush or a small screwdriver if needed.
- Reassemble the bobbin, insert a new needle, and run a test stitch on a scrap piece of fabric to verify even feeding and stitch formation.
- Check the bobbin case for proper seating and ensure the needle is installed correctly, matching the fabric type you plan to sew.
- Document any recurring issues (noise, skipping stitches, or tensions) for future maintenance or when consulting a professional.
Troubleshooting
| Symptom | Likely Cause | Fix | Prevention |
|---|---|---|---|
| Skipped stitches | Lint buildup or bent needle | Clean area, replace needle | Clean before long projects |
| Stitches looping | Incorrect top tension | Adjust tension per manual | Test on scrap fabric first |
| Stiff shuttle | Dry lubrication or debris | Oil lightly and remove buildup | Regular light cleanings |
| Machine not sewing | Bobbin misplacement | Reinsert bobbin and case properly | Follow factory threading path |
Common Mistakes
- Over-oiling: Too much lubricant can attract lint and gum up gears.
- Using household oils: Only use products designed for sewing machines.
- Ignoring the manual: Tension and lubrication points vary by model.
- Rushing during reassembly: Ensure all parts sit flush and aligned.
Taking time to follow the recommended steps reduces the risk of damage and ensures consistent performance over time.
Tips For Best Results
- Clean after completing a heavy project or after dust-prone fabrics like fleece or hair fibers.
- Keep a dedicated cleaning kit on hand for quick, regular maintenance.
- Store tools in a labeled container to simplify future cleanings.
- Periodically inspect belts and external covers for wear and tear during cleaning sessions.
Call A Professional
Seek professional service if you notice persistent noises, binding, broken parts, or if the machine fails to start after cleaning. Don’t attempt internal repairs beyond basic maintenance if you’re unsure about component placement or tension adjustments.
FAQ
How often should I clean my sewing machine?
For regular domestic use, a light cleaning every 1–2 months and a deeper clean every 6–12 months is common, depending on usage and project type.
Can I use any oil on my sewing machine?
No. Use only sewing machine oil and the recommended lubricants specified by the manufacturer to avoid damage.
What should I do if fabric keeps getting snagged?
Check thread path, lint build-up, and needle type. Replace the needle if damaged and reseat threads properly.
Is it okay to clean while the machine is plugged in?
Never clean while powered on. Always unplug and remove power cords before maintenance.
Do I need special tools for cleaning?
A basic sewing machine cleaning kit with lint brush and oil, plus a maintenance tool kit with a brush, air blower, and screwdriver, is typically sufficient.
How can I test the machine after cleaning?
Run a few stitches on a fabric scrap at different stitch lengths to confirm smooth operation and consistent tension.
What if I notice oil stains on fabric after sewing?
Wipe excess oil and ensure the parts are properly cleaned. Refrain from sewing until the area is dry and oil-free.
Buying Guide
Choosing the right cleaning and maintenance supplies supports a long-lasting sewing machine. Key factors include size and compatibility with your model, noise level during operation, energy efficiency of any powered tools, control options on maintenance accessories, and placement in your workspace.
Consider a dedicated sewing machine cleaning kit with lint brush and oil for routine maintenance, and a sewing machine oil and lint remover set for deeper care. A sewing machine maintenance tool kit (brush, air blower, screwdriver) provides essential tools for quick, on-demand upkeep.
When comparing options, look for kits that include gap-safe brushes, residue-free oils, and sturdy blowers. Assess whether the tools fit your machine’s access points and whether the kit’s oil height and cap design prevent over-application. Placement matters too: keep cleaners in a clean, dry area away from fabrics to avoid lint transfer during sewing sessions.
Would you like a tailored recommendation based on your machine model and typical projects? A concise checklist can help you pick the right combination of brushing, lubricating, and air-blowing tools to match your workflow.
Leave a Reply