How to Clean a Reverse Osmosis System
Maintaining a reverse osmosis (RO) system is essential for ensuring clean, great-tasting water. Proper cleaning helps remove mineral buildup, improve membrane efficiency, and extend the life of your system. This guide provides practical steps, safety notes, and product recommendations to help American households keep their RO units performing at their best.
Quick Answer
Clean your RO system regularly using a dedicated cleaning kit and membrane brush kit. Start with a thorough flush, apply a cleaning solution to the membrane, rinse, and then flush again. Use a membrane cleaning brush kit for hard-to-reach areas and a flushing kit to remove loosened deposits. Always follow the manufacturer’s instructions for the best results.
What You’ll Need
- Reverse osmosis membrane cleaning kit
- RO system flushing kit
- RO membrane cleaning brush kit
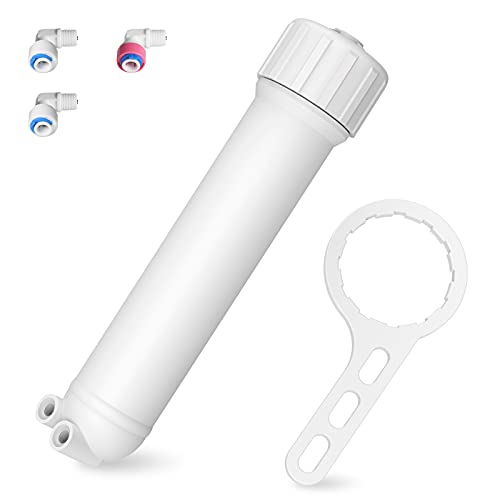


Before You Start
Before beginning, turn off the RO system and close the input water valve. Relieve system pressure according to the manufacturer’s guidance. Place a bucket beneath the drain line and have towels on hand to catch any spills. Safety cautions include wearing eye protection and gloves, and ensuring the area is well-ventilated. The entire procedure typically takes 60–120 minutes, depending on system size and accessibility.
Step-By-Step: How To Clean A Reverse Osmosis System
- Shut off the feed water supply and unplug the RO system if it has an electric pump.
- Open the faucet to relieve pressure and drain the tank.
- Disconnect the RO membrane housing and remove the membrane from its protective sleeve.
- Prepare the cleaning solution according to the membrane cleaning kit instructions.
- Attach the cleaning solution to the membrane housing and let it soak for the recommended time.
- Use the RO membrane cleaning brush kit to gently scrub any deposits on accessible surfaces.
- Rinse the membrane thoroughly with clean water as directed by the kit guidelines.
- Reconnect the membrane and reassemble the housing. Reinstall any filters if the kit includes them.
- Flush the system with clean water using the RO system flushing kit to clear residual cleaning solution.
- Allow the tank to refill, then test the water quality and confirm there are no leaks.
- Run several cycles of the faucet until the water flow stabilizes and the taste is clear.
Troubleshooting
| Symptom | Likely Cause | Fix | Prevention |
|---|---|---|---|
| Water has odd taste after cleaning | Residual cleaning solution | Run extra flush cycles with plain water | Rinse thoroughly after each cleaning |
| Low water production | Membrane clog or poor seal | Re-check seals and perform a second flush | Regular maintenance schedule |
| Leaks at fittings | Loose connections | Tighten fittings to manufacturer specs | Inspect seals during routine service |
| Membrane not producing quality water | Damaged membrane | Replace membrane per kit guidance | Handle membrane carefully during cleaning |
Common Mistakes
- Not following kit instructions precisely, leading to ineffective cleaning
- Using improper cleaning solutions or concentrations
- Rinsing insufficiently, leaving residues that affect taste
- Over-tightening fittings, causing leaks or damage
By avoiding these pitfalls, users can achieve better filtration results and extend system life.
Tips For Best Results
- Schedule cleaning every 6–12 months for typical residential use, or sooner if water quality changes
- Label and organize parts to simplify reassembly after cleaning
- Keep a small maintenance log with dates and findings
- Use only the recommended cleaning kit and brushes to protect the membrane
- After cleaning, perform a multi-stage flush to ensure all residues are removed
Call A Professional
Seek professional help if there are persistent leaks, unusual odors, or inconsistent water quality after cleaning. Stop and contact a pro if there is:
- Cracked housings or severely corroded components
- Unresolved leaks despite tightening connections
- Water contamination concerns or warranty questions
FAQ
How often should I clean my reverse osmosis membranes?
Most residential systems benefit from cleaning every 6–12 months, or sooner if you notice reduced flow or taste changes.
Can I use any cleaner with an RO membrane?
Use only cleaners provided by or recommended in the Reverse osmosis membrane cleaning kit to avoid damaging the membrane.
Is flushing the same as cleaning?
No. Flushing removes debris and residues after cleaning, while cleaning treatments dissolve mineral buildup on the membrane.
What should I do if water quality doesn’t improve after cleaning?
Inspect seals, replace the membrane if needed, and verify that the pre-filters are in good condition. If problems persist, consult a professional.
Are brushes necessary for cleaning?
A RO membrane cleaning brush kit helps reach stubborn deposits; use gentle, non-abrasive motions to avoid membrane damage.
Buying Guide
When choosing products to maintain an RO system, consider size compatibility, system model, and maintenance needs. Key buying factors include:
- Membrane cleaning kit: Look for a kit specifically designed for your RO model; verify included cleaning solutions and compatibility.
- RO system flushing kit: A flushing kit helps remove residues and restore flow after cleaning; ensure the kit connects to your unit’s plumbing.
- RO membrane cleaning brush kit: A brush kit with soft bristles reaches inside housings without scratching membranes while removing deposits.
Other considerations:
- Noise level: Some flushing kits are quiet; check product specs if noise matters in your kitchen or utility area.
- Ease of use: Choose kits with clear instructions and color-coded connections to minimize errors.
- Replacement parts: Availability of replacement membranes and seals can extend overall system life.
- Maintenance schedule: Pick gear that helps you maintain a regular cleaning and flushing routine.
For most homes, consolidating these tools into a single maintenance workflow can simplify routine care and keep water tasting fresh. Would you like help selecting a specific combination based on your RO model?
Leave a Reply