How to Clean a P-Trap
The P-trap is a critical part of a sink drainage system, designed to hold a small amount of water to block sewer gases from entering the home. When a clog forms or odor appears, cleaning the P-trap can restore drainage and banish smells. This guide walks American homeowners through safe, practical steps to clean a P-trap effectively.
While many clogs can be cleared with routine maintenance, some issues require disassembly or specialized tools. The following steps emphasize safety, proper tools, and a clear workflow to minimize mess and damage.
Quick Answer
Is the sink draining slowly or smells persistent? Remove the U-shaped portion, clean out hair and gunk, rinse, reassemble, and test drainage. Use protective gloves, a bucket, and the right tools to avoid spills and pipe damage.
What You’ll Need
- P-trap cleaning brush for sink drain
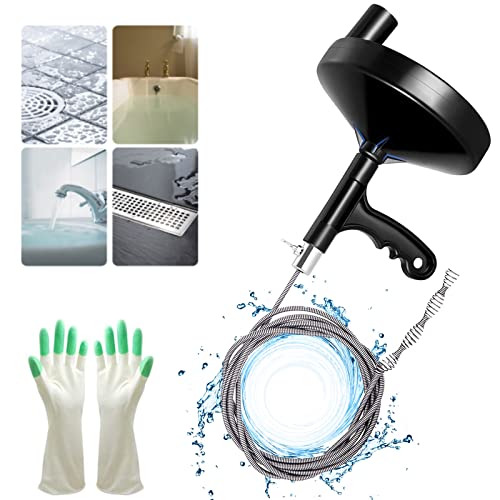
- drain auger snake for P-trap clearance
- PVC P-trap removal and cleaning tool kit


Before You Start
Shut off the water supply to the affected sink and place a bucket beneath the P-trap to catch any residual water. If the trap is stubborn or corroded, proceed with caution and consider calling a plumber. Wear gloves and eye protection, work in a well-ventilated area, and keep a cloth handy for spills. Estimated time: 30–60 minutes depending on access and clog severity. Do not rush disassembly of pipes if you notice rust, cracks, or leaks.
Step-By-Step: How To Clean A P-Trap
- Place a bucket under the P-trap and loosen the slip nuts on the trap with a wrench or pliers.
- Carefully lower the trap and let any standing water drain into the bucket.
- Inspect the trap for hair, soap scum, grease, or mineral buildup; remove large debris by hand.
- Use the P-trap cleaning brush for sink drain to scrub the interior walls and the bend.
- Rinse the trap with warm water; for stubborn deposits, a small amount of dish soap can help break up grease.
- Reassemble the trap, ensuring the gaskets are properly seated to prevent leaks.
- Wipe down the surrounding area, turn the water back on, and run the faucet to check for leaks and verify drainage.
- If drainage remains slow, run a drain auger snake for P-trap clearance through the inlet to dislodge deeper clogs.
- Repeat disassembly and cleaning if necessary, but avoid overtightening fittings during reassembly.
- Consider flushing the system with hot water after reassembly to help prevent future buildup.
- Dispose of collected debris and clean tools before storing them away in a dry area.
Troubleshooting
| Symptom | Likely Cause | Fix | Prevention |
|---|---|---|---|
| Slow drain after cleaning | Residual clog or residue in piping | Run the drain auger snake for additional clearance; re-clean the trap | Regular maintenance every few months |
| Odor persists | Stagnant water or dried-out trap | Pour water into the trap, clean again, and flush with hot water | Keep trap filled between uses; run water during dishes |
| Leaks around trap joints | Misaligned or damaged gasket | Re-seat or replace gaskets; ensure proper torque | Check seals after cleaning and reassemble |
| Cannot remove trap | Rust or seized fittings | Apply penetrating oil, wait, then attempt removal; replace if needed | Lubricate joints during maintenance |
Common Mistakes
- Over-tightening slip nuts, causing damage to threads or gaskets
- Forcing tools in tight spaces, leading to pipe stress
- Using harsh chemicals that can corrode PVC traps
- Neglecting to dry and inspect gaskets after reassembly
Tips For Best Results
Work with patience and a tidy workspace. Wearing gloves protects hands from sharp edges and dirty water. Keep a backup bucket handy for spills, and have towels ready. Label any parts you remove to simplify reassembly, and test the drain gradually to identify leaks early. If the trap is old or corroded, replacement may be more effective than cleaning.
Call A Professional
Seek professional help if you notice:
- Persistent leaks after reassembly
- Rusty or cracked PVC components
- Clogs that reoccur despite multiple cleanouts
- Uncertainty about removing hidden pipes or accessing wall traps
FAQ
Can I use chemical cleaners to unclog a P-trap?
Using chemical drain cleaners is not recommended for PVC traps; they can damage the plastic and pipes. Mechanical cleaning with brushes and a snake is safer and effective.
How often should I clean a P-trap?
Inspect and clean every 6–12 months, or sooner if slow drainage or odors appear.
Do I need to remove the entire P-trap to clean it?
Often yes, for thorough cleaning. Access through the slip nuts from below helps remove buildup more completely.
What if I can’t remove the trap?
Avoid forcing it; consult a plumber or try loosening fittings slowly with penetrating oil and proper tools.
Buying Guide
When choosing tools and kits for P-trap cleaning, consider size, compatibility, and durability. A compact P-trap removal and cleaning tool kit may include multiple adapters and brushes to fit different trap styles. Look for corrosion-resistant materials and comfortable handles for extended use. A drain auger snake designed for P-trap clearance helps reach deeper blockages without dismantling more pipe than necessary. For frequent maintenance, a dedicated P-trap cleaning brush can speed up routine cleaning. Consider a bundled kit that includes a P-trap brush, a snake, and spare gaskets to handle common household drains.
Key buying factors include:
- Size and fit: Ensure tools match common sink traps and PVC connections
- Noise level and ease of use: Ergonomic handles and smooth operation
- Energy and cost efficiency: Reusable tools reduce waste and ongoing costs
- Controls and versatility: Adjustable snake width and brush sizes
- Placement considerations: Cordless or compact tools are ideal for under-sink access
Alternatives include specialized PVC P-trap removal and cleaning tool kits designed to minimize mess and maximize control during disassembly. Compare kits that offer easy-to-clean components, clear instruction sheets, and durable materials to ensure long-term use.
Leave a Reply