How to Clean a Panini Maker
Cleaning a panini maker is essential for maintaining performance, food safety, and the appliance’s longevity. Proper care removes grease, burnt-on residue, and odors, ensuring every grilled sandwich tastes as good as the first one.
This guide covers practical, step-by-step methods using common cleaning tools and safe cleaners tailored for both countertop models and commercial-grade presses. It emphasizes non-abrasive techniques that protect nonstick surfaces while delivering a thorough clean.
Quick Answer
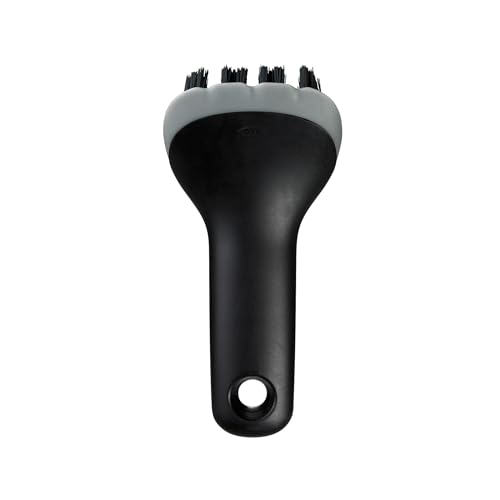
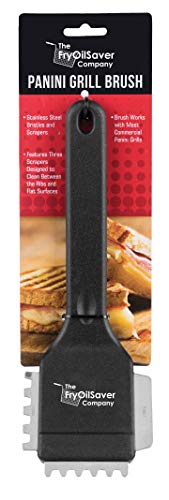
After each use, unplug and let the unit cool slightly, then wipe with a damp cloth. For stuck-on bits, use a non-scratch silicone panini press cleaning brush and a mild degreaser spray like panini maker grill cleaning spray degreaser 12 oz. Finish with a light wipe and dry. For metal grates or heavy residue, a stainless steel grill brush for panini press can help, but avoid harsh scrubbing on nonstick surfaces.
What You’ll Need
- Non-scratch silicone panini press cleaning brush
- Panini maker grill cleaning spray degreaser 12 oz
- Stainless steel grill brush for panini press
- Soft cloths or paper towels
- Warm water and mild dish soap
- Optional: applicator sponge or microfiber cloth
- Optional: protective gloves

Before You Start
Read the manufacturer’s manual for any model-specific warnings. Ensure the unit is unplugged and completely cool before cleaning. Remove any residual food from the plates with a spatula designed for nonstick surfaces. Use gentle, non-abrasive cleaners to protect the nonstick coating. Keep water away from the control housing and electrical components. Plan for about 5–15 minutes per cleaning session, depending on residue level.
Step-By-Step: How To Clean A Panini Maker
- Unplug and cool: Disconnect from power and let the plates cool to a safe temperature before touching.
- Wipe loose debris: Use a dry or slightly damp cloth to remove loose crumbs and oil from the plates and hinge area.
- Apply cleaner selectively: Lightly spray the degreaser on the plates, avoiding the control panel. Let it sit for 30–60 seconds to loosen burnt-on grease.
- Scrub gently: Use the non-scratch silicone panini press cleaning brush to lift residue without scratching nonstick surfaces. For stubborn spots, reapply cleaner and work in small circular motions.
- Wipe clean: Wipe away loosened grime with a soft cloth. Rinse cloth as needed to avoid re-depositing grease.
- Clean the exterior: Wipe the housing, handle, and temperature controls with a damp cloth. Do not soak or immerse the unit.
- Inspect and dry: Check for remaining residue. Dry all surfaces with a clean towel to prevent moisture buildup.
- Deep-clean for heavy use: If heavy residue persists, remove plates if possible, soak them in warm soapy water, then scrub with the silicone brush before reassembling.
- Season or recondition if recommended: Some models benefit from light oiling on nonstick surfaces; follow the user manual if applicable.
- Reconnect and test: Plug in, heat briefly, and run a test sandwich to ensure cleanup has not affected performance.
Troubleshooting
| Symptom | Likely Cause | Fix | Prevention |
|---|---|---|---|
| Grease smears on sandwiches | Residual oil on plates | Re-clean with degreaser spray and non-scratch brush | Wipe plates after each use |
| Sticky plates after cleaning | Soap residue | Rinse cloth thoroughly and wipe again | Use minimal soap; ensure plates are dry |
| Rough surface feels abrasive | Harsh scrub or metal brush | Stop using metal tools; switch to silicone brush | Use gentle cleaning methods consistently |
| Controls heat unevenly | Water intrusion or residue | Wipe dry around controls; have device checked if persists | Avoid moisture near electronics |
| Unpleasant odors | Stale grease buildup | Clean with degreaser, then wipe with a fresh cloth | Clean after every few uses to prevent buildup |
Common Mistakes
- Using abrasive tools on nonstick plates
- Soaking the entire unit or submerging in water
- Applying heavy cleaner directly to control panels
- Not drying plates fully before the next use
- Neglecting to remove stuck-on cheese or crust promptly
Keeping up with a regular cleaning routine helps extend the life of the panini maker and improves flavor consistency in every sandwich.
Tips For Best Results
- Clean soon after cooking to prevent grease from hardening.
- Use a panini maker grill cleaning spray degreaser 12 oz for tough jobs but always test a small area first.
- Keep a dedicated non-scratch silicone panini press cleaning brush handy near the kitchen station.
- For models with removable plates, wash plates separately in warm soapy water and ensure they’re completely dry before reassembling.
- Store the unit with the lid open for airflow if recommended by the manufacturer.
Call A Professional
Consider a professional if you notice persistent electrical issues, unusual smells during operation, or corrosion on internal components. Stop using the unit and contact a service technician if the power cord shows damage, the unit leaks fluid, or there is visible charring inside the housing.
FAQ
Is it safe to use metal brushes on a panini maker?
No. Metal brushes can gouge nonstick surfaces. Use a stainless steel grill brush only if the model supports it and you are cleaning metal plates; otherwise stick to a silicone brush.
Can I use regular kitchen spray on my panini maker?
Yes, but avoid aggressive solvents near the unit. Prefer a dedicated degreaser spray designed for cookware, followed by thorough wiping.
How often should I clean a panini maker?
Wipe down after each use and perform a deeper clean weekly or after cooking especially greasy meals.
What should I do if food sticks to the plates?
Let the unit cool, then use a silicone brush and degreaser to lift the crust. Avoid chiseling or scraping with hard tools.
Are removable plates easier to clean?
Yes. If your model has removable plates, wash them separately in warm, soapy water and dry completely before reassembling.
Buying Guide
Choosing the right panini maker for home use involves considering size, noise, energy use, controls, and placement. Here are key buying factors and how they impact cleaning and maintenance:
- Size and footprint: Larger units with dual plates offer versatility but may require more storage space. Consider countertop space and ease of access for cleaning.
- Noise level: Some models emit more fan or clack sounds during use. Quieter units are easier to operate in kitchens with open layouts.
- Energy efficiency: Look for models with efficient heating elements and good insulation. Energy-friendly units reduce heat buildup during use and cleanup.
- Controls and indicators: Clear temperature controls and indicator lights help you avoid overheating, which can complicate cleaning by causing more residue.
- Plate type and materials: Nonstick coatings simplify cleaning. If plates are removable, cleaning is easier and more thorough.
- Placement and ventilation: Ensure there is adequate clearance around the unit to prevent heat damage and allow quick cleaning access.
- Cleaning compatibility: Check manufacturer recommendations on cleaners and brushes. Some models tolerate specific degreasers or brushes better than others.
- Maintenance accessories: Availability of compatible cleaning brushes or sprays can influence maintenance ease and cost over time.
When evaluating options, ask yourself whether you prioritize easy cleaning, compact size for a small kitchen, or higher throughput for family meals. A well-chosen panini maker should balance cooking performance with simple, safe cleaning routines to keep flavors consistent and the appliance in good condition.
Leave a Reply