How to Clean a Microphone
Keeping a microphone clean helps preserve audio quality and extend the life of your gear. Regular maintenance removes dust, saliva buildup, and oil from hands that can affect performance. This guide walks through safe, effective methods to clean a microphone at home or in a studio using common tools and accessories.
Whether you own a dynamic or condenser mic, a careful cleaning routine can prevent pops, crackles, and reduced sensitivity. Follow the steps below to maintain your microphone without compromising its delicate components.
Quick Answer
Clean a microphone by removing dust with a soft brush or compressed air, wipe the exterior with a microfiber cloth and gentle cleaner, and use alcohol wipes only on metal surfaces if needed. Avoid liquid cleaners on foam windscreens and do not spray liquids into the capsule. Regular maintenance with a dedicated microphone cleaning kit keeps both the exterior and grille in top condition.
What You’ll Need
- Microphone cleaning kit brush alcohol wipes for condenser mic
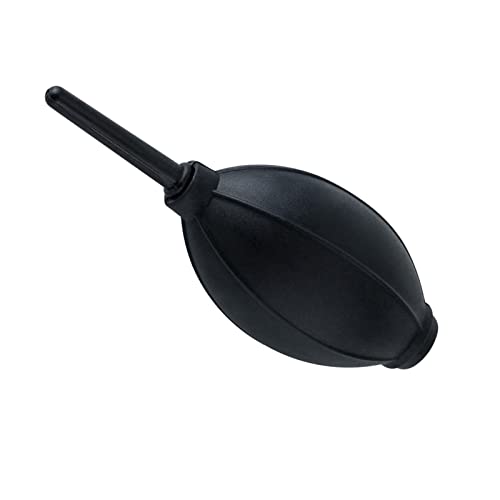
- Compressed air dust blower for microphone cleaning
- Microphone maintenance kit with microfiber cloth and cleaning spray

![mTech! Electronic Cleaning Kit with Spray Bottle & Cloth [Travel Size] Screen Cleaning Kit for Smartphones, Tablets, TVs, Laptops and All Tech with Plush Microfiber Cloth and Screen Shine Formula](https://m.media-amazon.com/images/I/41pYucLmVhL._SL500_.jpg)
Before You Start
Power off the microphone and disconnect it from any interface or mixer. If you have a detachable windscreen, remove it gently. Work in a clean, well-lit area to avoid transferring oils from hands to surfaces. Safety note: never spray liquids directly into the mic capsule. Allow any treated areas to dry fully before using the mic again. Time estimate: 10–20 minutes for routine cleaning; up to 30 minutes for a thorough wipe-down of the exterior and grille.
Step-By-Step: How To Clean A Microphone
- Power down and unplug the microphone from any equipment.
- Carefully remove any detachable windscreen or shock mount parts that are safe to detach.
- Use the microphone cleaning kit brush to gently sweep away surface dust from the grille and body, working from the outside toward the center.
- Lightly use the compressed air dust blower to dislodge dust from in and around the grille, keeping the nozzle at a safe distance to avoid moisture.
- Wipe the exterior with a microfiber cloth from the microphone maintenance kit, using a small amount of spray if included in the kit; avoid the capsule area.
- For condensation-prone condensers, wipe the outer shell with a damp (not wet) microfiber cloth; never saturate the microphone.
- Gently reattach windscreens and accessories once all parts are dry and free of debris.
- Test the microphone at a quiet level to confirm no residue or moisture remains and the signal is clean.
Troubleshooting
| Symptom | Likely Cause | Fix | Prevention |
|---|---|---|---|
| Reduced output or crackling | Dust inside grille or around capsule | Carefully clean exterior and grille; avoid liquid into the capsule | Regular light cleanings; cover when not in use |
| Sputtering or popping sounds | Moisture on grille or windscreen | Let microphone dry completely; wipe with dry microfiber | Keep away from humid environments; dry after handling |
| Moisture around capsule | Liquid contact on capsule | Do not spray cleaners near capsule; if moisture persists, professional service | Avoid direct liquids; use protective covers |
| Noisy preamp signal | Debris near grille | Clean exterior and grille; reseat connections | Store cleanly; handle with clean hands |
Common Mistakes
- Using excess liquid cleaners near the capsule
- Spraying compressed air directly into the capsule
- Cleaning while plugged in or powered on
- Neglecting to dry components completely before reuse
Tips For Best Results
- Clean on a soft surface to prevent accidental drops; place a microfiber cloth underneath.
- Perform routine maintenance monthly or more often in dusty environments.
- Store mics with protective cases to minimize dust buildup.
- Use appropriate tools for each task: brushes for dust, microfiber for surfaces, and compressed air with caution.
Call A Professional
Seek professional service if the microphone exhibits persistent noise, distortion, or visible damage to the capsule or internal wiring. Stop use and consult a technician if there are signs of liquid exposure, corrosion, or if the mic fails after cleaning. Do not attempt to disassemble internal parts unless you are trained to do so.
FAQ
Can I use alcohol wipes on all microphones?
Alcohol wipes can be used on metal surfaces but should be avoided on non-metal components and around the capsule. Always follow manufacturer guidance.
Is compressed air safe for all mic types?
Compressed air is generally safe for exterior cleaning, but keep the nozzle away from the capsule and avoid moisture buildup.
How often should I clean my microphone?
Light cleaning every few weeks and a thorough exterior wipe-down monthly work well for most setups.
Should I remove the grill to clean inside?
Only remove parts if you are trained and the design allows safe access; otherwise, clean exterior and grille carefully.
Buying Guide
When shopping for a microphone cleaning setup, consider size, noise level of tools, energy efficiency, controls, and placement flexibility. Look for a compact microphone cleaning kit brush that fits in a drawer, a reliable compressed air dust blower with adjustable pressure, and a microphone maintenance kit with microfiber cloth and cleaning spray that is safe for your mic type. Compare kits based on their included accessories, ease of use, and compatibility with condenser versus dynamic mics. For shared studio environments, choose tools with quiet operation to minimize disruption during sessions. Finally, ensure storage space and protective cases are suitable for your microphone collection and cleaning supplies. Would you benefit from a combined kit, or do you prefer separate tools for flexibility? A practical setup keeps gear ready for quick cleanups between sessions while prolonging mic life.
Leave a Reply