How to Clean a Keurig for Fresh, Great-Tasting Coffee
Keeping a Keurig coffee maker clean helps maintain flavor, extend the machine’s life, and prevent buildup that can affect performance. This guide walks through practical steps to clean and sanitize a Keurig using common supplies and the provided Keurig descaling solution, cleaning kit coffee maker, and needle cleaning tool.
Quick Answer
Run a descaling cycle with Keurig descaling solution to remove mineral buildup, then rinse with fresh water several times. Clean the exterior and removable parts, use a needle cleaning tool to clear the K-Cup entry, and perform a final hot-water rinse before making a test cup.
What You’ll Need
- Keurig descaling solution
- Keurig cleaning kit coffee maker
- Keurig needle cleaning tool


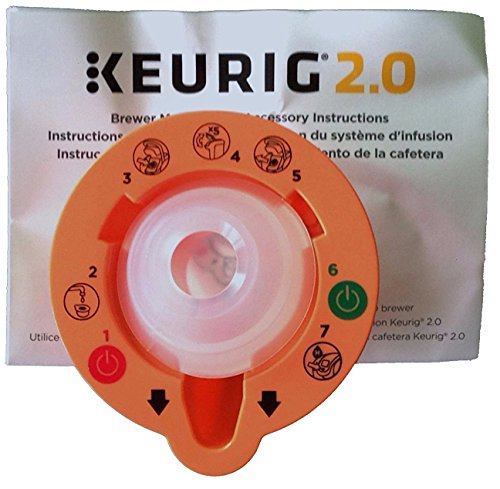
Before You Start
Unplug the brewer during cleaning and allow it to cool. Empty the water reservoir and discard any used pods from the drip tray area. Use a clean sponge or cloth to wipe surfaces, and avoid abrasive cleaners that could scratch the finish. Plan for a 60–90 minute cleaning session to complete descaling, rinsing, and reassembly. Important: if your water is hard, you may need to repeat the descaling cycle more than once to fully remove mineral deposits.
Step-By-Step: How To Clean A Keurig
- Unplug the Keurig and remove the water reservoir.
- Pour the Keurig descaling solution into the reservoir according to the product instructions.
- Fill the reservoir with water to the max line after adding the descaler mixture, then place a large cup on the tray.
- Run a cleansing brew without a K-Cup, using the largest cup setting to run the full descaling cycle.
- When the reservoir is empty, let the machine stand for 15 minutes to allow the descaler to work on internal components.
- Return the reservoir, fill it with fresh water, and run 2–3 hot-water brews to rinse the internal passages thoroughly.
- Detach the removable parts (tray, filter if applicable, and pod area) and wash them with warm soapy water. Rinse well and dry completely.
- Use the needle cleaning tool to clear any clogs in the K-Cup needle. Follow the tool’s directions for safe disassembly and cleaning.
- Reassemble the brewer and run a final hot-water cycle to ensure all residues are flushed out.
- Run a test brew with a small amount of water to confirm clean flavor and no off-tastes before making coffee for guests.
- Wipe the exterior with a damp cloth, paying attention to the nozzle area to prevent drips on countertops.
- Regular maintenance: perform a light rinse weekly and a full descaling every 1–3 months based on usage and water hardness.
Troubleshooting
| Symptom | Likely Cause | Fix | Prevention |
|---|---|---|---|
| Brewer not descaling properly | Mineral buildup in internal channels | Repeat descaling cycle with fresh solution and follow with multiple rinses | Schedule regular descaling every 1–3 months |
| Weak or no coffee flow | Clogged needle or nozzle | Use the needle cleaning tool to clear obstructions | Rinse after each cycle; avoid leaving coffee grounds in the brew area |
| Off-taste after cleaning | Residue from descaler or soap | Run several full hot-water rinses | Use fresh water every rinse |
| Leakage around the base | Improper reassembly or worn seals | Reassemble parts correctly; inspect seals and replace if needed | Handle removable parts gently during cleaning |
Common Mistakes
- Not following the descaler’s mixing instructions precisely, which can leave residues
- Using soap on the internal components, which can leave lingering flavors
- Skipping the needle cleaning step and allowing clogs to build up
- Ignoring hard-water buildup and delaying descaling during periods of heavy use
Tips For Best Results
- Use the largest cup setting during descaling to ensure all channels are flushed
- For homes with very hard water, consider placing a preventive descaling on a regular schedule
- Dry all removable parts completely before reassembly to prevent mold or mildew
- Keep the needle cleaning tool handy and use it every few weeks to prevent clogs
- Label the reservoir after cleaning to remind household members when the next maintenance is due
Call A Professional
Most Keurig cleaning tasks are straightforward, but contact a professional if the brewer shows persistent leaks, electrical issues, or fails to operate after thorough cleaning and descaling. Do not attempt internal repairs beyond basic maintenance; safety and warranty considerations may apply.
FAQ
How often should I descale a Keurig?
Most households can benefit from descaling every 1–3 months, depending on usage and water hardness.
Can I use lemon juice or vinegar for descaling?
Use only Keurig-approved descaling solutions or the manufacturer’s recommended alternatives to protect components.
What’s the best way to clean the needle?
Follow the needle cleaning tool instructions; usually it involves gently brushing and flushing with hot water.
Is it safe to wash the removable parts in the dishwasher?
Check the user manual; many parts are dishwasher-safe on a gentle cycle, but some components may require hand washing.
Buying Guide
Choosing cleaning solutions and accessories for a Keurig depends on several factors. Consider the scale of usage, water hardness, and maintenance comfort level. The key buying factors below help ensure effective care and assured performance over time.
Key Buying Factors
- <bSize and compatibility: Ensure the descaling solution and cleaning kit are compatible with your Keurig model. Some kits are universal, while others are model-specific.
- <bDescaling solution quality: Opt for a reputable Keurig descaling solution that is designed to break down mineral buildup without leaving residues.
- <bNeedle cleaning tool: A dedicated needle cleaning tool helps prevent clogs and protects the brew path from damage.
- <bCleaning kit contents: A comprehensive cleaning kit should include brushes, cloths, and safe-cleaning agents tailored for coffee makers.
- <bMaintenance schedule compatibility: Choose products that align with your desired maintenance rhythm—monthly quick cleans or quarterly descaling.
Size, Noise, and Energy Considerations
- <bSize: Cleaning accessories are compact and store easily; descalers come in bottles with standard dosing.
- <bNoise level: Cleaning cycles do not add noticeable noise beyond normal operation, but plan descaling during off-peak times if noise is a concern.
- <bEnergy efficiency: Cleaning steps themselves do not affect energy use; running full hot-water cycles consumes a standard amount of energy typical for brews.
Controls and Placement
- <bControls: Most Keurig units use simple button controls; descaling involves a no-pod brew cycle. Follow the manual for exact steps.
- <bPlacement: Place the machine on a stable, flat surface away from moisture and heat sources. Ensure good ventilation around the unit.
Comparison Perspectives
- <bDescaler brands: Compare features like scent-free formulas and residue-free rinsing properties.
- <bCleaning kit completeness: Some kits include a needle tool and brushes; others may require separate purchases.
- <bWarranty considerations: Use recommended products to avoid voiding warranties during maintenance.
Leave a Reply