How to Clean a Hearing Aid: A Practical Guide
Regular cleaning helps maintain sound quality and extends the life of a hearing aid. This practical guide walks through safe methods, essential tools, and best practices to keep devices hygienic and functioning well. Readers will learn simple steps, common issues, and when to seek professional help.
Proper maintenance combines daily care with periodic deep cleaning. By following these steps, users can reduce wax buildup, moisture damage, and microbiological concerns that can affect performance and comfort.
Quick Answer
Clean your hearing aid daily with a soft brush and gentle cleaning solution, dry thoroughly after use, and inspect for wax or moisture. Use a wax guard removal tool as needed and store devices in a dehumidifier drying box to prevent moisture and bacteria buildup.
What You’ll Need
- hearing aid cleaning kit with brush and cleaning solution
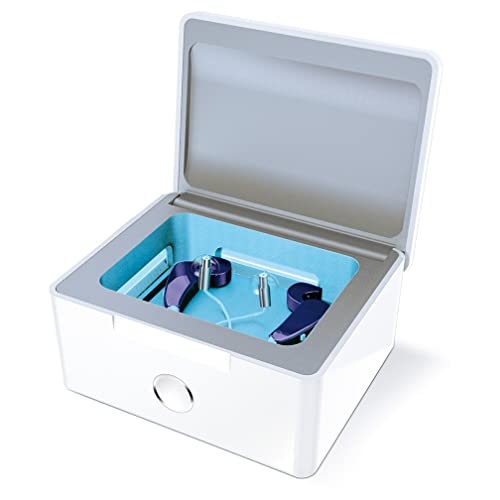
- hearing aid dehumidifier drying box for moisture and bacteria
- hearing aid wax guard removal tool set with replacement prongs


Before You Start
Ensure hands are clean and dry before handling the device. Work in a well-lit area and follow manufacturer guidelines for your specific model. Do not submerge the hearing aid in water or cleaning solvents not approved by the manufacturer.
Time estimate: 10–20 minutes for routine cleaning; longer if you need to replace guards or perform a deeper clean. Regular maintenance reduces the risk of feedback, poor sound, and discomfort.
Step-By-Step: How To Clean A Hearing Aid
- Power off the device and remove any attachments or domes as instructed by the user manual.
- Gently brush the exterior with the cleaning brush to remove surface dust and wax.
- Inspect the sound outlet and microphone ports for visible wax or debris; use a soft pick or tool from the kit if provided.
- Wipe the body with a slightly dampened cloth using approved cleaning solution if indicated by the manufacturer; avoid excess moisture.
- Clean the earmold or tubing, if applicable, using a damp cloth and ensure airflow paths are clear.
- Check and replace wax guards using the wax guard removal tool set with replacement prongs if you notice reduced amplification or wax buildup.
- Place the hearing aid in the dehumidifier drying box to remove residual moisture and prevent bacterial growth.
- Reassemble the device, store in a clean case, and run a quick function check to confirm audio quality and fit.
Troubleshooting
| Symptom | Likely Cause | Fix | Prevention |
|---|---|---|---|
| Whistling or feedback | Wax obstruction or loose dome | Clean ports and reseat dome; replace wax guards | Regular cleaning; inspect domes weekly |
| Low sound or muffled output | Wax buildup or moisture | Clean thoroughly; dry in dehumidifier | Daily brief cleaning; use drying box after wear |
| Moisture detected after use | Humidity inside device | Place in drying box; avoid humid environments | Store in dry, cool place |
| Unresponsive channels | Blockage in tubing or vent | Inspect and clear tubing; replace guards if needed | Routine maintenance and prompt cleaning |
Common Mistakes
- Using excessive moisture or home solvents not approved for hearing aids
- Forcing brushes or tools into tiny openings
- Neglecting daily cleaning and moisture control
- Ignoring signs of wear like loose fittings or damaged domes
Tips For Best Results
- Develop a simple daily routine: brush, check, and dry after use.
- Keep the cleaning kit within easy reach to encourage consistent maintenance.
- Use the dehumidifier box regularly, especially in humid months or after sweating.
- Replace wax guards as soon as you notice reduced clarity or increased feedback.
- Schedule periodic professional checks to ensure optimal performance and seal integrity.
Call A Professional
Seek a professional if you notice persistent cracking sounds, persistent moisture accumulation, cracks in the housing, or if cleaning does not restore sound quality. If you experience sudden hearing loss or discomfort, stop using the device and contact an audiologist or the device manufacturer’s service center.
FAQ
How often should I clean my hearing aid?
Clean daily with basic tools and perform a deeper clean weekly or as needed based on wax production and moisture exposure.
Can I use regular household cleaners on my hearing aid?
No. Use only manufacturer-approved cleaning solutions and follow product directions to avoid damage.
What is a wax guard and why do I need it?
A wax guard protects the microphone and receiver from wax and debris; replace guards when wax buildup is evident.
Is it safe to store my device in a damp bathroom?
No. Damp environments promote moisture buildup and bacteria; store in a dry, ventilated area and use a dehumidifier box as recommended.
Buying Guide
When choosing cleaning tools and accessories for hearing aids, consider size, compatibility, and user needs. Is a compact kit sufficient for daily maintenance, or is a full cleaning kit with multiple attachments necessary? Noise from a dehumidifier box is typically minimal, but placement matters for convenient charging and drying.
Key factors include size and portability of the cleaning kit, the efficiency of the dehumidifier drying box, and the availability of replacement parts such as wax guards. Look for kits that include a gentle cleaning brush, soft cloth, and approved cleaning solution.
Energy efficiency and ease of use matter for devices like a dehumidifier drying box. A model with low power consumption and straightforward indicators helps users maintain a routine. Consider storage space and whether the device can travel with you, especially for users who wear hearing aids on the go.
Placement matters: keep the tools and drying box near the hearing aid storage area to encourage daily maintenance. For wax guards, ensure an easy replacement process and compatible prongs with your specific model. Finally, prioritize brands with clear instructions and reliable customer support to resolve issues quickly.
Leave a Reply