How to Clean a Burnt Vape Coil Safely and Effectively
Burnt coils can ruin the vaping experience with harsh taste and reduced performance. Proper cleaning can restore flavor and extend coil life when done carefully. This guide explains practical methods using common tools and parts available in many vaping setups.
Readers will find a clear, step-by-step approach, safety reminders, and troubleshooting tips to keep coils performing well while avoiding damage to devices or user injury.
Quick Answer
If a coil tastes burnt, remove it and inspect for visible gunk. Use a gentle cleaning method—soak in a neutral cleaner or warm water, then scrub with a dedicated brush set and rinse thoroughly. Dry completely before reinstalling. For stubborn residue, a vape coil cleaning brush set and an ultrasonic cleaner for vape coils can speed up the process. If the coil is corroded or damaged, replace it rather than reuse it.
What You’ll Need
- Ultrasonic cleaner for vape coils
- Vape coil cleaning brush set
- Vape rebuildable coil tool kit with screwdriver


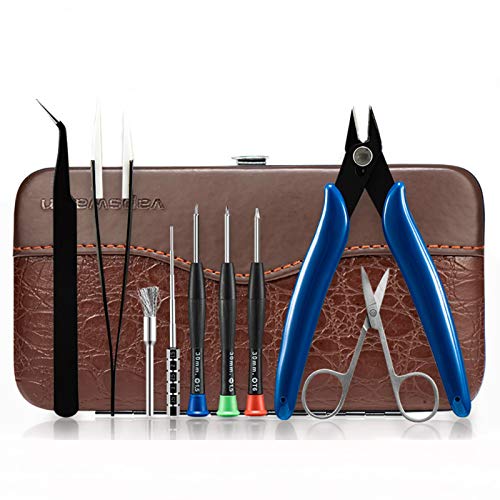
Before You Start
Ensure the device is powered off and the battery is disconnected if applicable. Drain the tank and remove any remaining liquid. Work in a clean area to prevent debris from entering the hardware. Safety notes: never immerse the battery or hot components; allow parts to cool completely before handling. Time estimates vary: basic cleaning can take 10–20 minutes, while soaking and drying may require several hours.
Critical cautions: avoid using harsh chemicals that may damage silicone seals or coil insulation. If you notice corrosion, frayed leads, or visible damage, replace the coil rather than attempting a risky repair.
Step-By-Step: Cleaning A Burnt Vape Coil
- Disassemble the tank and remove the coil from the rebuildable head if applicable.
- Rinse the coil under warm running water to remove loose residue.
- For quick results, place the coil in a dedicated ultrasonic cleaner for vape coils and run a short, gentle cycle.
- If using manual cleaning, combine a mild soak with a neutral cleaner or warm water for 10–15 minutes.
- Gently scrub the coil with a vape coil cleaning brush set to loosen baked-on residue.
- Rinse again until no soapy or foamy residue remains.
- Pat dry with a lint-free cloth and allow the coil to air dry completely, or use a low-heat setting to speed evaporation (if your device supports it).
- Reassemble, prime the coil with a few drops of e-liquid, and test on a safe power setting before full use.
- If the aroma or flavor remains metallic or off, repeat the cleaning steps or consider replacing the coil.
- Keep coils clean by establishing a regular maintenance schedule aligned with usage patterns.
Troubleshooting
| Symptom | Likely Cause | Fix | Prevention |
|---|---|---|---|
| Bitter or burnt taste persists after cleaning | Residue remained or insulation damage | Re-clean with brush set; inspect insulation; replace coil if issues persist | Clean coils regularly; avoid over-tightening connections |
| Coil won’t heat or fires intermittently | Poor connections or damaged leads | Check connections; reseat coil; replace damaged parts | Handle components gently; store dry |
| Excessive gurgling or flooding | Improper wicking or coil placement | Re-wick and reseat; scrub coil to remove residue | Prime correctly; avoid over-saturating wicks |
| Coil appears corroded or damaged | Long-term wear or harsh cleaning | Replace coil or rebuildable head | Inspect routinely; replace after heavy use |
Common Mistakes
- Using abrasive cleaners that damage coil insulation
- Pouring hot liquids or solvents onto cool hardware
- Over-soaking beyond recommended times, which can loosen seals
- Reusing a visibly degraded coil
- Rushing drying time and reassembling still damp coils
Tips For Best Results
- Maintain a dedicated cleaning routine to prevent heavy buildup.
- Choose a gentle cleaning method first; escalate only if needed.
- Use an ultrasonic cleaner for vape coils to dislodge stubborn residue without manual scrubbing.
- Carefully inspect insulation and leads for wear before reusing a coil.
- Prime new or cleaned coils to avoid dry hits during initial use.
Call A Professional
Seek professional help if the device shows signs of electrical shorting, persistent overheating, or unusual odors after cleaning. Stop using the coil if you notice scorching, melted plastic, or exposed wires. A pro can assess compatibility with the device’s power settings and perform advanced maintenance safely.
FAQ
Can I clean any burnt coil with water?
Water is acceptable for basic cleaning of coils not exposed to electrical risk, but ensure complete drying before reuse. For stubborn buildup, a specialized cleaner or ultrasonic cleaning is recommended.
How often should I clean vape coils?
Frequency depends on usage, liquid type, and power level. Light users may clean weekly; heavy or high-leistung users may clean more often or replace coils sooner.
Is an ultrasonic cleaner necessary?
Not strictly necessary, but it speeds up cleaning and improves residue removal for many users.
When should I replace a coil instead of cleaning?
Replace if cleaning cannot restore flavor, if there are physical signs of wear, or if you notice lingering burnt taste after multiple cleanings.
Buying Guide
When shopping for coil cleaning gear, consider size compatibility with your vape setup and your preferred cleaning method. Look for an ultrasonic cleaner with gentle cycling options suitable for small parts like vape coils. A dedicated vape coil cleaning brush set helps reach tight spaces, while a rebuildable coil tool kit with screwdriver supports hands-on maintenance and adjustments. Evaluate noise levels, ease of use, and compatibility with your existing rebuildable head.
- Size and compatibility: Ensure the cleaner and tools fit your device dimensions and coil type.
- Noise level: Quieter cleaning cycles reduce workspace disruption.
- Energy efficiency: Efficient ultrasonic cycles consume less power during cleaning.
- Controls: Simple timers and adjustable cycles offer flexibility for different residue levels.
- Placement: Compact tools fit in a dedicated vape maintenance station or drawer.
Would you benefit from a bundled kit that includes a brush set and rebuildable tool kit? Consider your current coil style and maintenance habits to decide which combination best supports long-term performance and safer handling.
Leave a Reply