How to Clean a 3D Printer Bed for Better Adhesion
Keeping a 3D printer bed clean is essential for strong first layers and consistent prints. This guide explains a practical, safe method to remove resin or filament residues from glass and other common beds, using readily available materials.
With the right steps and tools, you can restore adhesion without damaging the bed surface. The following sections cover preparation, a concise action plan, and safer maintenance habits for frequent users.
Quick Answer
Assess the bed surface—glass beds and removable build surfaces respond best to gentle cleaning. Use isopropyl alcohol 99% or a dedicated bed-cleaning spray, and a soft microfiber cloth. For stubborn residue, a 3d printer build plate scraper with handle for glass bed can help without scratching. Wipe, dry, and recheck adhesion before printing.
What You’ll Need
- Isopropyl alcohol 99% for 3d printer bed cleaning
- 3d printer bed cleaning kit microfiber cloth IPA spray bottle
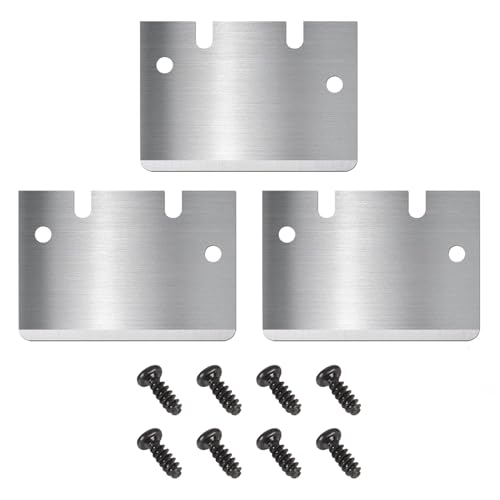
- 3d printer build plate scraper with handle for glass bed
- Optional: lint-free wipes, water, and a non-abrasive sponge


Before You Start
Clear the printer area and power off the machine. Let the bed cool before touching to avoid burns. Use isopropyl alcohol 99% in a well-ventilated space; avoid open flames, and never mix chemicals. Identify your bed type (glass, PEI, garolite) to select appropriate cleaning methods. Time estimate: 5–15 minutes per cleaning session depending on residue.
Step-By-Step: How To Clean A 3D Printer Bed
- Power down the printer and unplug it, then allow the bed to cool completely.
- Remove any removable build plate or surface, if possible, following your printer’s manual.
- Wipe loose dust and debris from the bed with a soft microfiber cloth.
- Moisten a corner of the cloth with isopropyl alcohol 99% or use the included IPA spray bottle to lightly dampen the cloth.
- Gently wipe the entire bed surface, using small circular or back-and-forth motions to lift oils, grease, and filament residue.
- For stubborn spots, apply a bit more alcohol and let it sit for a few seconds before repeating the wipe. If needed, use a 3d printer build plate scraper with handle for glass bed to lift adhered particles carefully.
- Dry the bed thoroughly with a clean, dry microfiber cloth to prevent moisture from affecting adhesion.
- Reinstall the build plate or surface, ensuring it is flat and properly seated before loading filament.
- Calibrate or re-level the bed if you notice any shift after cleaning. Run a small test print to verify adhesion.
- Store cleaning supplies out of reach of children and pets, and cap the IPA bottle securely after use.
Troubleshooting
| Symptom | Likely Cause | Fix | Prevention |
|---|---|---|---|
| Poor adhesion after cleaning | Residual oil or moisture on bed | Re-clean with isopropyl alcohol 99% and dry thoroughly | Wipe and dry completely; avoid touching surface after cleaning |
| Scratches on glass bed | Abrasive scraper or debris | Use soft tools only; replace scrapers with non-scratch options | Inspect tools before use and replace worn edges |
| Adhesion varies between prints | Uneven bed or contamination | Re-level bed and clean evenly | Perform routine cleaning before each print cycle |
| Cannot remove dried filament | Strong residue | Apply more alcohol, soak briefly with cloth, then wipe | Prevent buildup by cleaning after each print |
Common Mistakes
- Using harsh or abrasive cleaners that damage the bed surface
- Over-wetting the bed, leaving moisture that affects adhesion
- Scrubbing aggressively, which can scratch glass or modify surface textures
- Skipping calibration after cleaning
Sticking to gentle cleaners and proper drying helps maintain consistent adhesion and prolongs bed life.
Tips For Best Results
- Do a quick wipe with a dry microfiber cloth before starting a print to remove any floating particles.
- Keep a dedicated cleaning kit nearby for quick maintenance between prints.
- Consider a bed cleaning kit microfiber cloth IPA spray bottle combo for portable cleaning power.
- Label each tool by bed type (glass, PEI, etc.) to avoid cross-contamination.
Call A Professional
Consult a professional if you notice persistent adhesion issues after repeated cleaning, warping of the bed surface, or if the glass bed shows visible damage. Seek expert help for electrical or mechanical issues that may affect bed leveling or heater performance.
FAQ
What is the best cleaner for a glass 3D printer bed?
Isopropyl alcohol 99% is widely recommended for glass beds due to its fast evaporation and effective residue removal.
Can I use water to clean a 3D printer bed?
Water is not ideal for most beds; use isopropyl alcohol or a bed-specific cleaner to avoid residue and surface damage.
How often should I clean the bed?
Clean before starting a new print job, and perform a quick wipe if you notice adhesion issues during a print.
Is it safe to use a scraper on a glass bed?
Yes, if you use a scraper designed for glass and apply gentle pressure to avoid scratching.
What should I do after cleaning?
Dry the bed completely and recheck the surface flatness or levelness before reattaching the build plate.
Should I remove the bed surface for cleaning?
For some beds, removing the surface aids cleaning; refer to the printer manual and reattach securely afterward.
Buying Guide
When choosing cleaning tools and accessories, consider factors such as bed type (glass, PEI, etc.), ease of cleaning, and compatibility with IPA. Look for a complete kit that includes a microfiber cloth, a soft scraper, and a spray bottle for easy application. A dedicated cleaning kit offers convenience and minimizes the risk of introducing contaminants onto the bed. Think about storage and portability for frequent hobbyists who move their printer or perform maintenance in different spaces. How easy is it to access the bed and re-level after cleaning? These questions help ensure a smoother workflow and reliable first layers.
Final Thoughts
Regular, careful cleaning supports strong adhesion and print quality. By choosing the right tools—such as a 3d printer build plate scraper with handle for glass bed and appropriate cleaners—you can maintain a pristine print surface and reduce failed prints. The routine outlined here provides a practical, home-friendly approach for American users seeking consistent results.
Leave a Reply