How to Clean Plastic Shower Surround
A plastic shower surround adds a sleek, easy-to-clean look to bathrooms, but soap scum, hard water deposits, and mildew can still appear. This guide outlines practical, step-by-step methods to restore brightness and keep surfaces sparkling with common household tools and the right cleaning products.
Following a routine cleaning plan reduces buildup and extends the life of the surround. The methods below emphasize safe handling of cleaning tools and minimizing damage to glossy or matte plastic finishes.
Quick Answer
For a fast clean, rinse the surface with warm water, apply a non-abrasive cleaner, let it sit briefly, scrub with a soft brush or microfiber sponge, rinse thoroughly, and dry with a dual-action shower squeegee to prevent water streaks.
What You’ll Need
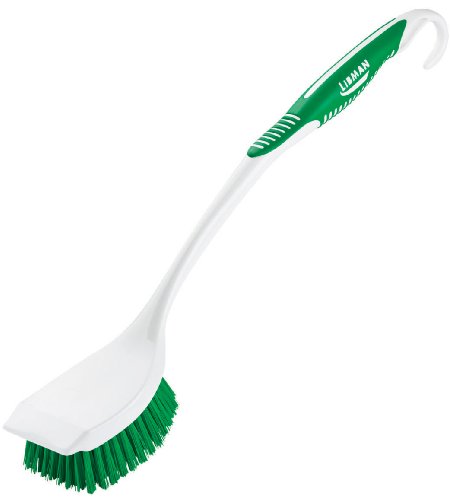
- 12 inch long-handled cleaning brush for acrylic plastic shower surround
- microfiber scrub sponge non-scratch for plastic shower surround cleaning
- dual-action shower squeegee for plastic shower surround cleaning and water streaks


Before You Start
Ensure the bathroom is well-ventilated. Wear gloves if you have sensitive skin or use stronger cleaners. Test a small inconspicuous area first to confirm the product won’t dull or scratch the plastic. Prepare a timer for steady cleaning sessions to avoid overexposure to cleaners on skin or eyes. Estimated total time: 20–40 minutes depending on buildup.
Cautions: Do not use abrasive pads or harsh ammonia-based cleaners on glossy plastic surfaces; these can scratch or dull the finish. Avoid bleach on dyed or colored plastics unless the product label explicitly permits it.
Step-By-Step: How To Clean Plastic Shower Surround
- Remove any items from the shower and rinse the surround with warm water to loosen surface dirt.
- Prepare a cleaning solution appropriate for plastic. A mild dish soap solution or a dedicated plastic-safe bathroom cleaner works well.
- Apply the cleaner to the surface or onto the microfiber sponge, avoiding oversaturation that could seep into seams.
- Scrub in gentle, circular motions with the microfiber sponge to lift soap scum and mineral deposits.
- For stubborn buildup, use the 12 inch long-handled cleaning brush to reach higher areas and corners without leaning.
- Rinse thoroughly with warm water, ensuring all cleaner residues are removed from seams and edges.
- Dry the surround with the dual-action shower squeegee, moving from top to bottom to minimize water streaks.
- If mold or mildew appears, treat affected areas with a diluted vinegar solution or a mold-safe bathroom cleaner, then rinse and dry completely.
- Reassess any remaining spots with a final light scrub, then rinse again and dry.
- Maintain a routine by repeating weekly, or biweekly, depending on usage and water hardness.
- Store tools in a dry area after use to prevent mildew on brushes and sponges.
Troubleshooting
| Symptom | Likely Cause | Fix | Prevention |
|---|---|---|---|
| Streaks after drying | Water mineral deposits or soap residue | Re-wipe with squeegee and rinse with clean water | Wipe down after each shower; use distilled water if water is hard |
| Scratches on surface | Abrasive tools or harsh cleaners | Switch to non-scratch sponge and plastic-safe cleaners | Avoid abrasive pads; test cleaners first |
| Persistent mildew in corners | Moist, shaded areas with organic matter | Apply diluted vinegar or mildew cleaner; scrub and rinse | Improve ventilation; wipe dry after use |
| Discoloration after cleaning | Strong cleaners or chlorine exposure | Switch to milder cleaners; rinse thoroughly | Follow product labels; avoid mixing cleaners |
Common Mistakes
- Using abrasive sponges or steel wool on plastic surfaces
- Letting cleaners sit too long on the surface
- Skimping on rinsing, leaving residue that attracts more dirt
- Not drying after cleaning, promoting mildew growth
- Overpacking with cleaners in corners where water collects
Tips For Best Results
- Establish a cleanup schedule to prevent heavy buildup; shorter, frequent sessions are easier than one deep clean.
- Work from top to bottom to trap gravity-assisted dirt and avoid re-soiling cleaned areas.
- Use microfiber tools for gentle, effective removal of soap scum without scratching.
- When mineral deposits are hard, let the cleaner sit for a few minutes before scrubbing to break down deposits.
- Rinse thoroughly and dry immediately to prevent water spots and mildew.
- Store cleaning tools properly; keep brushes dry between uses to extend their life.
Call A Professional
Call a professional if you notice persistent mold growth that covers large areas, cracks in the surround, warping, or persistent discoloration despite cleaning. Seek help if there are any signs of water damage behind the surround or leaking seams that require resealing or replacement.
FAQ
What cleaner is safest for plastic shower surrounds?
Use mild dish soap, a dedicated plastic-safe bathroom cleaner, or a vinegar-water solution. Avoid abrasive cleaners and harsh bleach unless labeled safe for plastics.
How often should I clean my plastic shower surround?
Light cleaning weekly and a more thorough clean every 2–4 weeks helps prevent buildup and maintains shine.
Will a long-handled brush damage the surface?
If used with gentle pressure and non-abrasive pads, a long-handled brush helps reach high areas without harming the surface.
Can I use bleach on a plastic shower surround?
Bleach can be used on some plastics if the product label allows it, but test first in a hidden area and rinse well to avoid discoloration.
Buying Guide
When choosing cleaning tools for a plastic shower surround, consider size, material, and ergonomics. A 12-inch long-handled brush helps reach corners without bending, while a microfiber sponge provides effective scrubbing without scratching. A dual-action squeegee helps prevent water streaks and save time during drying. Look for tools with non-slip handles and washable components to extend their life.
Size and layout matter: larger surrounds benefit from longer handles and wider scrubbing heads, while narrower stalls may be easier with compact brushes. Noise level is typically low with manual tools, but consider a quiet squeegee if the bathroom is shared. Energy efficiency isn’t a major factor for manual cleaning, but durable, washable materials reduce waste.
Controls and placement: store tools within easy reach near the shower, in a ventilated cabinet or hook rack to keep them dry. For placement, ensure brushes dry upright or dangling so moisture doesn’t promote mildew. Choose tools that are compatible with the specific plastics used in the surround to avoid scratching or fading.
Leave a Reply