How to Clean Years of Soap Scum Off Tile
Soap scum buildup can dim bathroom tiles and grout, especially in damp climates or high usage areas. This guide provides a practical, step by step approach using common tools to remove years of soap scum from ceramic and porcelain tile without damaging the surface.
Quick Answer
Best overall approach combines mechanical agitation with a gentle, acidic or alkaline cleaner. Start with a long handled grout brush to loosen buildup, then follow with a steam cleaner for stubborn areas. Finish with an electric rotating grout brush to restore bright, sealed grout lines.
What You’ll Need
- Long-handled tile grout brush soap scum remover
- Steam cleaner for bathroom tile grout soap scum
- Electric rotating grout cleaning brush for ceramic tile
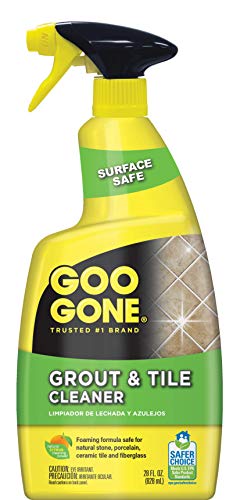
- Non abrasive tile cleaner or a homemade cleaner (baking soda paste or vinegar solution, depending on tile type)
- Protective gloves and eye protection


Before You Start
Prepare the area by removing loose items from the tub or shower surround. Ventilate the space or run a fan to reduce chemical fumes. Test any cleaner on a small, inconspicuous area of tile to confirm it does not discolor or damage the surface. Avoid using highly acidic cleaners on natural stone tiles. Time estimate: 45 minutes to 2 hours depending on buildup.
Critical cautions: never mix cleaners unless the product instructions explicitly allow it, and always wear gloves. Do not use abrasive pads that can scratch tile or grout. For high heat or steam devices, follow manufacturer safety guidelines.
Step-By-Step: How To Clean Soap Scum From Tile
- Dry the area to identify all heavily soiled spots and measure grout lines that show discoloration.
- Apply a cleaner along the grout lines using a spray bottle or directly with the brush head of the long-handled tool.
- Let the cleaner sit for 5–10 minutes to loosen soap scum compounds without drying on the surface.
- Use the long-handled tile grout brush soap scum remover to scrub the grout lines with firm, overlapping motions.
- For ceramic tile faces, employ the electric rotating grout cleaning brush for gentle agitation on embedded grime in the grout and a light pass on tile surfaces.
- Employ the steam cleaner for bathroom tile grout soap scum in a steady, slow pass to lift residues and sanitize cracks and crevices.
- Wipe away loosened residue with a clean microfiber cloth; reapply cleaner to particularly stubborn sections and repeat the agitation steps.
- Rinse thoroughly with clean water to remove any cleaner film; dry with a towel to prevent water spots.
- Inspect grout lines; repeat steps on areas with persistent staining using a lighter touch to avoid wear.
- Seal grout once completely dry if the floor or wall uses grout that benefits from sealing.
- Clean and reset tools after use, following device specific maintenance if needed.
Troubleshooting
| Symptom | Likely Cause | Fix | Prevention |
|---|---|---|---|
| Soap scum persists after cleaning | Shallow cleaning or wrong cleaner | Switch to a more effective cleaner; increase contact time | Clean weekly, use squeegee to reduce buildup |
| Discoloration on grout | Mold or mineral staining | Treat with a mold stain remover or a hydrogen peroxide solution | Ventilate area, dry after showers |
| Scratch marks on tile | Abrasive scrubbing or harsh cleaners | Switch to non abrasive methods and milder cleaners | Avoid steel wool or harsh pads |
| Tile surfaces hazy after cleaning | Soap film or mineral deposits | Rinse thoroughly and polish with microfiber cloth | Rinse after each cleaning session |
Common Mistakes
- Using overly harsh chemicals on delicate ceramic or glazed tiles
- Over scrubbing grout lines which can wear the grout
- Skipping a surface test before applying cleaners
- Not drying the area after cleaning leading to new residue
Tips For Best Results
- Work from top to bottom to prevent dirty water running onto cleaned areas
- Maintain a regular cleaning schedule to prevent deep soap scum buildup
- Use a microfiber cloth for final drying to avoid streaks
- Combine steam cleaning with mechanical agitation for tougher grout lines
Call A Professional
Consider a pro if the grout is severely cracked, if mold is extensive, or if tile surfaces show permanent staining after multiple cleaning attempts. Stop and seek expert advice if there is any sign of water damage, loose tiles, or persistent odor that indicates underlying issues.
FAQ
Can I use vinegar on all tile types?
Vinegar is effective on many ceramic or glazed tiles but should be avoided on natural stone or unglazed surfaces where acidity can dull the finish.
How long should I let cleaners sit on grout?
Typically 5–10 minutes, but follow product instructions and test on a small area first.
Is steam cleaning safe for tile grout?
Yes for most ceramic or porcelain grout. Always check device guidance and keep the nozzle at a safe distance to avoid overheating.
How often should I reseal grout?
Grout sealing frequency depends on tile location and use. Many homes reseal every 1–2 years after thorough cleaning and drying.
What is the best order for cleaning tile and grout?
Begin with brushing grout lines, apply cleaner to tile surfaces, use steam for deep reach, rinse, and dry before inspecting for touch ups.
Do I need to use all three tools?
Not always. Start with the long-handled grout brush and cleaner, add steam for stubborn zones, and use the electric rotating brush only as needed for heavy grout wear.
Can I reuse cleaning solutions?
Most cleaners are formulated for single use. Check the product label for reuse guidelines and storage safety.
Buying Guide
Choosing the right tools to remove years of soap scum from tile involves evaluating several factors. Size and layout of the bathroom, noise acceptance, energy use, and compatibility with tile material all matter. A combined approach using a long-handled grout brush, a steam cleaner, and an electric rotating grout brush offers versatility for different surfaces and levels of buildup.
Key buying factors
- <bSize and reach: A long handle helps reach corners without bending. Look for adjustable lengths if possible.
- <bNoise level: Steam cleaners and rotating brushes vary in noise. If the bathroom is shared, consider models with lower noise ratings.
- <bEnergy efficiency: Steam cleaners and powered brushes consume electricity. Check energy usage and runtime per charge if cordless.
- <bControls and ease of use: Simple start/stop controls with clear indicators help reduce fatigue during long cleaning sessions.
- <bPlacement and storage: Choose compact models that fit under sinks or in cabinets and come with convenient hang or stand storage.
For many households, a starter bundle including a long-handled grout brush, a reliable steam cleaner, and an electric rotating grout brush provides the best balance of performance and cost. Compare cleaning power, replaceable heads, and warranty terms to ensure long term value. If the tile surfaces differ in material, verify compatibility with each tool before use.
Leave a Reply