How to Clean a Very Dirty Grill
Grills can accumulate heavy grease, char, and baked-on residue over the season. A thorough cleaning restores performance, flavor, and safety. This guide walks through a practical, step-by-step approach to tackle a very dirty grill using common cleaning tools and targeted techniques.
Quick Answer
Start with a high-heat burn and brush to loosen grime, then apply a degreaser for stubborn spots. Finish with a thorough rinse and light oiling to protect grates. For best results, use a dedicated grill brush, a degreaser spray with scrubber, and a porcelain grill grate cleaner kit to remove heavy buildup efficiently.
What You’ll Need
- Heavy-duty stainless steel grill brush and scraper for tough crusts on grates
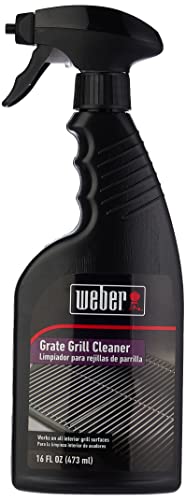
- Grill degreaser spray barbecue cleaner with scrubber to dissolve grease
- Porcelain grill grate cleaner brush kit for delicate porcelain surfaces
- Water and mild dish soap
- Metal or heat-safe gloves for protection
- Non-scratch pad or sponge for surfaces
- Plastic or rubber scraper for stubborn drips


Before You Start
Safety first: ensure the grill is completely cool and disconnected from any fuel source before cleaning. Remove grills, grates, and accessories to inspect components for damage. If the grill has a grease tray, empty and sanitize it. Time estimate: 45–90 minutes for a thorough job, longer if there is heavy buildup. Critical cautions: never use metal brushes on porcelain-coated grates as they can scratch; always wear gloves and ventilation when using chemical cleaners.
Step-By-Step: How To Clean A Very Dirty Grill
- <bPrepare the grill: Close the lid, ignite at a low heat or run a quick burn to loosen debris, then turn off and wait for it to cool slightly.
- <bClear loose debris: Remove grates, flavorizer bars, and trays. Scrape each surface with a scraper to offload loose char and ash.
- <bTreat the grates: Apply the grill degreaser spray barbecue cleaner with scrubber to all grate surfaces. Let it sit for 3–5 minutes to penetrate baked-on grease.
- <bScrub and rinse: Use the heavy-duty stainless steel grill brush and scraper on metal grates to lift grime. For porcelain surfaces, switch to the porcelain grill grate cleaner brush kit to avoid scratches. Rinse with warm water.
- <bClean other parts: Wipe down the burners, lid interior, and exterior with a damp cloth and a small amount of soap. For stubborn spots, use the degreaser with a scrubber on a non-scratch pad.
- <bDe-grease the tray and interior: Empty the grease tray, scrub with degreaser, rinse, and dry. Wipe interior walls to remove fingerprints and residue.
- <bRinse and dry: Rinse all cleaned parts thoroughly with clean water. Dry completely to prevent rust, especially on metal components.
- <bSeason and reassemble: Lightly coat grates with a neutral oil to prevent sticking. Reassemble grates, burners, and trays in their original order.
- <bTest burnclean: Reignite the grill at a high heat for 10 minutes to burn off remaining cleaner and finish drying. Let it cool before cooking.
- <bFinal wipe down: Give the exterior a quick wipe with a damp cloth to remove any smudges and restore shine.
- <bPrevent future buildup: Establish a routine cleaning after heavy grilling sessions and cover the grill to minimize exposure to dust and moisture.
Troubleshooting
| Symptom | Likely Cause | Fix | Prevention |
|---|---|---|---|
| Grates still sticky after cleaning | Residue left from degreaser or oil | Reapply degreaser and scrub with appropriate brush | Rinse thoroughly and dry completely; oil lightly after use |
| Porcelain coating appears scratched | Using metal brush on porcelain | Switch to porcelain-specific brush kit; avoid metal brushes | Use protective brushes designed for porcelain |
| Grease tray smells or smokes | Old grease residues | Thoroughly remove, scrub, and re-line with a fresh tray liner | Empty and clean tray after each use |
| Grates Rusting | Moisture left on metal surfaces | Dry completely and apply light oil | Store with grill cover on a dry day |
Common Mistakes
- Using a high-pressure jet on sealed components, which can force grease into seams
- Neglecting the grease tray—overflow leads to flare-ups during cooking
- Overlooking the ignition area, where carbon buildup can affect performance
- Skipping proper drying—moisture accelerates rust and mold growth
Tips For Best Results
- Schedule a deep clean at least every few months, depending on usage
- Do a quick post-curn cleanup by removing loose debris and wiping surfaces
- Choose tools that match grill surface: stainless steel brushes for metal grates, porcelain-specific kits for porcelain finishes
- Keep a cleaning kit near the grill for convenience
- Always test cleaners on a small area first to ensure compatibility
Call A Professional
Consider professional help if the grill shows significant rust, corroded burners, gas leaks, or cracked porcelain. Stop using the grill immediately if you detect gas smells, unusual noises, or heat becomes irregular. Complex repairs or internal corrosion require certified service.
FAQ
How often should I deep clean a gas grill?
Most cooks find a deep clean every 2–3 months, or after heavy grilling sessions, helps maintain performance and flavor.
Can I use a metal brush on porcelain grill grates?
No. Metal brushes can scratch porcelain. Use a porcelain-safe cleaning kit to avoid damage.
Is it safe to leave degreaser on the grill?
Follow the product instructions and rinse thoroughly to prevent residue that could affect flavor.
What’s the best way to maintain grill grates between uses?
Oil grates lightly after cleaning and before cooking, and store the grill covered to reduce moisture exposure.
Buying Guide
When choosing cleaning tools for a very dirty grill, consider performance, material compatibility, and ease of use. Important buying factors include size and reach of the cleaning tools, noise level during scrubbing, and the effectiveness of degreasers on baked-on grease. Consider how each tool fits your grill type—gas, charcoal, or pellet—and whether the kit includes porcelain-specific brushes for delicate surfaces. For kitchens with frequent heavy grilling, a robust heavy-duty brush combined with a strong degreaser can reduce cleaning time significantly.
Size matters for reach: a longer handle helps access flames and corners without burning hands. Noise is a minor but practical consideration; a comfortable, well-balanced brush reduces hand fatigue. Energy efficiency isn’t a direct factor for cleaning gear, but ease of use and quick action save time. Controls on cleaners aren’t typically involved, but user-friendly spray bottles and scrubbers can improve results. Placement-wise, store cleaning kits near the grill for rapid access after cooking.
For comprehensive cleaning, a system that includes a heavy-duty stainless steel grill brush and scraper, a grill degreaser spray barbecue cleaner with scrubber, and a porcelain grill grate cleaner brush kit covers most common grill surfaces and buildup. These tools work together to remove crusts, dissolve grease, and protect porcelain finishes, ensuring a clean grill ready for the next cookout.
Leave a Reply