How to Clean Needles on Keurig Supreme Plus
Keeping the needles on the Keurig Supreme Plus clean helps maintain optimal brewing performance and beverage flavor. This guide walks American users through a safe, practical cleaning routine using commonly available tools designed for K-Supreme Plus machines.
Quick Answer
Turn off the machine and unplug it. Remove the used pod holder, detach the needle cleaning tool, and rinse with warm water. Use the Keurig needle cleaning tool for K-Supreme Plus to clear any clogs, then run a plain water cycle to flush the system. If mineral buildup is visible, use a descaling solution kit with cleaning brush as directed, then rinse thoroughly.
What You’ll Need
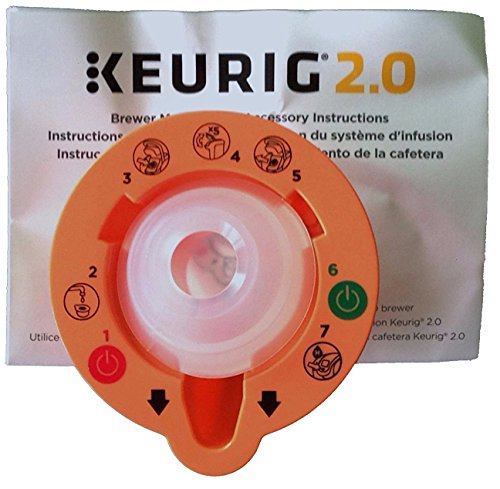
- Keurig needle cleaning tool for K-Supreme Plus
- Keurig descaling solution kit with cleaning brush
- Keurig maintenance cleaning kit for K-Supreme Plus
- Clean small bowl or cup for rinsing
- Warm water

Before You Start
Unplug the brewer before beginning any maintenance. Place the machine on a stable, clean surface and remove any remaining k-cups or accessories from the area. Do not submerge the machine in water, and avoid using abrasive cleaners. Allow any descaling residues to dry before reassembling. The total time for a standard needle clean is typically 20–40 minutes, depending on mineral buildup.
Step-By-Step: How To Clean Needles On Keurig Supreme Plus
- Power off and unplug the Keurig Supreme Plus, then remove the water reservoir and the K-Cup Pod Holder.
- Carefully detach the needle assembly following the user manual instructions to access the needles.
- Use the Keurig needle cleaning tool for K-Supreme Plus to gently probe both needles, rotating as needed to dislodge any clogs.
- Rinse the needle area with warm water to clear loosened debris.
- If mineral buildup is visible, apply the Keurig descaling solution kit with cleaning brush to the needle and surrounding passages, following the kit directions.
- Run a short cleaning cycle with plain water to flush residue from the needles and internal channels.
- Reassemble the needle assembly, reinstall the reservoir, and fill with fresh water for a final full brew cycle without coffee to rinse the system.
- Inspect for any remaining obstructions by performing another quick water run if necessary.
- Empty the carafe tray and wipe down the exterior to remove any splashes or drips.
- Repeat the process periodically based on water hardness and usage to prevent future clogs.
Troubleshooting
| Symptom | Likely Cause | Fix | Prevention |
|---|---|---|---|
| Brewing stops mid-cycle | Needle blockage or tight fit | Clean needles with the cleaning tool and re-seat parts | Regular maintenance; use descaling as needed |
| Weak or no brew | Clogged needle or clogged passages | Deep clean with cleaning kit; run multiple rinses | Descale every 1–3 months depending on usage |
| Water leakage around needle area | Loose components or damaged seals | Re-seat and inspect seals, replace if necessary | Handle parts gently during cleaning |
| Rinse cycle leaves residue | Undissolved mineral buildup | Use descaling solution as directed, then thorough rinse | Regular descaling, especially in hard water areas |
Common Mistakes
- Using harsh brushes or abrasive cleaners on needle tips
- Forgetting to unplug the unit during maintenance
- Skipping descaling when mineral buildup is evident
- Not fully flushing the system after cleaning, leaving residues
By avoiding these missteps, the Keurig Supreme Plus stays responsive and brewed beverages stay flavorful.
Tips For Best Results
- Schedule routine maintenance every 1–2 months for households with hard water.
- Use the highest-quality cleaning tools recommended by Keurig to protect needle integrity.
- Never use the brewer without a water reservoir attached during cleaning cycles to prevent damage.
- Keep a dedicated, small brush or tool for needle maintenance to minimize downtime.
- Document your maintenance routine to track when descaling and needle cleaning were last performed.
Call A Professional
Consult a professional if the machine exhibits persistent leaks, electrical concerns, or if cleaning does not restore normal operation after multiple cycles. Stop using the unit immediately if there are unusual noises, odors, or visible damage to internal components.
FAQ
How often should I clean the needles on a Keurig Supreme Plus?
Aim for a needle cleaning every 1–2 months, or more often if you notice clogs or reduced brew strength.
Can I use vinegar to clean the needles?
Vinegar is not recommended; use the Keurig descaling solution kit or a recommended descaler to avoid damaging seals.
What should I do if the cleaning tool doesn’t remove a clog?
Repeat the cleaning steps with warm water and, if needed, apply the descaling solution kit with brush following the instructions.
Is it safe to run a cleaning cycle with no coffee in the brewer?
Yes, a plain-water cleaning cycle is safe and helps flush residues after cleaning.
Will descaling affect flavored beverages?
Descaling helps remove mineral buildup that can affect taste; after descaling, run several clean water cycles to restore flavor neutrality.
Should I disassemble the entire machine for cleaning?
Only disassemble the parts described in the user manual. Full disassembly is not recommended for home maintenance.
What if the needles cannot be reached?
Consult the maintenance kit instructions or contact Keurig support for guidance.
Buying Guide
When selecting accessories for needle maintenance on the Keurig Supreme Plus, consider size compatibility, ease of use, and compatibility with K-Supreme Plus models. Evaluate the cleaning tools for precision tip design, bristle softness, and durability. Look for descaling kits that include a brush and clear instructions to minimize downtime and risk. Consider a maintenance kit that combines needle tools with descaling supplies for consolidated care. Noise levels, chemical usage, and water flow are practical factors—choose solutions and tools that fit your household routine and water hardness. For replacement parts, verify model compatibility and warranty terms. A well-rounded cleaning regimen helps extend brewer life and maintain consistent beverage quality.
Leave a Reply