How to Clean Printer Rollers for Better Print Quality
Printer rollers can accumulate dust, ink, and paper fibers over time, leading to misfeeds, smudges, and uneven print quality. Regular maintenance helps extend the life of your printer and keeps output crisp. This guide walks American users through a practical, step-by-step approach using common cleaning tools.
Quick Answer
Gently remove loose debris, wipe rollers with isopropyl alcohol wipes, and use a lint-free microfiber cloth to finish. For stubborn residue, repeat with fresh wipes and clean cloth until rollers spin smoothly without sticking.
What You’ll Need
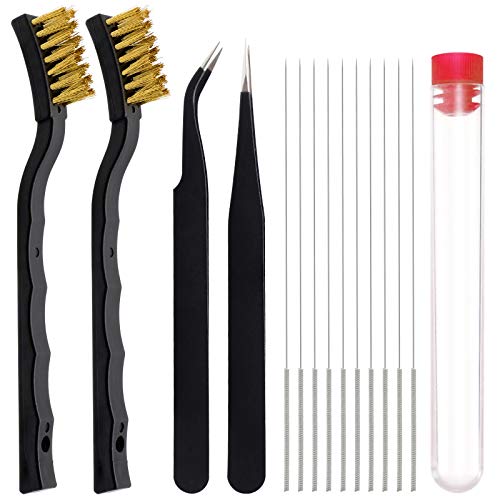
- Printer roller cleaning brush kit
- Isopropyl alcohol wipes for printer maintenance
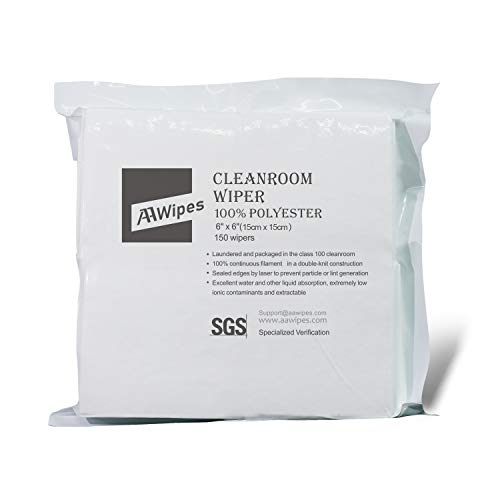
- Lint-free microfiber cloth for printer cleaning

Before You Start
Unplug the printer and allow it to cool if it has been printing recently. Work in a clean, well-lit area and avoid touching any electrical contacts. Remove paper trays if needed to access rollers. Time estimate: 15–30 minutes for a typical inkjet or laser printer.
Cautions: Use only isopropyl alcohol between 70% and 90% strength. Do not pour liquids directly onto rollers. Do not use abrasive cleaners or solvents that could damage coatings or seals.
Step-By-Step: How To Clean Printer Rollers
- Open the printer cover and locate the transfer and pickup rollers. Identify any visible dust, ink, or fibers.
- Using the printer roller cleaning brush kit, gently remove loose debris from the roller surfaces. Avoid applying pressure that could deform the rollers.
- Prepare a small area with a lint-free microfiber cloth. Lightly dampen the cloth with isopropyl alcohol wipes for printer maintenance.
- Wipe each roller in a consistent direction, ensuring you cover the entire surface. Do not over-saturate the cloth; use a fresh wipe if dirt remains.
- Dry the rollers with a dry section of the microfiber cloth. Allow a few minutes for any residual moisture to evaporate before closing the printer.
- Run a test page or a cleaning cycle if your printer offers one. Inspect the output for improvements and repeat steps if necessary.
- Check for residual debris in paper paths and feed rollers. Clear any stubborn particles with the brush kit or a fresh wipe as needed.
- Close covers, reinsert paper trays, and replug the printer. Perform a final print test to confirm consistent feeding and clean output.
- Schedule regular maintenance every few months or after heavy printing sessions to prevent buildup.
Troubleshooting
| Symptom | Likely Cause | Fix | Prevention |
|---|---|---|---|
| Paper jams persist after cleaning | Rollers still dirty or misaligned | Repeat cleaning with fresh wipes and inspect alignment | Establish a routine cleaning schedule |
| Grainy or smeared prints | Residue on rollers or transfer belt | Thorough wipe-down with isopropyl wipes | Avoid touching print area with bare hands |
| Feed issues | Rollers not gripping paper | Clean thoroughly; verify media type and path | Use the recommended paper settings |
| Smudges only on edges | Edge of roller dirty | Target edge cleaning and check paper guides | Keep area free of dust |
Common Mistakes
- Using too much liquid on cloth, causing moisture in electronics
- Skipping the dryer step or rushing drying time
- Cleaning with abrasive materials or solvents not approved for printers
- Neglecting regular maintenance, leading to recurrent jams
Tips For Best Results
- Use a dedicated printer roller cleaning brush kit to remove stubborn debris safely
- Work in short, deliberate passes to avoid rolling liquid into internal components
- Prefer isopropyl alcohol wipes designed for electronics to reduce residue
- Pair cleaning with a gentle paper path check to prevent feeding problems
- Document when you cleaned and set a reminder for the next session
Call A Professional
Consider contacting a professional if you notice persistent feeding issues, unusual noises, or if cleaning does not resolve streaks after multiple attempts. Stop and seek service if you observe exposed circuitry, battery concerns, or if the printer is under warranty guidance that requires authorized service.
FAQ
How often should I clean printer rollers?
Clean every few months or after heavy printing sessions, or sooner if you notice jams or streaks.
Can I use alcohol on all printer parts?
Only use isopropyl alcohol on surfaces that are labeled safe for electronics; avoid plastic housings not designed for solvents.
What if I don’t have a roller brush kit?
Use a soft, lint-free microfiber cloth with light pressure and a few wipes; avoid rough materials that could scratch rollers.
Will cleaning improve print alignment?
Yes, removing buildup helps ensure consistent roller grip and reduces misfeeds and alignment shifts.
Buying Guide
When choosing accessories for printer roller maintenance, consider size compatibility with your printer model, ease of use, and material quality. Look for a roller cleaning brush kit that reaches both pickup and transfer rollers without disassembly. Assess whether isopropyl alcohol wipes are labeled for electronics and are effective at removing ink and dust without leaving residue. A lint-free microfiber cloth should be soft and non-abrasive to avoid micro-scratches. For best results, select a complete kit that includes multiple wipe sizes and cleaning tools.
Key factors to compare include noise level and energy efficiency for any cleaning routine that requires powered cycles, although most maintenance is manual. Controls and placement are less critical for standalone cleaning tools, but ensure the kit is compatible with your printer’s accessibility—top access vs. rear panels can influence ease of use. Finally, consider whether a bundle offers related products that complement ongoing maintenance, such as replacement rollers or cleaning swabs.
Leave a Reply