How to Clean a Waterpik Water Flosser
Maintaining a Waterpik water flosser not only extends its life but also ensures you get the best oral care results. Regular cleaning removes mineral buildup, debris, and mold risk. This guide walks through practical steps with common cleaning tools to keep your device performing at its best.
Quick Answer
Run the device with fresh water, use a descaling tablet for periodic mineral buildup, and clean the reservoir and tips regularly. For routine maintenance, a quick rinse after each use and a deeper clean monthly will keep the unit fresh and effective.
What You’ll Need
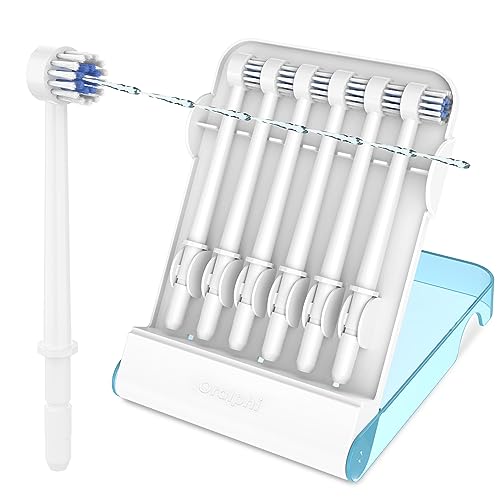
- Waterpik water flosser cleaning brush for rinsing and scrubbing components
- Waterpik reservoir cleaning kit to sanitize the reservoir and lid
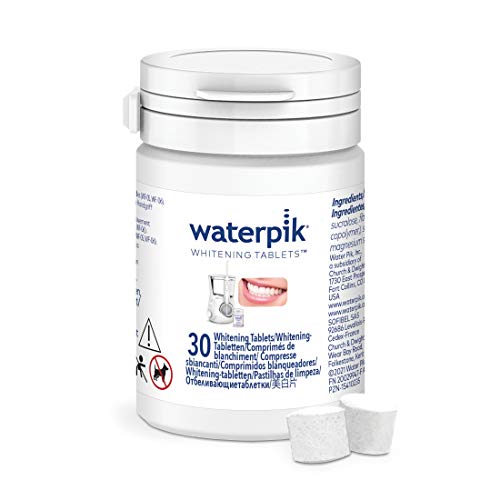
- Descaling tablets for Waterpik water flosser or approved descaling solution

Before You Start
Unplug the unit before disassembly. Empty the reservoir and detach the nozzle before cleaning. Use warm, not hot, water to avoid warping seals. If any mold or strange odor is detected, perform a full sanitation cycle. Time estimates for a thorough clean range from 20 to 40 minutes depending on how deeply you scrub and how often you descale. Never immerse the main unit in water or submerge electrical components.
Step-By-Step: How To Clean A Waterpik Water Flosser
- Disconnect the unit and remove the reservoir and nozzle from the handle.
- Rinse all removable parts under running water to remove loose debris.
- Use the Waterpik water flosser cleaning brush to scrub the reservoir lid, reservoir inner walls, and nozzle housing.
- Fill the reservoir with warm water and a small amount of mild dish soap; rinse thoroughly to avoid soap residue.
- Run the descaling solution as directed by the product instructions, or dissolve a descaling tablet for Waterpik water flosser in the reservoir and run a cleaning cycle.
- Let the solution sit briefly if recommended, then flush the system with clean water to remove any residue.
- Clean the hose exterior with a damp cloth, and wipe the handle ports with a soft brush to remove mineral deposits.
- Reassemble the unit and run a test cycle with plain water to ensure no cleaning residue remains.
- Inspect the nozzle for wear; replace if cracks or mineral buildup persist after cleaning.
- Schedule monthly descaling if you have hard water, and replace components per the manufacturer’s guidelines.
- Keep a regular cleaning schedule: a quick rinse after use plus a deep clean every 2–4 weeks depending on usage.
- Store the device in a dry, well-ventilated area to prevent moisture-related issues.
Troubleshooting
| Symptom | Likely Cause | Fix | Prevention |
|---|---|---|---|
| Low water flow after cleaning | Clogged nozzle or hose | Soak and scrub nozzle; replace if needed | Rinse after each use; avoid using hard objects to clear |
| Unpleasant odor in reservoir | Bacterial growth | Descale with tablets or approved solution; sanitize reservoir | Empty daily; dry reservoir between uses |
| Residue around lid or reservoir | Soap or mineral buildup | Thorough rinse with plain water; repeat with descaling cycle | Rinse and dry after each use |
| Nozzle leaks | Worn seals | Replace nozzle or seals per manufacturer | Inspect seals regularly; avoid overtightening |
Common Mistakes
- Forgetting to rinse the reservoir after cleaning, which leaves residues
- Using harsh cleaners or bleach that can damage seals
- Ignoring mineral buildup in hard-water areas, leading to reduced performance
- Not replacing worn nozzles or seals promptly
Tips For Best Results
- Adopt a routine: quick rinse after each use and a deeper clean weekly for high usage
- Use the reservoir cleaning kit regularly to sanitize interior surfaces
- Use descaling tablets at recommended intervals to prevent mineral deposits
- Keep a backup nozzle on hand to minimize downtime
- Label cleaning days on a calendar to maintain consistency
Call A Professional
Seek professional help if you notice persistent leaks, electrical issues, or if the device fails to power on after cleaning. Do not attempt internal repairs yourself; water flosser components involve electrical elements and may require authorized service.
FAQ
How often should I clean my Waterpik water flosser?
Clean the reservoir weekly and perform a full descaling every 1–3 months, depending on water hardness and usage.
Can I use household vinegar to descale?
Vinegar is not recommended for most Waterpik models; use only descaling tablets or the approved descaling solution.
Is it normal to smell after descaling?
Some odor may occur briefly; rinse thoroughly with clean water and allow the reservoir to dry before next use.
What if the unit stops working after cleaning?
Check power supply, reset if available, and consult the manual or customer support if issues persist.
How long do nozzle tips last?
Tips typically last several months with regular use; replace when signs of wear or reduced pressure appear.
Should I remove the reservoir between uses?
Removing and drying the reservoir after use helps prevent mold and keeps the unit fresh.
Do Waterpik cleaning kits include all needed parts?
Most kits provide brushes and components for sanitizing; verify included items versus your model’s needs.
Buying Guide
Choosing cleaning supplies for a Waterpik involves evaluating compatibility, cleaning power, and maintenance needs. Consider the following factors to ensure you pick the right tools:
- <bSize and compatibility: Ensure the cleaning brush and reservoir kit fit your Waterpik model and any replacement parts are compatible with your unit.
- <bDescaling effectiveness: Descaling tablets should be safe for plastic reservoirs and effective against mineral buildup. Follow manufacturer directions for dosing and frequency.
- <bEase of use and design: Look for tools that are easy to handle, rinse, and store. A reservoir cleaning kit should include brushes and a safe cleaning solution.
- <bMaintenance cadence: If you have hard water, plan for more frequent descaling and regular reservoir sanitization to prevent mineral deposits.
- <bNoise and energy considerations: Cleaning routines do not impact noise during operation, but set aside a quiet time for thorough maintenance if required.
- <bPlacement and storage: Store cleaning tools near the bathroom or laundry area where the Waterpik is kept, in a dry container to prevent mold.
With the right tools and a consistent schedule, cleaning a Waterpik water flosser becomes quick and straightforward. Regular maintenance helps maintain peak performance and oral hygiene benefits.
Leave a Reply