How to Clean Subfloor Before Flooring
Preparing a subfloor properly is essential for a durable, long-lasting floor. The process involves removing debris, smoothing surfaces, and ensuring the base is dry and ready for underlayment and finished flooring. This guide provides practical steps, tool recommendations, and safety tips for American homeowners and professionals alike.
Quick Answer
For a clean, ready subfloor, sweep or vacuum debris, remove high spots with a concrete floor scraper, and smooth the surface with an angle grinder fitted with a dust shroud. Use a strong industrial vacuum to capture dust at the source, then wipe the area and allow it to dry before installation.
What You’ll Need
- Concrete floor scraper with blade
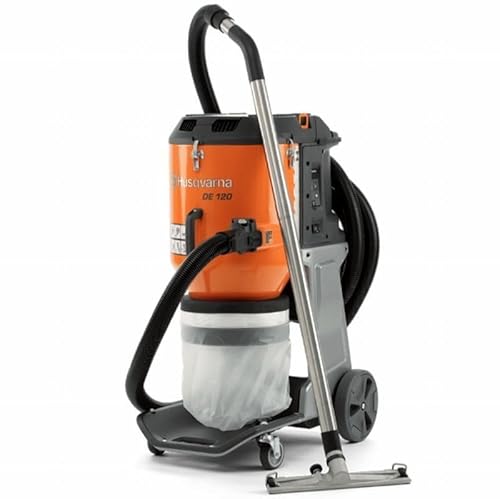
- Industrial vacuum concrete dust extractor
- Angle grinder with dust shroud for concrete
- Shop broom and heavy-duty trash bags
- Water source and mop or towel for moisture check
- Personal protective equipment: safety glasses, dust mask, hearing protection


Before You Start
Assess the subfloor for major cracks or uneven spots and plan repairs before cleaning. Ensure the area has good ventilation and a clear path for debris removal. Test for moisture in the concrete by placing a small piece of plastic on the surface for 24 hours; condensation indicates excessive moisture that must be addressed. Allocate time: a typical cleaning job may take a few hours depending on subfloor condition. Wear respiratory protection and eye protection during all dust-generating steps.
Step-By-Step: How To Clean Subfloor Before Flooring
- Clear the room of furniture and move it to a staging area.
- Inspect the subfloor for cracks, wet spots, or high spots that require leveling.
- Use a concrete floor scraper with blade to remove high spots, adhesives, and loose material.
- Plug in an industrial vacuum concrete dust extractor and begin dust collection at the source while scraping.
- Switch to the angle grinder with a dust shroud for concrete to smooth rough patches and edges.
- Keep the grinder moving evenly to avoid gouges; work in small sections at a time.
- Vacuum again with the dust extractor to capture airborne dust from grinding.
- Wipe the entire surface with a damp mop or towel to check for residual dust and moisture.
- Allow the subfloor to dry completely; recheck moisture before proceeding with underlayment and flooring.
- Repair any cracks or voids as needed with appropriate patch material and allow curing per product instructions.
- Do a final sweep and vacuum to ensure a clean, dry surface.
- Proceed with underlayment installation or flooring once the surface is stable and clean.
Troubleshooting
| Symptom | Likely Cause | Fix | Prevention |
|---|---|---|---|
| Dust still visible after cleaning | Grinding created fine dust that settled | Vacuum again with a powerful extractor; wipe surface | Keep dust collection active during grinding |
| Adhesive residue remains | Old glue or adhesive not fully removed | Use a scraper or adhesive remover compatible with subfloors | Test a small area first and remove thoroughly |
| Moisture on surface | Concrete is damp or has high humidity | Dry thoroughly; address moisture source; use moisture barrier if needed | Moisture test before installation |
| Uneven patches after grinding | Inconsistent pressure or worn grinding wheel | Regrind with steady technique and, if needed, patch | Use a leveling compound for large inconsistencies |
Common Mistakes
- Skipping dust collection and letting particles roam the room
- Not checking moisture, leading to flooring failures
- Overly aggressive grinding that creates dips or gouges
- Neglecting to clean corners and edges where debris collects
- Failing to recheck surface after cleaning before underlayment
Tips For Best Results
- Work from the farthest corner toward the door to keep dust contained.
- Match the grinder’s disc and speed to the job; slower, steady passes reduce heat buildup.
- Keep a dedicated dust extractor running to minimize airborne particles.
- Inspect tools for blade wear—dull blades create more dust and uneven surfaces.
- Test moisture with a plastic sheet near the center of the room for 24 hours.
Call A Professional
Consider hiring a pro if the subfloor has extensive cracks, moisture issues, or widespread adhesive residues that require specialized equipment and repair materials. Stop work and consult a contractor if you notice large cracks widening, persistent moisture, or unexpected subfloor movement that could affect flooring performance.
FAQ
What is the first step to clean a subfloor before flooring?
Clear the space, inspect for damage, and remove loose material using a concrete floor scraper with blade.
Do I need an industrial vacuum for dust?
Yes, an industrial vacuum concrete dust extractor helps capture dust at the source and protects air quality.
Can I grind directly after scraping?
Yes, but ensure the surface is dry and free of loose debris before grinding and use a dust shroud.
How long should the subfloor dry before laying flooring?
Drying time depends on humidity and ventilation; plan for several hours and retest moisture before installation.
What if there are moisture issues?
Address moisture sources, dry the area, and consider a moisture barrier or professional assessment if needed.
Buying Guide
Choosing the right tools for subfloor cleaning hinges on efficiency, safety, and compatibility with your flooring project. Key considerations include the size of the space, the amount of debris and adhesive residue, and the presence of moisture.
Size and power matter: larger rooms benefit from a high-capacity dust extractor and a robust floor scraper, while smaller jobs can use standard units. Noise level is a practical factor for residential work, especially in living spaces. Look for models with good filtration and easy maintenance.
Controls and ergonomics influence workflow: comfortable grips, variable speeds, and straightforward blade changes help maintain steady progress. Placement of tools and storage should minimize trips and downtime during the project.
Durability and compatibility: ensure tool blades, shrouds, and vacuums are designed for concrete use, and verify that attachments fit your equipment. For American homeowners, availability of replacement parts and service locally is important for long-term reliability.
Practical buying perspectives:
- Size: match to room dimensions and expected debris volume
- Noise level: consider neighbor and family tolerance during daytime work
- Energy efficiency: choose powerful yet efficient vacuums and grinders
- Controls: intuitive operation reduces setup time
- Placement: plan storage and dust containment to keep the work area clean
- Compatibility: ensure blades, shrouds, and vacuums work together
By selecting the right combination of a concrete floor scraper with blade, industrial vacuum concrete dust extractor, and angle grinder with dust shroud for concrete, homeowners and professionals can achieve a clean subfloor ready for durable flooring installation. If in doubt, consult a flooring professional to tailor the plan to your exact space and flooring type.
Leave a Reply