How to Clean a Burnt Pizza Stone
Pizza stones add a crisp bottom crust, but cleaning them after burnt hotspots can be tricky. This guide outlines safe, effective methods using common tools, including a soft-bristle cleaning brush, a pumice stone, and a ceramic scraper tool. Following these steps helps restore the stone without damaging its surface or seasoning.
Quick Answer
For light residue, scrub with a pizza stone cleaning brush with soft bristles and warm water, then dry completely. For baked-on burns, gently work with a pumice stone for burnt pizza stone cleaning, followed by a ceramic baking stone scraper tool to lift stubborn bits. Avoid soap and soaking. Reseason if needed after deep cleaning.
What You’ll Need
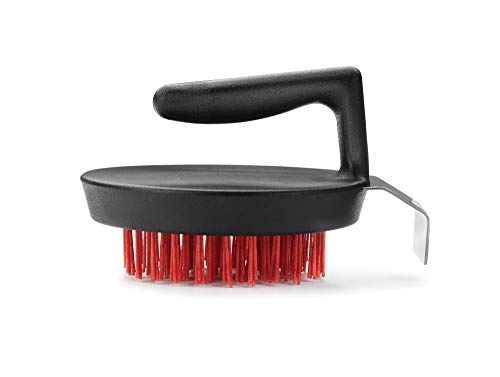
- Pizza stone cleaning brush with soft bristles (non-abrasive)
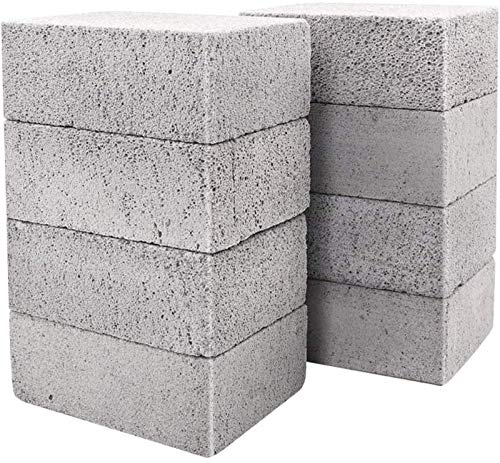
- Pumice stone for burnt pizza stone cleaning (lightly abrasive)
- Ceramic baking stone scraper tool (flat, sturdy edge)
- Warm water
- Paper towels or clean cloths
- Optional: rubbing alcohol or white vinegar (in very small amounts, for odor)

Before You Start
Ensure the stone has cooled completely before handling. Do not submerge a hot stone in water, and never use soap on unglazed stones, as it can absorb residues and affect flavor. Work in a well-ventilated area and keep pets away from the cleaning area. Time estimate: 15–40 minutes depending on burn severity. Safety note: never use metal tools that could scratch the stone’s surface.
Step-By-Step: How To Clean A Burnt Pizza Stone
- Let the stone cool fully after baking to avoid thermal shock.
- Brush away loose crumbs with the pizza stone cleaning brush with soft bristles until the surface is roughly clean.
- For light stains, wipe with a damp cloth and pat dry. For stubborn residue, proceed to the pumice step.
- Gently rub the affected area with the pumice stone for burnt pizza stone cleaning in a circular motion. Do not press hard; pause if the surface darkens excessively.
- Wipe away any dislodged debris with a clean cloth, then inspect the stone for remaining spots.
- Use the ceramic baking stone scraper tool to lift burnt bits along the edges and any clingy patches. Repeat as needed with light pressure.
- Rinse the surface very lightly with a barely damp cloth if any residue remains, then dry thoroughly with paper towels.
- Stand the stone on edge in a dry area to ensure complete air drying before the next use.
Troubleshooting
| Symptom | Likely Cause | Fix | Prevention |
|---|---|---|---|
| Stubborn burn marks remain | Burnt-on food baked deeply | Use a gentle pumice stone with light pressure; finish with a scraper | Preheat evenly, wipe crumbs after each use |
| Surface feels rough after cleaning | Abrasive material abrading the glaze | Switch to softer cleaning tools and avoid aggressive scrubbing | Limit pumice use and condition stone over time |
| Odor persists | Residual oils or food particles | Clean with warm water and a mild vinegar rinse sparingly, then dry | Regular, light cleaning after each bake |
| Cracks or glaze chipping | Thermal shock or over-aggressive cleaning | Stop use of abrasive tools and consult a professional if needed | Cool naturally, avoid sudden temperature changes |
Common Mistakes
- Using soap or dishwashing detergents on a stone
- Soaking a hot or warm stone in water
- Over-scrubbing with metal tools or harsh abrasives
- Not drying the stone completely, leading to mold or odor
Tips For Best Results
- Clean promptly after burns to prevent set-in stains
- Always dry the stone thoroughly and store it in a dry place
- Use the ceramic baking stone scraper tool for precise removal of baked-on bits
- Rotate your stone during cleaning to cover all areas evenly
- Consider reseasoning the stone lightly if color or coating seems uneven after cleaning
Call A Professional
Contact a professional stone care service if you notice deep cracks, major chipping, or if cleaning attempts fail to restore performance. Stop using the stone if there are visible structural flaws or if food tastes off even after cleaning.
FAQ
Can I use soap on a pizza stone?
No. Soap can be absorbed by the stone and affect flavor. Cleaning should rely on brushes, scrapers, and mild moisture only.
Is it safe to soak a pizza stone?
Soaking is not recommended. Water absorption can cause the stone to crack from thermal stress during future use.
How often should I clean my pizza stone?
Clean after usage to remove burnt bits and oils. A light cleaning after each bake helps maintain surface integrity.
What’s the best way to reseason a pizza stone?
After cleaning and drying, rub a light coat of high-heat oil (such as vegetable oil) over the surface, then bake at a high temperature for an hour to restore surface conditioning.
Buying Guide
When selecting a pizza stone and cleaning tools, consider size, material, and maintenance needs. A standard baking stone should fit your oven and allow for even heat distribution. Noise level isn’t a primary factor, but choosing arms-length brushes and scrapers keeps cleanup efficient. Energy efficiency isn’t tied to the stone itself, but avoiding excessive cleaning steps saves time and energy. Look for tools that complement your cleaning routine: a soft-bristle brush for regular maintenance, a pumice stone for burnt areas, and a ceramic scraper for precise detailing. Place the stone on a heat-resistant surface when cooling and store it in a dry area to prevent moisture buildup. If you bake frequently, a compact set with all three tools can streamline maintenance and extend the stone’s life, ensuring consistently crisp crusts with less effort.
Leave a Reply