How to Clean a Philips Air Fryer Safely and Effectively
Maintaining a Philips air fryer ensures optimal performance and better-tasting results. A regular cleaning routine prevents buildup, preserves nonstick coating, and extends the appliance’s life. This guide provides practical steps and tools to clean your Philips air fryer efficiently.
While cleaning, follow device-specific instructions in your user manual and use nonabrasive tools to protect the nonstick basket and crevices. The process is straightforward and can be completed without disassembly beyond unit basics described below.
Quick Answer
After cooking, unplug the unit and let it cool. Remove the basket and pan, wash with warm soapy water using a nonstick-friendly sponge, then rinse and dry completely before reassembling. For stubborn residue, soak the basket in warm, soapy water and scrub with the Philips air fryer cleaning brush nonstick basket.
What You’ll Need
Gather these tools and materials to clean a Philips air fryer effectively:
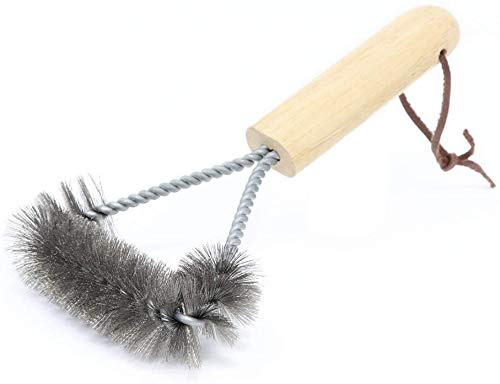
- Philips air fryer cleaning brush nonstick basket or a soft-bristle brush
- Air fryer cleaning kit with brush sponge Philips compatible
- Non-abrasive sponge microfiber cloth set for Philips air fryer basket
- Warm dish soap
- Water for rinsing
- Soft microfiber towels for drying

Before You Start
Before cleaning, ensure the air fryer is unplugged and completely cool. Remove the basket and pan according to the manual. Avoid using metal utensils or abrasive cleaners that can scratch the nonstick coating. Do not immerse the main unit in water; wipe it with a damp cloth. If the outer shell is sticky, a mild cleaning spray applied to a cloth is acceptable. Budget about 10–20 minutes for routine cleaning or longer if there is baked-on residue.
Step-By-Step: How To Clean A Philips Air Fryer
- Unplug the unit and allow it to cool completely. Remove the basket and pan.
- Wash the basket and pan in warm, soapy water using a nonstick-friendly sponge.
- Use the Philips air fryer cleaning brush nonstick basket or a soft brush to gently scrub any stuck-on residue, especially in the crevices.
- Rinse thoroughly under lukewarm water and dry with a soft microfiber towel.
- Wipe the interior of the main unit with a damp, well-wrung cloth to remove grease buildup, then dry with a clean towel.
- If residue remains on the basket or pan, soak them in warm, soapy water for 10–15 minutes before scrubbing again.
- Inspect the sealing ring and edges for crumbs; remove crumbs gently with a dry brush or microfiber cloth.
- Reassemble the basket and pan once completely dry, then run a short empty cycle with a small amount of water to verify cleanliness.
- Store the unit in a clean, dry area and keep the cleaning tools handy for next use.
- For frequent use, establish a quick weekly wipe-down routine after every few uses to prevent buildup.
Troubleshooting
| Symptom | Likely Cause | Fix | Prevention |
|---|---|---|---|
| Grease on the outside | Exterior splashes during cooking | Wipe with damp cloth; avoid harsh sprays | Cover foods to reduce splatter; regular wipe-down |
| Difficult removal of baked-on residue | Residue accumulated over time | Soak basket in warm, soapy water; scrub with soft brush | Clean after every few uses |
| Unusual smells after cleaning | Residual moisture or soap residue | Rinse thoroughly; run an empty cycle with water | Dry components completely |
| Nonstick coating appears worn | Abrasion from abrasive tools | Stop using harsh tools; switch to nonabrasive methods | Use appropriate cleaning tools |
Common Mistakes
- Using abrasive sponges or metal scrubbers on nonstick surfaces
- Fully submerging the main unit in water
- Forgetting to dry the basket and pan completely before reassembly
- Skipping the interior wipe-down after cleaning the basket
Sticking to nonabrasive tools and mindful drying helps maintain coating integrity and performance.
Tips For Best Results
- Clean the basket promptly after use to prevent food oils from hardening.
- Use warm, soapy water rather than hot water to protect the coating.
- Keep a dedicated set of cleaning tools for the air fryer to avoid cross-contamination with other cookware.
- Regularly check seals and vents for crumbs and wipe away buildup to improve airflow.
Call A Professional
Seek professional help if the air fryer shows persistent electrical issues, unusual noises from the motor, or visible damage to the power cord or housing. Do not attempt internal disassembly beyond the user-accessible parts, and contact Philips support or a qualified appliance technician for repairs.
FAQ
Is it safe to use dish soap on the Philips air fryer basket?
Yes, use mild dish soap and warm water to clean the basket and pan.
Can I put the basket and pan in the dishwasher?
Check the user manual; many Philips baskets and pans are dishwasher-safe, but hand washing prolongs coating life.
What should I do about stubborn burnt-on food?
Soak in warm soapy water and use a soft brush; avoid abrasive tools that could scratch the coating.
How often should I deep-clean the air fryer?
Deep-clean every 1–2 weeks with heavy usage, plus a quick wipe-down after each use.
Will cleaning affect the nonstick coating?
Using nonabrasive tools and avoiding harsh chemicals helps preserve nonstick performance.
Buying Guide
When choosing accessories to support cleaning and maintenance of a Philips air fryer, consider factors such as compatibility, material quality, and cleaning efficacy. A dedicated cleaning kit and brush designed for Philips-compatible baskets can simplify routine maintenance, while microfiber cloth sets provide gentle, effective drying and wiping. Here are key buying factors:
- <bSize and fit — Ensure cleaning tools fit the basket and pan dimensions of your Philips model.
- <bMaterial quality — Prefer nonabrasive brushes and soft microfiber cloths to protect nonstick surfaces.
- <bCompatibility — Look for Philips-compatible brushes and kits to match your specific unit.
- <bEase of use — Tools with ergonomic handles and multi-purpose brushes save time.
- <bMaintenance impact — Regular cleaning tools can extend the life of the nonstick coating.
- <bPlacement — Store tools near the kitchen area where the air fryer is used for quick access.
Would you like help selecting a specific cleaning kit based on your Philips model and usage? I can compare options and recommend a setup that keeps your air fryer spotless and ready for next use.
Leave a Reply