How to Clean Hearing Aids for Wax Buildup
Regular cleaning helps maintain sound quality and extend the life of hearing aids. Wax and debris can reduce performance, cause feedback, or impact comfort. This guide provides practical steps tailored for American users, using common hearing aid cleaning tools to safely remove wax and moisture.
Quick Answer
Target wax buildup with a dedicated cleaning kit that includes a wax pick, brush, and suction tool. Use a drying kit or desiccant to remove moisture after cleaning. Avoid high-pressure air or water, which can damage devices. Perform a quick wipe daily and a deeper clean weekly for best results.
What You’ll Need
- Hearing aid cleaning kit with wax pick and brush
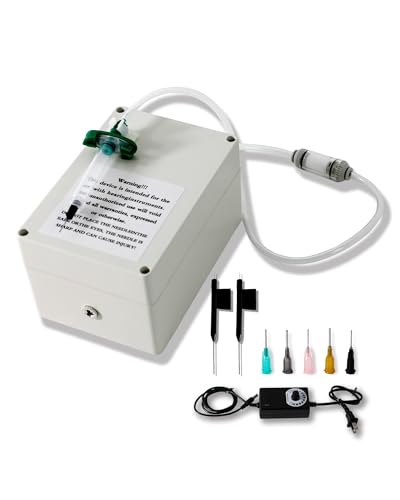
- Hearing aid wax removal tool kit suction brush
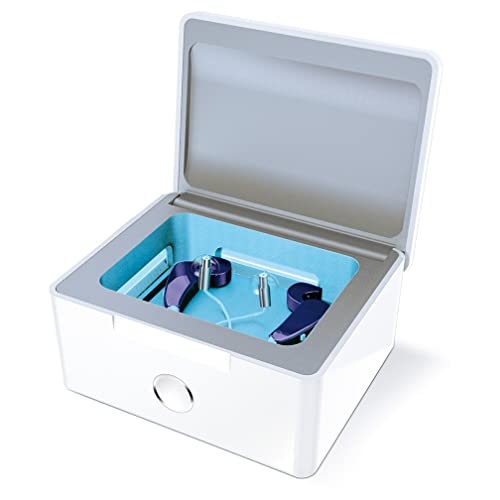
- Hearing aid dryer and cleaning kit with desiccant

Before You Start
Prepare a clean, well-lit surface and gather your tools. Turn off or remove the battery from the hearing aid before cleaning to prevent electrical issues. Do not submerge devices in water or use alcohol directly on the sound outlet. If you wear BTE devices, ensure each piece is cleaned separately to avoid moisture spreading to the electronics. Allow devices to cool if they feel warm after extended use.
Step-By-Step: How To Clean Hearing Aids For Wax Buildup
- Power down and remove the battery or disconnect the device to avoid short circuits during cleaning.
- Use the wax pick to gently lift visible wax near the microphone and wax guard. Work slowly to avoid pushing debris deeper into the venting system.
- Wipe the exterior housing with a soft, dry cloth to remove oils and loose particles.
- Brush the openings with the small cleaning brush from your kit. Lightly brush in a straight motion to dislodge wax from crevices.
- Use the suction tool to remove loosened wax and moisture from the sound outlet and vent areas. Avoid applying suction directly to the microphone if not intended for that purpose.
- Inspect the wax guard or dome, and replace or clean it per manufacturer instructions if wax is trapped in the guard.
- Place the hearing aid in the dryer or desiccant-based cleaning kit for 4–6 hours, or follow the kit’s recommended dry time, to remove residual moisture.
- Reassemble, reinsert the battery if needed, and perform a listening check to ensure sound is clear and free of distortion.
- Schedule regular cleaning sessions—ideally after daily use or after exposure to dusty or windy environments—to prevent buildup.
- Store cleaning tools in a dry, dedicated container to prevent contamination and keep them ready for the next session.
- Document any recurring issues (e.g., frequent wax buildup, feedback) for discussion with an audiologist if needed.
Troubleshooting
| Symptom | Likely Cause | Fix | Prevention |
|---|---|---|---|
| Reduced sound or distortion | Wax or moisture blocking the sound outlet | Clean with wax pick, brush, and suction; dry thoroughly | Clean daily; use drying kit after exposure to moisture |
| Whistling or feedback | Wax guard pushed out or loose fit | Re-seat or replace wax guard; check for gaps | Inspect seals during cleaning; avoid touching the microphone opening |
| Moisture inside | Humidity exposure | Run through dryer/desiccant kit fully | Store in a dry place; use daily drying routine |
| Wax reaccumulation quickly | Inadequate prior cleaning or wax guard condition | Replace wax guards as recommended; clean more thoroughly | Offer routine maintenance checks with clinician |
Common Mistakes
- Using hot water or household cleaners on hearing aids
- Forcing a tool into narrow vents or microphones
- Relying on air canister blasts that push wax deeper
- Neglecting to dry devices after cleaning
Tips For Best Results
- Clean your hearing aids at the same time each day to establish a routine.
- Keep all cleaning tools in a dedicated kit to prevent cross-contamination with other devices.
- Use the wax pick gently; applying too much pressure can damage the delicate openings.
- Combine cleaning with a regular desiccant drying cycle to minimize moisture-related performance changes.
- Consider professional maintenance if wax buildup persists despite routine cleaning.
Call A Professional
Stop and seek professional help if you notice persistent distortion, unexplained drop in volume, or physical damage to the housing or ear canal earmold. Call a licensed audiologist or hearing aid technician if:
- The device fails to turn on after cleaning
- There is visible damage to wires, tubing, or the earmold
- Wax guards or domes repeatedly clog despite routine cleaning
FAQ
How often should I clean my hearing aids for wax?
Daily exterior cleaning plus a deeper clean weekly is a good practice, with a full dry cycle after any moisture exposure.
Can I use household tools to remove wax?
Stick to purpose-built tools like wax picks, brushes, and suction tools designed for hearing aids.
Is it safe to use alcohol on hearing aids?
Avoid alcohol or solvents on the device, especially near openings and seals, as they can degrade materials.
What if wax keeps returning after cleaning?
Frequent buildup may indicate larger environmental factors or a worn wax guard; consult an audiologist for a guard replacement or device inspection.
Buying Guide
Choosing the right cleaning setup for hearing aids involves several considerations. Start with the kit’s contents—look for a wax pick and brush, plus a suction option to effectively remove debris. A dryer with desiccant helps combat moisture, which is a common cause of performance issues. Consider the device type (in-the-ear, behind-the-ear, or receiver-in-canal) as cleaning access can vary. Look for compact, travel-friendly kits if you’re frequently on the go and prefer spill-proof storage.
Buying Guide: Key Factors To Compare
- Size and Portability: Choose a compact kit for travel without sacrificing tool quality.
- Noise Level: Dryers and desiccants should operate quietly, especially in bedrooms or shared spaces.
- Energy Efficiency: Reusable desiccants save energy and reduce waste; check refill options.
- Controls: Simple on/off for dryers and clear labels for wax guards help avoid misuse.
- Placement: A dedicated cleaning station or small case makes storage tidy and accessible.
- Compatibility: Ensure tools fit your hearing aid model, especially if it uses custom guards.
- Durability: Stainless steel or durable plastics withstand daily use and cleaning cycles.
Regular maintenance extends device life and keeps sound clear. With the right kit and a little routine, wax buildup becomes manageable and less impactful on daily hearing.
Leave a Reply