How to Clean Grease Off Kitchen Walls Before Painting
Cleaning kitchen walls prior to painting is essential for a smooth finish and long-lasting results. Grease, steam, and cooking splatters can prevent paint from adhering properly. This guide walks American readers through an effective, practical process using common degreasers and simple tools to prep walls for a fresh coat.
Following the right steps ensures the new paint sticks evenly and remains durable in a busy kitchen. The approach below emphasizes safety, efficiency, and clear, actionable instructions you can apply in most homes.
Quick Answer
Quick method: Use a heavy-duty kitchen wall degreaser spray, a non-scratch scrub brush, and a rinse-safe cleaner to remove oil, grime, and soap scum. Rinse thoroughly, allow to dry, then lightly sand or wipe with a damp cloth before painting.
What You’ll Need
- Kitchen wall degreaser spray heavy duty 32 oz
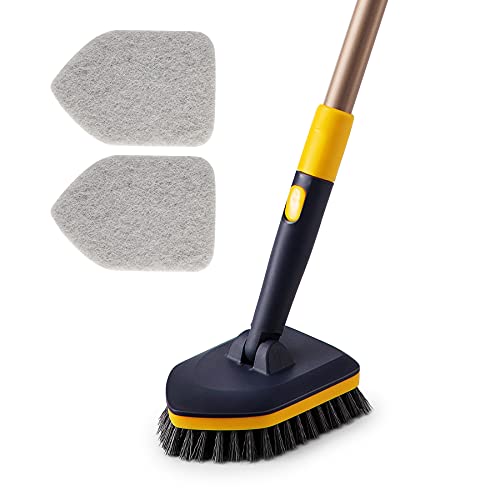
- Non-scratch scrub brush for kitchen walls cleaning set
- Grease cutting cleaner for paint prep no-rinse TSP substitute gallon

Before You Start
Assess the wall surface for peeling paint, cracks, or damp spots. Wear gloves and eye protection, and ensure adequate ventilation. Clear countertops and protect flooring with drop cloths. Time estimate: 60–120 minutes, depending on wall size and grease buildup. Avoid mixing cleaners with bleach or ammonia, which can create hazardous fumes, and test cleaners on a small area first to confirm compatibility with the current wall finish.
Step-By-Step: How To Clean Grease Off Kitchen Walls Before Painting
- Remove loose dust and cobwebs with a dry cloth or soft dusting tool to prevent gritty abrasion during cleaning.
- Apply the heavy-duty kitchen wall degreaser spray to a small, inconspicuous area first to check for any discoloration or damage.
- Spray a light, even coat onto greasy areas and let it dwell for 30–60 seconds to break down cooking oils.
- Scrub with the non-scratch scrub brush in circular motions, focusing on corners, grout lines, and under cabinets where grease collects.
- Wipe away loosened grime with a damp microfiber cloth, rinsing the cloth frequently to avoid re-depositing grease.
- For stubborn areas, switch to the grease cutting cleaner for paint prep no-rinse TSP substitute and repeat the process, ensuring the surface feels clean to the touch.
- Rinse walls with a clean damp cloth or sponge to remove cleaner residues completely.
- Allow walls to air dry completely. If needed, finish with a light wipe to remove any remaining moisture.
- If paint will be applied over glossy surfaces, lightly sand with fine-grit paper or use a deglosser to improve adhesion.
- Inspect for remaining grease spots; repeat cleaning on any stubborn areas before painting.
- Proceed with primer and paint once the walls are dry and clean, following manufacturer instructions for best results.
Troubleshooting
| Symptom | Likely Cause | Fix | Prevention |
|---|---|---|---|
| Grease remains after cleaning | Grease buildup in hard-to-reach areas | Reapply cleaner to those spots and use a soft brush to scrub gently | Clean regularly to prevent heavy buildup |
| Paint doesn’t adhere | Residual grease or wax on wall surface | Re-clean thoroughly and use a deglosser if needed | Ensure walls are completely dry before priming |
| Discoloration after cleaning | Cleaner reacting with existing paint or wall finish | Test in a small area; use milder cleaner if discoloration occurs | Spot-test cleaners on an inconspicuous area first |
| Peeling paint after cleaning | Old layers beneath were damaged or not sanded | Lightly sand and prime before repainting | Avoid over-wetting walls and prep damaged sections |
Common Mistakes
- Skipping the test patch before full-wall cleaning
- Using abrasive scrubbers on glossy or delicate surfaces
- Rushing to paint before walls are completely dry
- Over-wetting walls, which can soak into seams and drywall
- Neglecting proper ventilation during cleaning and painting
Tips For Best Results
- Work in sections to prevent cleaner evaporating before you scrub.
- Use the no-rinse cleaner as a follow-up to prevent residue buildup that can hinder paint adhesion.
- For ultra-greasy kitchens, repeat cleaning in cycles to gradually remove layers of oil without damaging the wall.
- Finish with a primer designed for kitchens to improve durability against moisture and heat.
Call A Professional
Stop signs to call a pro include persistent peeling, efflorescence, or water damage after cleaning, plus extensive mold or mildew growth. Cracks behind cabinets or in drywall that become visible after moisture exposure also warrant professional assessment. If uncertainty remains about wall condition or primer compatibility, consulting a painting contractor can prevent costly repairs later.
FAQ
What is the best cleaner to prep for painting kitchen walls?
The combination of a heavy-duty kitchen wall degreaser spray and a grease cutting cleaner for paint prep no-rinse works well on baked-on grease and oil.
Should I sand after cleaning?
Lightly sand glossy surfaces to improve adhesion, then apply primer as directed by the paint manufacturer.
How long should walls dry before painting?
Allow at least 1–2 hours for surfaces to dry fully, longer in humid conditions.
Can I paint over old grease with no-primer paint?
Most surfaces benefit from a primer in kitchen environments to ensure durable adhesion against grease and steam.
Is it safe to mix cleaners?
Do not mix cleaners with bleach or ammonia; follow label directions for each product.
Do I need to wear PPE?
Yes—gloves and eye protection are recommended, and good ventilation helps from strong cleaners during use.
What if grease returns after painting?
Re-clean the walls thoroughly, sand lightly, and re-prime before repainting to restore adhesion.
Buying Guide
When choosing products for cleaning grease off kitchen walls before painting, consider size, compatibility, and surface safety. Look for cleaners labeled for paint prep or TSP substitutes that are no-rinse and effective on oily residues. A non-scratch scrub brush helps to avoid gouges on painted surfaces, while a heavy-duty degreaser provides quick action against baked-on grease. Assess how large your kitchen is to estimate how many bottles or gallons you’ll need, and check for any surface sensitivities (e.g., specialty paints or wallpapers) that may require milder cleaners. For best results, use a practical combo: a heavy-duty degreaser for initial cleaning, followed by a no-rinse grease cutter for final wipe-down, then a compatible primer before painting.
Curious about noise, energy usage, or placement of cleaning tools? Consider how you’ll store cleaners and whether you’ll need to move appliances or trim work during prep. A well-thought-out setup reduces back-and-forth trips and speeds up the project.
Leave a Reply