How to Keep Water Clean at Home: A Practical Guide
Clean drinking water starts with understanding the sources and choosing the right filtration and purification approach. This guide outlines practical steps to improve water quality in a typical American household, using common home filtration equipment and testing methods.
Quick Answer
Test your water quality first using a home test kit to identify pH, chlorine, and hardness levels. Install a countertop reverse osmosis system for removing dissolved minerals and contaminants, and add a UV purifier for extra microbial protection, especially if your water source is uncertain. Schedule routine filter replacements and regular testing to maintain consistently clean water.
What You’ll Need
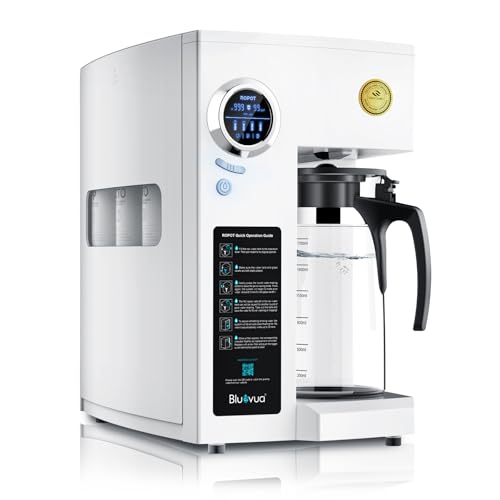
- Countertop reverse osmosis water filtration system with replaceable filters
- Water quality test kit for home use with pH, chlorine, and hardness test strips
- UV water purifier system for home use with optional booster pump


Before You Start
Before beginning any installation or testing, read the manuals for your filtration and purification devices. Ensure you have a clean faucet or a dedicated cold-water line to connect filtration units. Plan a workflow that minimizes water waste and aligns with the manufacturer’s maintenance schedule. Time estimate for setup and initial testing typically ranges from 1 to 3 hours, depending on your plumbing and space. Safety tip: Disconnect power to any devices during installation and wear eye protection when handling filters.
Step-By-Step: How To Keep Water Clean
- Test baseline water quality with the water quality test kit to establish current pH, chlorine, and hardness levels.
- Identify contaminants by reviewing test results and determine if a countertop reverse osmosis system is appropriate for your needs.
- Choose a suitable installation location near the sink or countertop, ensuring clearance for filters and a drain line.
- Install the countertop reverse osmosis system with replaceable filters according to the manufacturer’s instructions, connecting to the cold-water line and faucet.
- Activate the system and run several gallons of water to flush initial residues and prime new filters.
- Install the UV water purifier system for home use, placing it on the main filtration line or under the counter as recommended, and connect the optional booster pump if needed for adequate flow.
- Turn on the UV purifier and verify the power supply, ensuring the UV lamp is functioning and within the recommended replacement interval.
- Test water again after filtration and UV treatment to confirm improvements in pH, chlorine reduction, and overall safety.
- Schedule regular filter replacements for the RO system and periodic UV lamp changes to maintain performance.
- Keep a log of test results and filter dates to track long-term water quality trends and promptly address any deviations.
- Establish a maintenance routine that includes monthly visual checks, quarterly tests, and annual professional assessments if needed.
Troubleshooting
| Symptom | Likely Cause | Fix | Prevention |
|---|---|---|---|
| Water tastes bland or metallic | Outdated RO or carbon filters | Replace filters per schedule | Set reminders for replacements |
| Low water pressure from the faucet | Restriction in filter housing or line | Check for kinks and clean filters; replace if needed | Install booster or ensure proper line sizing |
| UV indicator off or lamp not lighting | Power issue or lamp failure | Check connections; replace lamp if necessary | Follow replacement intervals |
| Persistent chlorine odor after treatment | Insufficient contact time or cartridge issue | Verify flow rate and replace cartridges | Confirm proper installation and maintenance |
Common Mistakes
- Using an RO system without addressing the source water quality can lead to mineral depletion in drinking water
- Neglecting filter maintenance or delaying replacements, which reduces effectiveness
- Assuming UV purification replaces chemical disinfection entirely; UV should be paired with filtration in many cases
- Ignoring water testing results after installation and relying on initial readings only
Tips For Best Results
- Test water periodically to catch changes in supply or pipe corrosion that may introduce contaminants
- Label and organize replacement filters to avoid mix-ups between RO and carbon stages
- Keep a simple maintenance log with dates of tests, replacements, and lamp changes
- Check for leaks and ensure all connections are snug but not overtightened
- Store spare filters in a cool, dry place to extend their shelf life
Call A Professional
There are signs that call for professional help: persistent off-tastes or odors after all home treatments, frequent filter clogging, or uncertain water contamination risks (for example, after flood events or aging plumbing). If you see any of the following, contact a licensed plumber or water treatment specialist: sudden color changes in water, persistent health-related concerns, or complex installations beyond DIY capabilities.
FAQ
Is a countertop RO system enough for all contaminants?
For many homes, a countertop RO system greatly improves taste and reduces dissolved minerals and common contaminants, but it may not remove all microbes. Pair with UV purification if microbial risk is a concern.
How often should I replace filters?
Follow the manufacturer’s schedule, typically every 6–12 months for RO cartridges and annually for UV lamps, depending on usage and water quality.
Can I install these systems myself?
Many homeowners can install countertop RO and UV systems with basic plumbing skills, but professional installation is recommended for complex setups or if you lack tools.
How do I know if I need a UV purifier?
If your water source has potential microbial contamination or if you want an extra safety margin, a UV purifier provides an additional disinfection step.
Will these systems remove minerals?
RO systems remove many dissolved minerals; if you rely on remineralized water, consider a post-filter or mineral cartridge to restore essential minerals.
Buying Guide
When selecting a system for keeping water clean, consider size, noise, energy use, controls, and placement. A compact countertop RO setup with replaceable filters is ideal for small kitchens, while a UV purifier adds peace of mind for households with uncertain water sources. Look for units with clear filter-change indicators, easy cartridge access, and solid warranty coverage. Consider how the system fits your daily routines—whether you prefer a plug-and-play option near the sink or a discreet under-sink configuration. For families with sensitive guests or health concerns, a combined approach using RO filtration plus a UV disinfection stage often provides robust protection. Compare models based on filtration stages, flow rate, and maintenance requirements to find a solution that balances effectiveness with convenience.
Leave a Reply