How to Clean a Dyson Animal Vacuum
The Dyson Animal line is built for households with pets, delivering strong suction and specialized tools. Regular maintenance keeps performance high and extends the vacuum’s life. This guide provides a practical, step-by-step approach to cleaning and refreshing your Dyson Animal vacuum, with safe handling tips and troubleshooting strategies.
Quick Answer
Key steps at a glance: unplug the unit, empty the dust bin, wash or replace the filter, check the brush bar and cyclone assembly, and attach the appropriate tool for targeted cleaning. Routine checks every few weeks prevent loss of suction and improve pet hair removal.
What You’ll Need
Gather the following items to perform a thorough cleaning. The list below prioritizes tools related to the Dyson Animal series:
- Dyson Animal replacement filter for vacuum cleaner
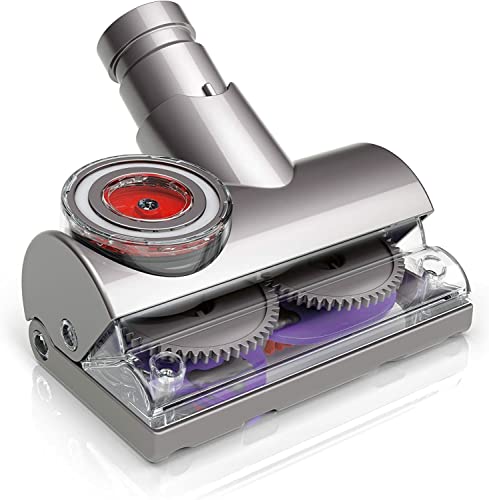
- Dyson turbine tool pet hair attachment for vacuum
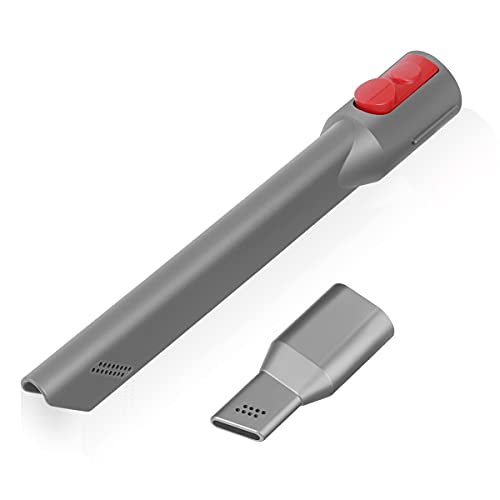
- Dyson crevice and upholstery tool set for Animal series vacuum
- Soft cloth and mild cleaning solution
- Cleaning brush or old toothbrush
- Compressed air can (optional, for stubborn debris)

Before You Start
Preparation matters. Ensure the vacuum is unplugged from any power source before maintenance. Work in a well-ventilated area and lay down a protective mat to catch dust. Important cautions: never immerse the vacuum body in water, avoid harsh chemical cleaners, and let any damp components dry completely before reassembly. If you notice visible damage to the cord, housing, or filters, halt maintenance and consider professional service.
Time estimate: 15–30 minutes for a standard cleaning, longer if you replace filters or perform deeper checks.
Step-By-Step: How To Clean A Dyson Animal Vacuum
- Unplug the vacuum and lay it on a stable surface. Remove the wand or canister attachment if applicable according to your model.
- Empty the dust bin. Hold the bin over a trash receptacle and press the release button to empty contents. Tap the cyclone housing gently to loosen any fine dust.
- Inspect the cyclone and filter area. If you see clogs or hair buildup around the cyclone, use a dry brush to dislodge tangled fibers. Avoid using water on the cyclone housing.
- Remove and clean the filter. Depending on your model, the filter may be a washable type. Rinse it under lukewarm water until the water runs clear, then let it air dry completely for at least 24 hours before reinstalling.
- Clean the brush bar and drive belt. Lay the vacuum on its side and inspect the brush bar for hair wrapped around it. Use scissors or a cleaning tool to cut away hair, and wipe the bar with a damp cloth if needed. Check the belt for wear and replace if stretched or cracked.
- Examine the tube and wand. Look for blockages or debris that could impede airflow. Use a long, flexible brush tool to clear any buildup from the wand and narrow passages.
- Clean tool attachments. Detach the Dyson turbine tool pet hair attachment for vacuum and the crevice and upholstery tool set. Remove hair and dust from the bristles and seams, using a cleaning brush or warm, soapy cloth if necessary. Rinse and air dry if required by your model’s guidelines.
- Reassemble and perform a test run. Once all parts are dry, reinstall filters and attachments. Plug in the vacuum and run it briefly to ensure suction improves and no unusual noises occur.
- Schedule routine maintenance. Plan to inspect filters, brush bars, and hoses every 1–3 months, especially in homes with multiple pets or high dust environments.
Troubleshooting
| Symptom | Likely Cause | Fix | Prevention |
|---|---|---|---|
| Loss of suction | Clogged filters or blockages | Clean or replace filter; clear blockages in wand and hose | Regular maintenance and timely filter replacement |
| Unusual noise | Hair wrapped around brush bar or loose belt | Clean hair from brush; replace worn belt | Frequent brush bar checks during pet shedding |
| Dust escaping from bin | Overfilled bin or seal wear | Empty bin before full; inspect seals and replace if worn | Empty regularly and inspect seals after cleaning |
| Brush bar stops spinning | Motor obstruction or jam | Clear jam from brush area; ensure wheel and belt are free | Keep tools and hair away from the brush during cleaning |
Common Mistakes
- Washing filters that are not designed to be washable
- Using excessive water on non-washable parts
- Ignoring odor or persistent loss of suction signs
- Removing safety locks or altering components beyond manufacturer guidance
To avoid these mistakes, follow manufacturer instructions for filter care and avoid submerging any electrical components.
Tips For Best Results
- Avoid letting pet hair accumulate around the brush bar by performing weekly quick checks during shedding season.
- Store the vacuum with the attachments attached to protect seals and keep tools accessible.
- Use the crevice and upholstery tools for tight spaces, stair corners, and car interiors to maximize cleaning efficiency.
- Label replacement parts to simplify future maintenance and ensure you always have spare filters on hand.
Call A Professional
Consider a professional service if you notice:
- Persistent loss of suction after cleaning and filter changes
- Cracking in the housing or exposed wiring
- Unusual electrical smells or heat development during use
These could indicate internal component wear or safety risks that require expert assessment.
FAQ
Can I wash the Dyson Animal filter?
Yes, if your model’s filter is labeled washable. Rinse with lukewarm water until clear and let it dry completely before reinstalling.
How often should I replace the filter?
Replacement frequency depends on usage and pet hair load. Check the user manual for your model’s guidance and consider replacing every 6–12 months if you notice reduced suction.
What tools come with the Animal series for cleaning?
The Animal series often includes a turbine tool for pet hair, a crevice tool, and an upholstery tool to access tight spaces and furniture.
Why is there hair on the brush bar after cleaning?
Hair tangles are common in homes with pets. Regularly remove hair from the brush bar to prevent it from hindering performance.
Is it safe to use compressed air to clear clogs?
Use compressed air cautiously and only on non-electrical parts to avoid damage or forcing debris into seals.
Should I clean the cyclone assembly?
Yes, gently remove debris from the cyclone housing to restore optimal airflow without disassembly beyond guidance.
Buying Guide
When choosing or maintaining a Dyson Animal vacuum, consider these buying factors to maximize efficiency and longevity:
- Size and weight: A model that’s easy to carry upstairs or between rooms helps with daily pet cleanup.
- Noise level: Quieter operation reduces stress for pets and improves user experience.
- Energy efficiency: Look for efficient motors and well-sealed cyclones for strong suction with lower energy use.
- Controls and indicators: intuitive controls and clear filter-out indicators simplify maintenance.
- Placement and storage: Consider a compact docking station or wall mount for convenient storage and quick access to tools.
- Attachments: Ensure the included turbine tool, crevice tool, and upholstery tool meet your cleaning needs, and assess the need for additional pet-hair tools.
- Replacement parts availability: Check that filters and tools are readily available to maintain performance over time.
- Pet-specific features: Strong suction, optimized brush bars, and accessible attachments improve pet hair removal on furniture, stairs, and car interiors.
Thinking about a model upgrade or maintenance plan? A proactive approach with the right tools and routine checks keeps a Dyson Animal vacuum performing at its best for years.
Leave a Reply