How to Clean an Agitator Without Removing It
Cleaning the agitator in a washing machine without taking it out can improve washing performance and extend the appliance’s life. This guide explains practical steps, recommended tools, and safe practices for American homes. The goal is to remove built-up soap scum, hair, and mineral deposits that reduce cleaning efficiency and cause odor.
Whether you own a top-load or a modern high-efficiency model, regular maintenance helps prevent odors and ensures lights and cycles run as designed. This article lays out a clear, step-by-step plan so you can get results with common household tools and purpose-built cleaning aids.
Quick Answer
Use a long-handled appliance brush to loosen debris around the agitator, then apply a dedicated washing machine cleaner or descaler. Rinse with hot water cycles, repeating as needed until residue is gone. Avoid forceful scrubbing that could scratch chrome or plastic parts.
What You’ll Need
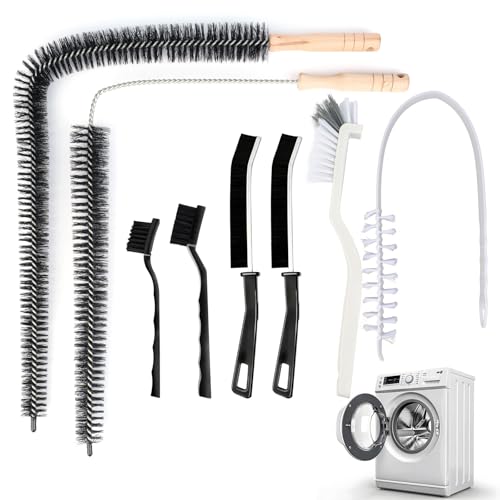
- Washing machine agitator cleaning brush
- Appliance cleaning brush long handle for washing machine
- Washing machine cleaner descaler kit


Before You Start
Prepare by checking the washer drum for obvious debris and selecting a cycle that won’t overfill the tub during cleaning. Turn off the machine and unplug if you plan to reach inside the drum or manipulate components. Choose a hot water rinse if your model supports it, as warmer water helps dissolve soap scum and mineral deposits.
Keep the area around the washer clear to avoid accidental splashes. If your home uses hard water, expect mineral buildup to be more pronounced and plan for an extra cleaning pass. Time estimate: 30–60 minutes, depending on soil level.
Step-By-Step: How To Clean An Agitator Without Removing It
- Run a preliminary hot wash with no laundry using a washing machine cleaner descaler kit or a vinegar solution to loosen buildup.
- Power off the machine and unplug it. Open the lid and locate the agitator to inspect the top and sides for visible grime.
- Attach the appliance cleaning brush long handle for washing machine and gently press the bristles into crevices around the agitator base to dislodge residue.
- Work in circular motions around the bottom and sides of the agitator, using the washing machine agitator cleaning brush to reach tight gaps without removing the part.
- Apply a small amount of wash-safe cleaner to the brush or directly to the surface, and scrub until visible residue diminishes. Avoid aggressive scrubbing that could scratch plastic or metal.
- Rinse the drum with hot water by running a short cycle to flush out loosened debris. Resume a cleaning cycle if residue remains.
- Inspect the gaps between the agitator and the basin; repeat brushing and rinsing as needed until the interior surfaces look clean.
- Run a final rinse with hot water, then a complete cycle with laundry loads to ensure any cleaner residue is removed from fabrics.
- Wipe the exterior surfaces and the top of the agitator with a damp cloth to remove any splashes or residue.
- Document results and schedule monthly maintenance if you notice buildup returning quickly, especially in areas with hard water.
- If stubborn mineral deposits persist, consider alternating between a cleaner descaler kit and a vinegar rinse on subsequent cycles for thorough cleaning.
Troubleshooting
| Symptom | Likely Cause | Fix | Prevention |
|---|---|---|---|
| Odor despite cleaning | Soap scum trapped in crevices | Re-run cleaner cycle and brush crevices more thoroughly | Regular maintenance every 1–2 months |
| Persistent residue after cleaning | Mineral build-up | Use a descaler kit and hot water cycles | Install a water softener or use distilled rinses occasionally |
| Uneven washing or leftover lint | Residual buildup in the drum | Deep clean with brush and longer rinse | Schedule routine cleanings and check hoses |
| Electrical or cycle errors | Internal components stressed during cleaning | Stop and seek professional service if errors recur | Avoid aggressive scrubbing near electronics |
Common Mistakes
- Using metal brushes that could scratch finishes
- Forcing brushes into tight gaps without assessing visibility
- Neglecting to rinse after cleaning, leaving chemical residues
- Skipping hot-water cycles when mineral deposits are present
Using the right tools, like a washing machine agitator cleaning brush and a appliance cleaning brush long handle for washing machine, helps avoid these mistakes and keeps the process efficient.
Tips For Best Results
- Do cleaning sessions on a day when you can run additional rinse cycles without scheduling conflicts.
- Pair cleaning with periodic descaling if your water is hard to reduce mineral buildup.
- Always follow cleaner product directions and test a small area first if you’re unsure about finishes.
- Maintain a regular schedule—monthly if you use the machine heavily, or quarterly for light use.
Call A Professional
Consider contacting a professional if you notice persistent odors, water leakage, unusual noises, or if the agitator shows signs of damage or loosening. Stop cleaning attempts and consult a technician if the unit emits strong chemical smells, or if you cannot safely access the drum interior without disassembly.
FAQ
Can I clean the agitator without removing it?
Yes, most buildup can be removed with a brush and cleaner while the agitator remains in place.
What cleaner should I use around the agitator?
Use a dedicated washing machine cleaner descaler kit or a mild, non-abrasive cleaner designed for appliances.
How often should I clean the agitator?
Schedule a cleaning every 1–3 months depending on use and water hardness.
Are there risks to removing the agitator later?
Removing the agitator is a more advanced task and should be done only if you have proper instructions or a technician’s assistance.
Buying Guide
When choosing products to support agitator cleaning, consider size, compatibility, and ease of use. Look for tools that reach crevices around the base, as well as cleaners that are safe for your washer’s materials. Factors to weigh include:
- <bSize and compatibility: Ensure the brush head fits the diameter and design of your agitator and drum.
- <bNoise and ease of use: Longer handles reduce bending and improve leverage without splashing.
- <bEnergy and water impact: Descaler kits and hot-water cycles should be used in ways that minimize energy use.
- <bControls and placement: Choose tools that are easy to store near the washer and do not interfere with control panels.
Compare kits based on their cleaning efficiency, material compatibility, and user reviews. For many households, a long-handled appliance brush, a specialized agitator brush, and a descaler kit together form a practical cleaning trio that keeps washers running smoothly without disassembly.
Leave a Reply