How to Clean a Tarnished Necklace
Over time, silver jewelry can lose its shine and develop tarnish. This guide provides practical, step-by-step instructions to safely restore a tarnished necklace using common cleaning tools and products available in the United States. Whether the piece is simple or contains stones, the methods below prioritize care and preservation of metal and finish.
Quick Answer
For light tarnish, start with a silver jewelry cleaning kit with tarnish remover and polishing cloth. For heavier tarnish or hard-to-reach areas, use silver tarnish remover liquid for jewelry or an ultrasonic jewelry cleaner for silver necklaces. Always test a small area first and dry thoroughly after cleaning.
What You’ll Need
- Silver jewelry cleaning kit with tarnish remover and polishing cloth
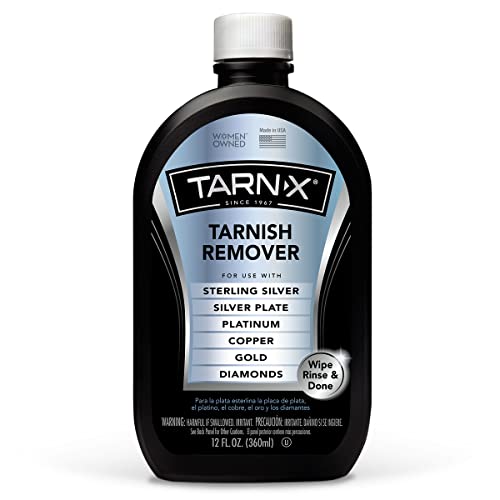
- Silver tarnish remover liquid for jewelry
- Ultrasonic jewelry cleaner for silver necklaces


Before You Start
Inspect the necklace for delicate stones, loose clasps, or fragile links. If stones are present, check manufacturer guidance before cleaning. Work in a well-ventilated area and wear gloves if you have sensitive skin. Avoid using abrasive pads on surfaces that could scratch. Plan for 15–30 minutes of careful cleaning, plus drying time.
Important cautions: Do not soak antique or plated pieces longer than recommended, as prolonged exposure can damage the finish. If a piece is visibly damaged or excessively tarnished, consider professional cleaning to avoid irreversible harm.
Step-By-Step: How To Clean A Tarnished Necklace
- Prepare a cleaning workspace with a soft cloth, mild dish soap, and warm water. Remove any stones if permitted by the piece’s design.
- If using a silver jewelry cleaning kit, follow the kit’s directions for applying the tarnish remover to a soft cloth or brush. Gently rub tarnished areas in small circular motions.
- Rinse the necklace under lukewarm water to remove cleaning residue. Ensure all cleaning solution is washed away, especially around clasps and intricate links.
- Pat dry with a clean, lint-free cloth. Do not air-dry, as moisture can cause water spots or re-tarnishing.
- If tarnish persists, apply a small amount of silver tarnish remover liquid for jewelry to a soft brush or cloth. Work in gentle strokes and avoid over-application.
- Rinse again thoroughly to remove any chemical residue. Verify you’ve removed every trace, especially near clasps and engravings.
- For a deeper shine, use an ultrasonic jewelry cleaner designed for silver necklaces. Fill the machine with the recommended cleaning solution or water, submerge briefly, and run a short cycle as instructed.
- Dry completely and buff with the included polishing cloth until the piece shines evenly. Reassemble any components and store away from moisture.
Troubleshooting
| Symptom | Likely Cause | Fix | Prevention |
|---|---|---|---|
| Dull finish returns after cleaning | Residual tarnish or uneven application | Re-clean in small sections and polish evenly | Clean regularly to prevent heavy buildup |
| Discoloration around stones | Cleaner or liquid touched stones | Spot-test on inconspicuous area; if unsure, stop and consult a professional | Protect stones with tape or skip liquid near settings |
| Clasp or wire becomes brittle | Over-cleaning or harsh chemicals | Switch to gentler methods and limit exposure | Store properly; avoid harsh cleaners |
| Piece turns black after cleaning | Reaction with sulfur compounds in air or cleaners | Rinse and dry thoroughly; use milder products next time | Store in anti-tarnish pouches |
Common Mistakes
- Using abrasive pads or harsh chemicals on silver surfaces
- Soaking jewelry for too long, especially pieces with stones
- Neglecting to rinse off all cleaning agents completely
- Not drying thoroughly, leading to water spots or new tarnish
Avoid these pitfalls by following manufacturer guidelines and performing tests on inconspicuous areas first.
Tips For Best Results
- Clean regularly to prevent heavy tarnish buildup and make each cleaning easier
- Use a dedicated polishing cloth to maintain a protective shine without scratching
- Store silver jewelry in a cool, dry place or in anti-tarnish bags
- Rinse and dry promptly after cleaning to minimize future tarnish formation
- If you wear perfume or lotions, apply them before putting on silver jewelry to reduce chemical exposure
Call A Professional
Consider professional cleaning if the necklace has valuable stones, delicate filigree, or if tarnish is deeply set. Seek help if you notice a loose clasp, structural damage, or if cleaning risks loosening stones.
FAQ
Can I clean a tarnished necklace with toothpaste?
No. Toothpaste is mildly abrasive and can scratch silver. Use designated silver cleaners or mild solutions instead.
Is ultrasonic cleaning safe for all silver necklaces?
Ultrasonic cleaning is generally safe for solid silver pieces, but may harm soft gemstones or delicate settings. Check manufacturer guidance before use.
How often should I clean my silver jewelry?
Light cleaning every few weeks helps maintain shine; deeper cleanings can be done monthly or as needed based on tarnish levels.
What storage helps prevent tarnish?
Anti-tarnish pouches or sealed compartments, away from moisture and sulfur-containing environments, help minimize tarnish between wears.
Buying Guide
When choosing products to clean a tarnished necklace, consider several factors that affect results and safety. Size and metal purity influence cleaning approach; larger or more intricate pieces may require more steps or an ultrasonic cleaner. Noise level is a practical consideration for ultrasonic machines in quiet spaces. Energy efficiency matters if you plan frequent use. Controls should be simple, with clear instructions and low risk of splashing cleaners. Placement matters—clean in a well-ventilated area, away from children and pets. Compare a silver jewelry cleaning kit with tarnish remover and polishing cloth, a silver tarnish remover liquid for jewelry, and an ultrasonic jewelry cleaner for silver necklaces to determine the best combination for your pieces. Question yourself: Do you prefer a one-stop kit or targeted cleaners for specific needs? A tested kit can simplify maintenance, while an ultrasonic cleaner provides thorough results for bulky designs.
Leave a Reply